Bringing a VanMoof X3 or S3 Back to Life – Part 2 – Battery Pack
In Part 1 of this series, I extracted and deconstructed the Smart Cartridge from my partner’s VanMoof X3 with the goal of charging the small, secondary, battery inside it. That was successful and I managed to charge the small Lithium-Poly cell, bringing the bike back to life. The VanMoof supplied power brick would still not charge the bike’s primary battery and I suspected that some or all of the individual cells have discharged to the point that the safety circuits will not allow a charging voltage to be applied.
My plan for this post is to lay out the steps and tools required to remove the primary battery pack from the bike, deconstruct it to the level of individual cells, charge them manually and rebuild the battery and the bike.
In part 1 some of the steps were detailed in VanMoof’s technical documents, but unfortunately everything we’re doing in this post is entirely unsupported. These steps have been reverse engineered by tearing down our bike so, caveat lector, they may vary from unit to unit. Luckily, removing the battery pack from the bike is easier than removing the Smart Cartridge and only involves removing three security torx bolts from the bottom of the downtube. The only tricky bolt is the one behind the chainring. Accessing it can be achieved by unclipping the soft plastic chain guard, then gently bending it out of the way.
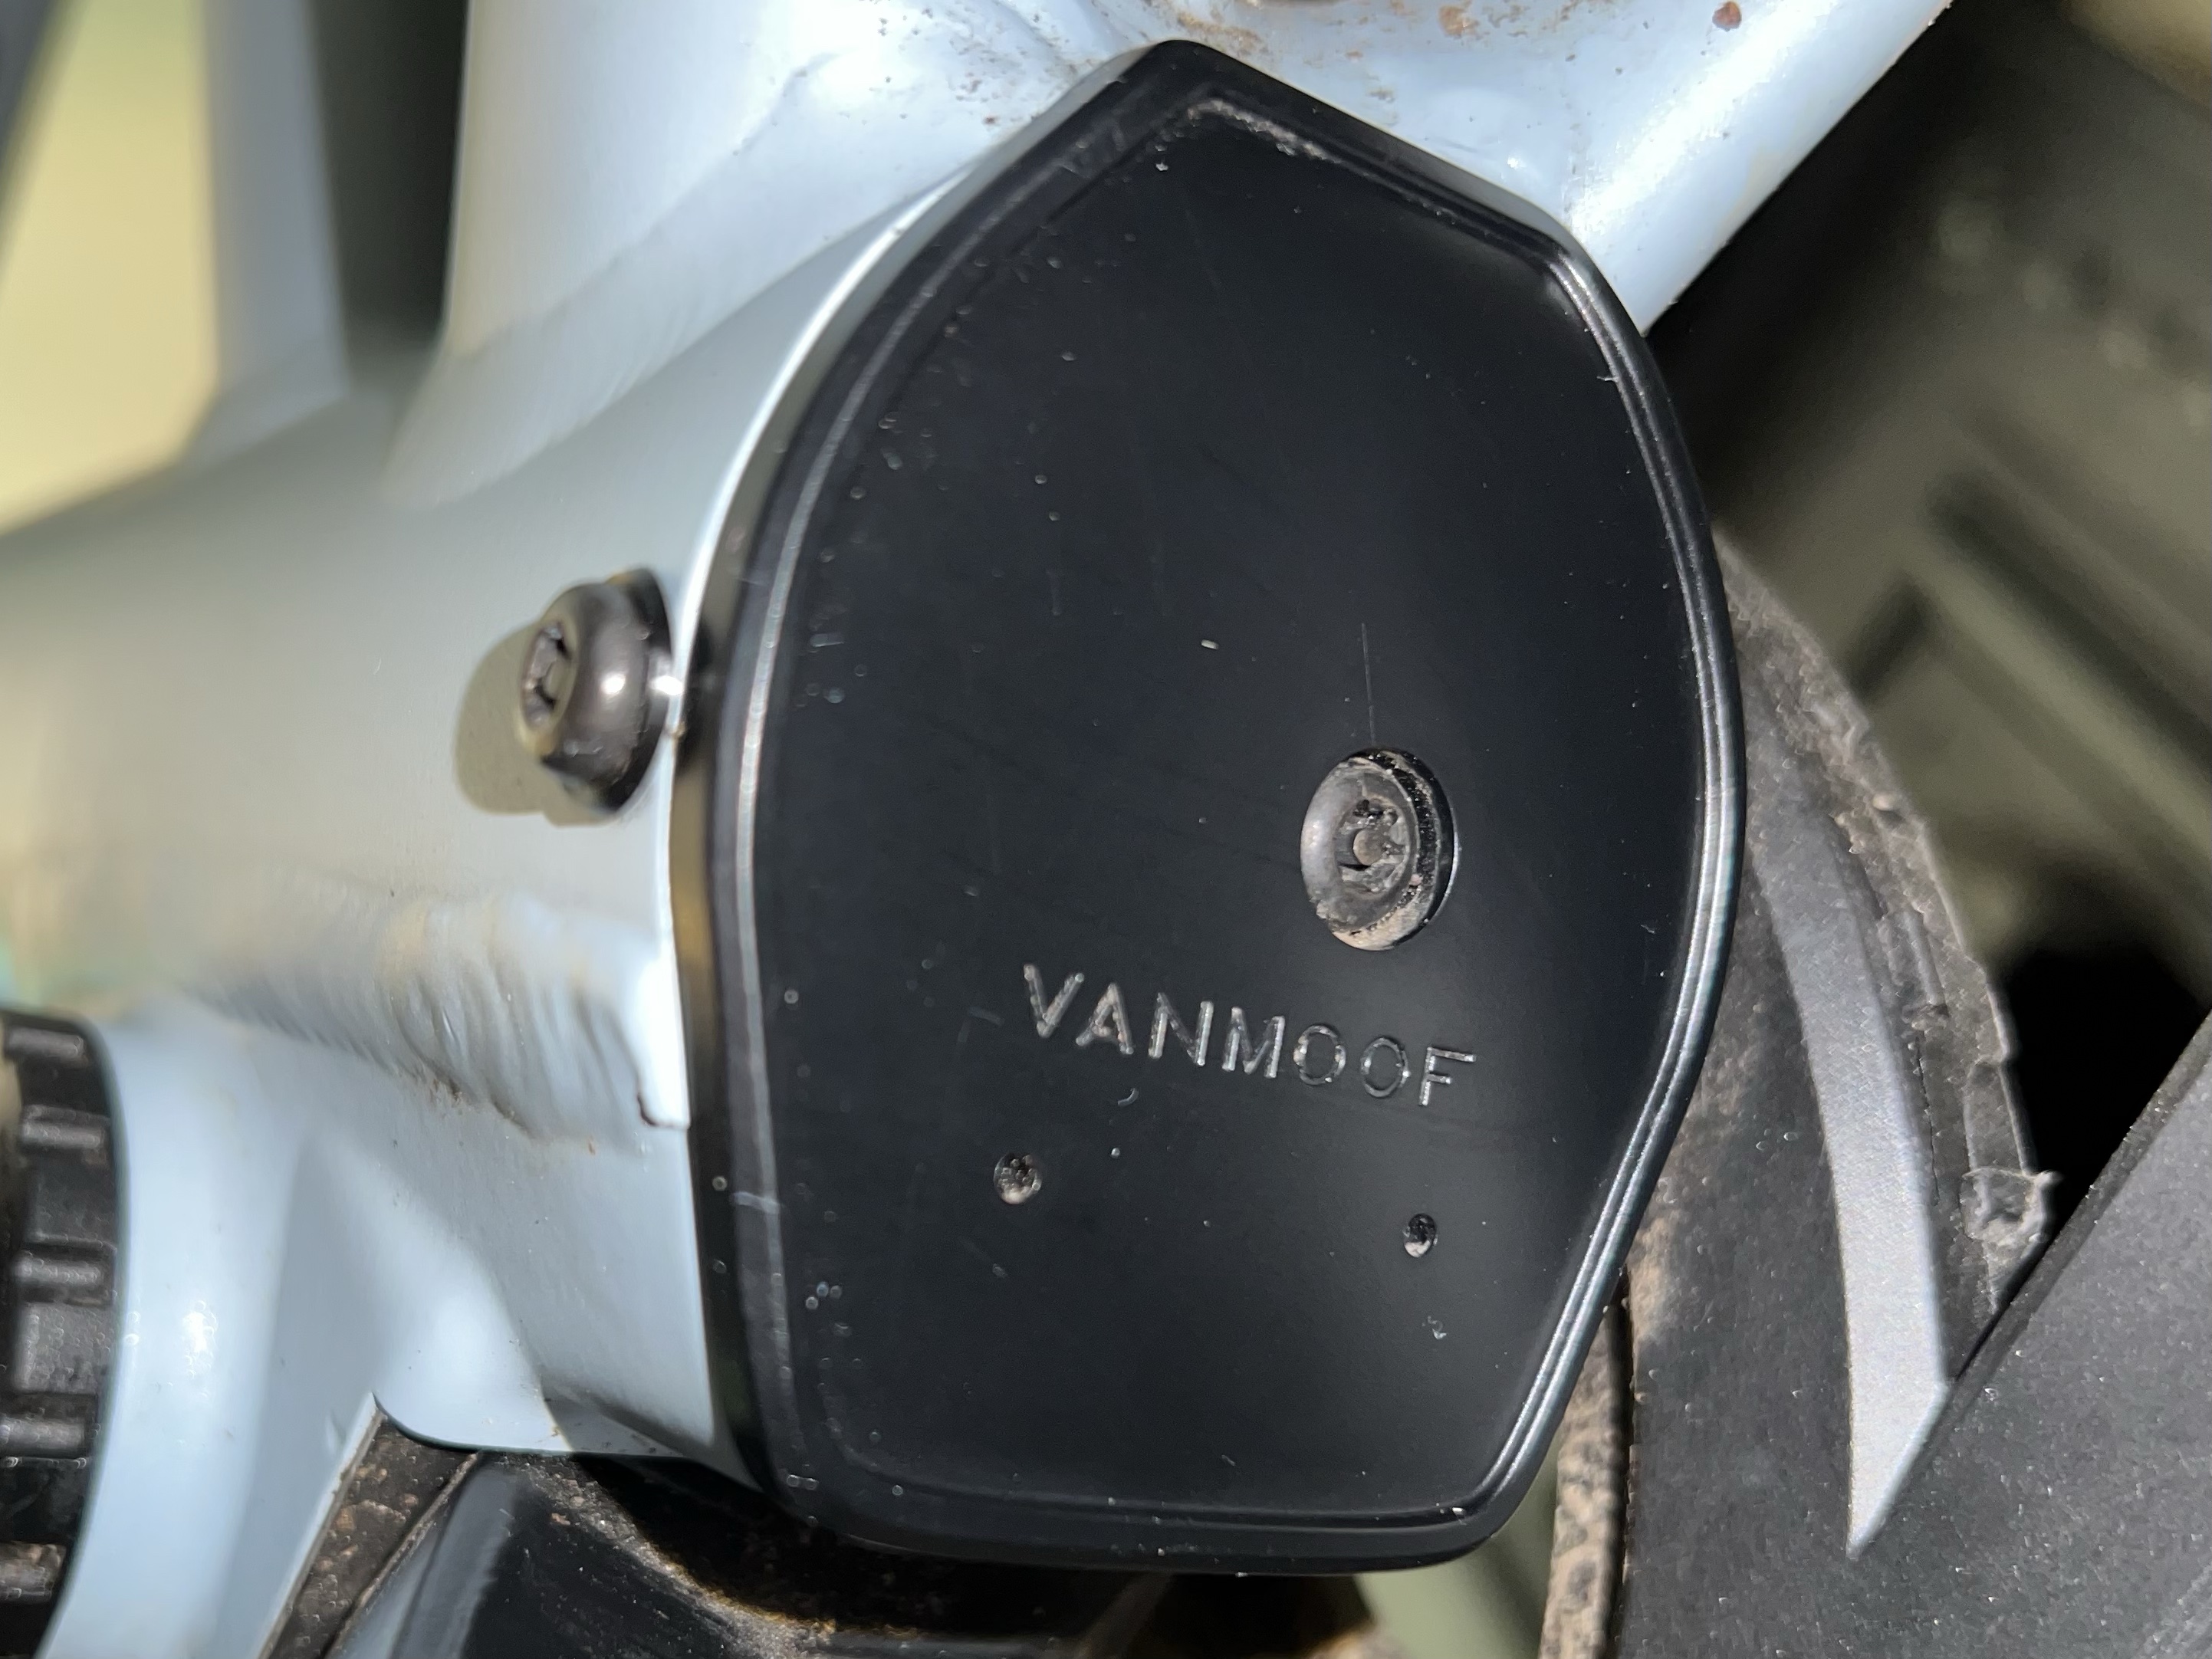

Once all three bolts have been undone, the protective cap can be removed. This will reveal the end of the battery pack, complete with a swing-out removal handle. Pop out the handle with a finger tip and you’ll be able to pull the battery pack free with a firm tug. Be careful not to damage the cable you find in the same area; it’s connected to the cadence sensor and without it the bike will be unable to provide pedal assist.
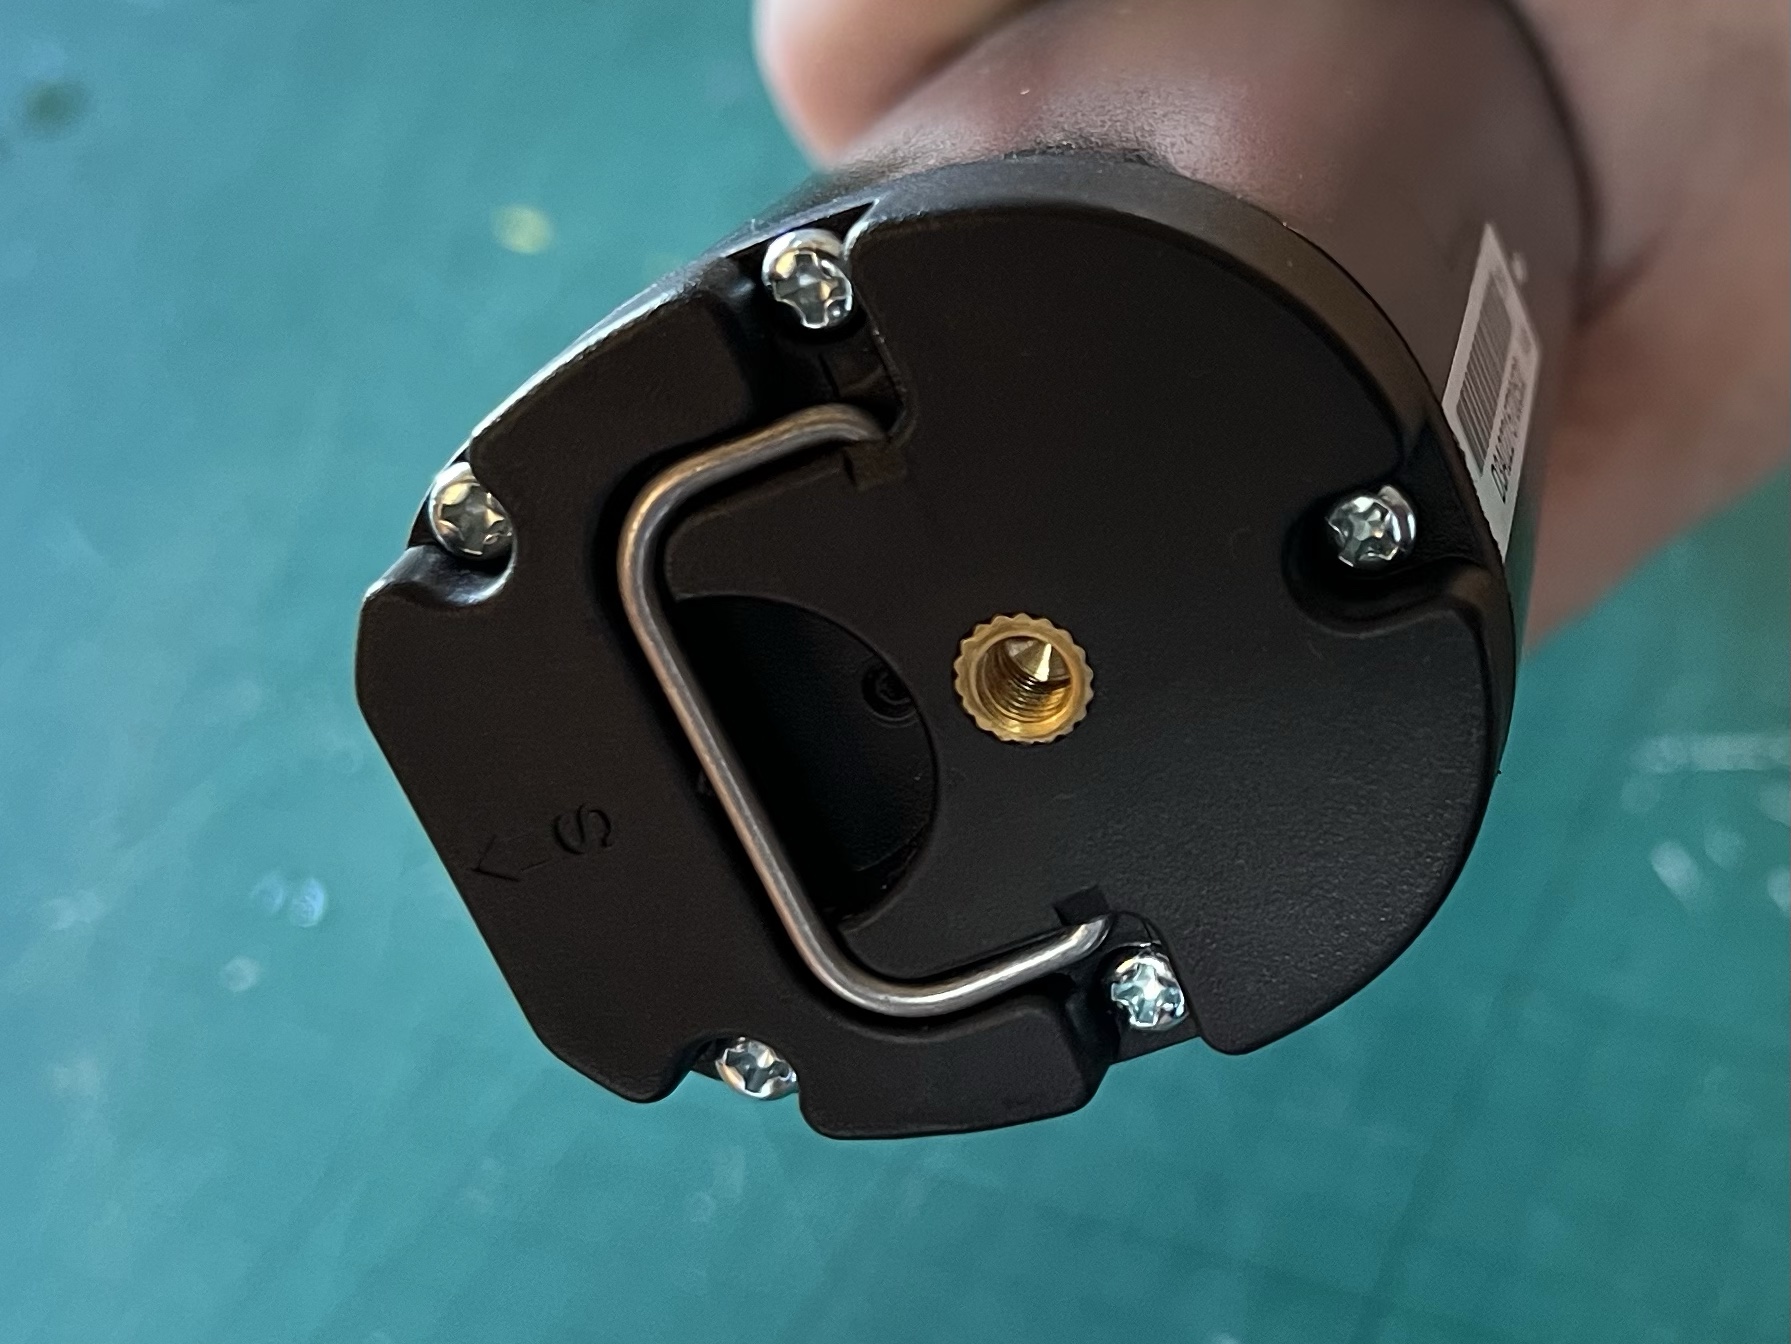
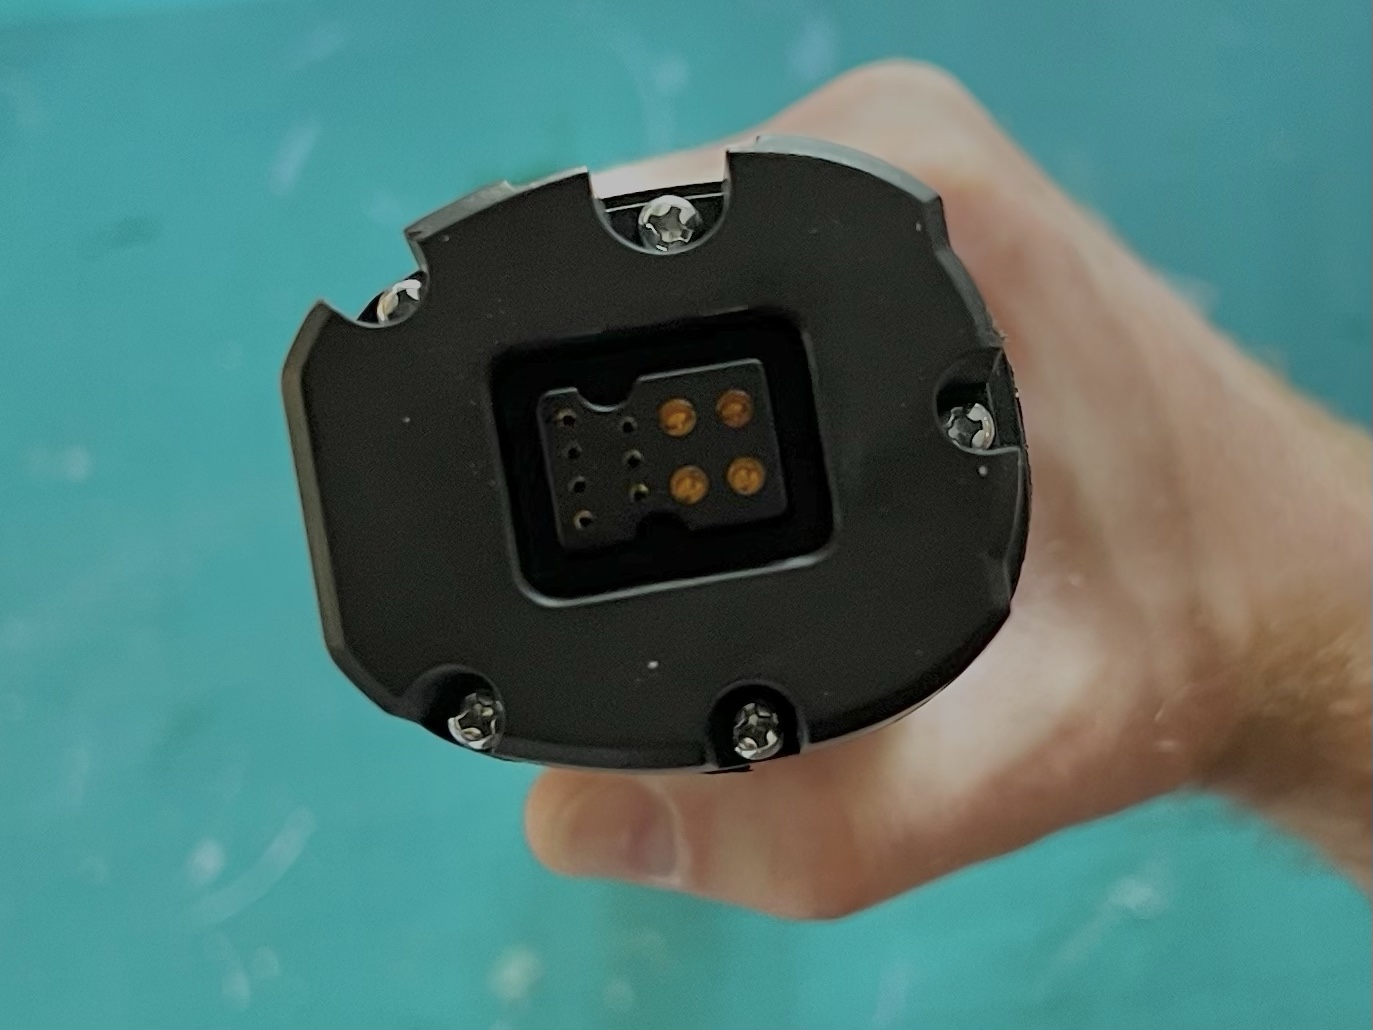
With the battery pack free, it can be placed on the workbench for further break-down. Remove the 5 cross head screws from each end of the battery pack and use an iFixit Opening Tool, or similar, to pop the caps off. The cap with the swing-out handle can be completed removed from the battery pack, but the cap with the power connector is wired internally to the circuit and cells within.
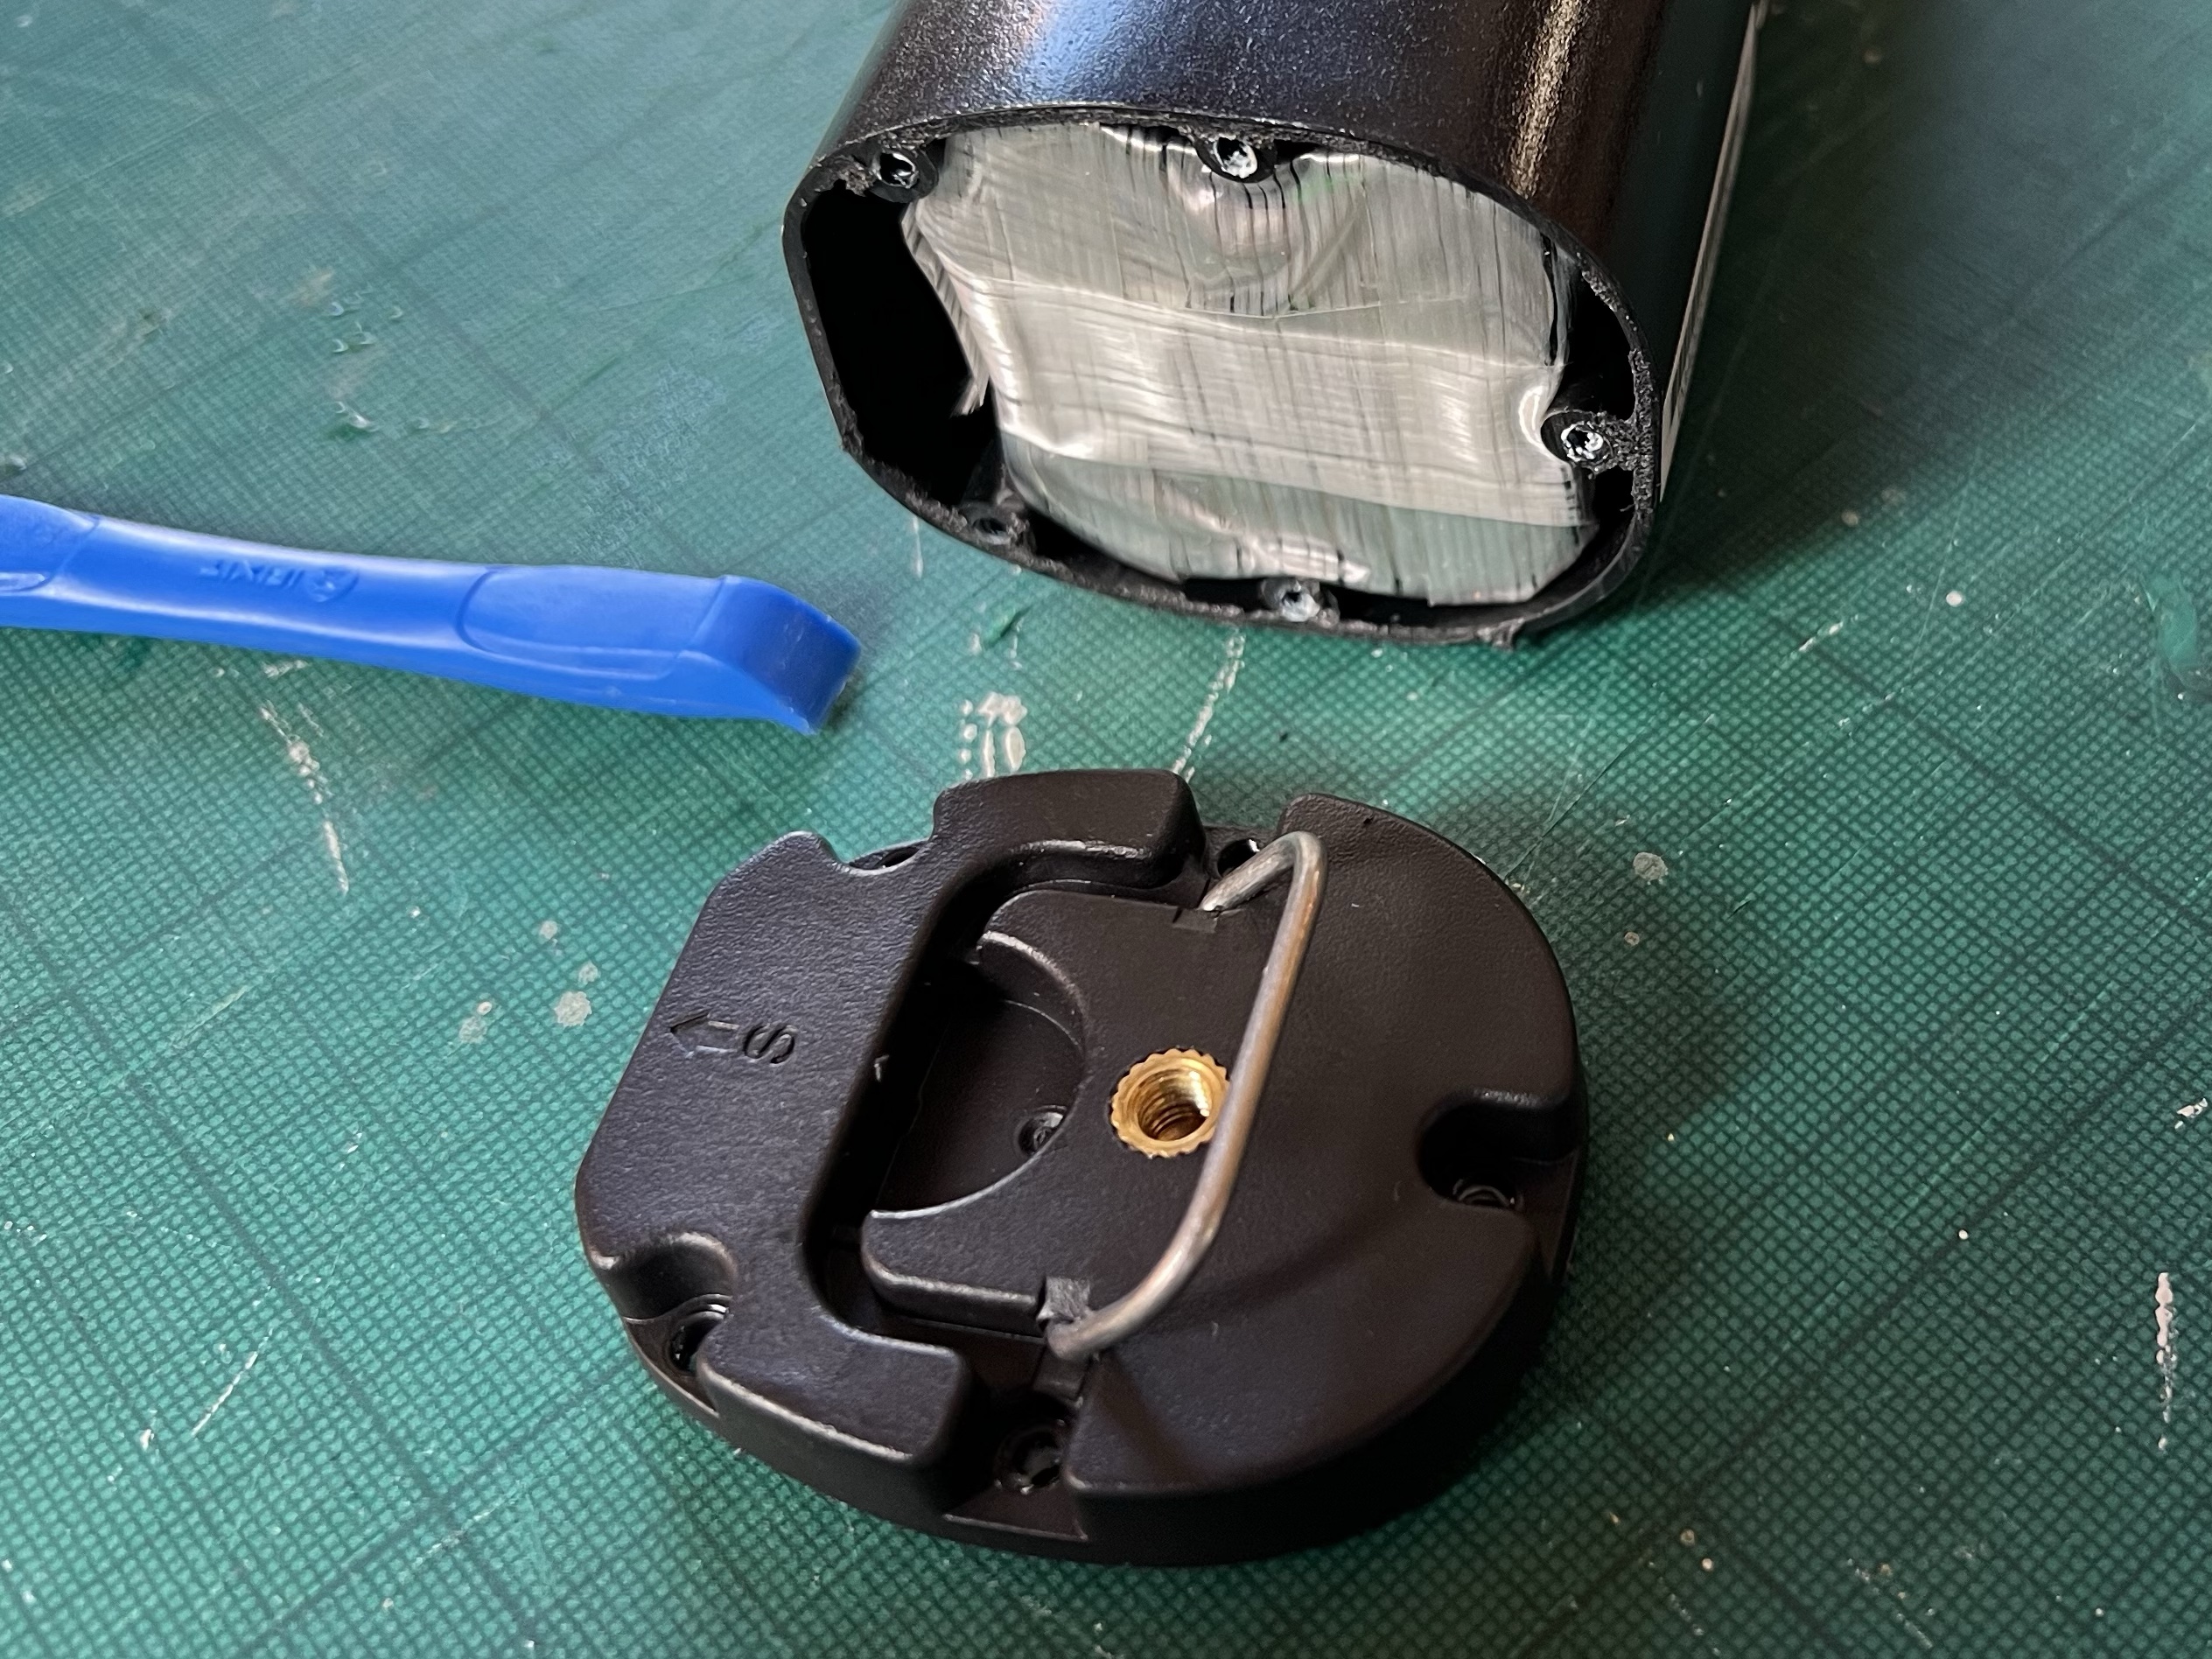
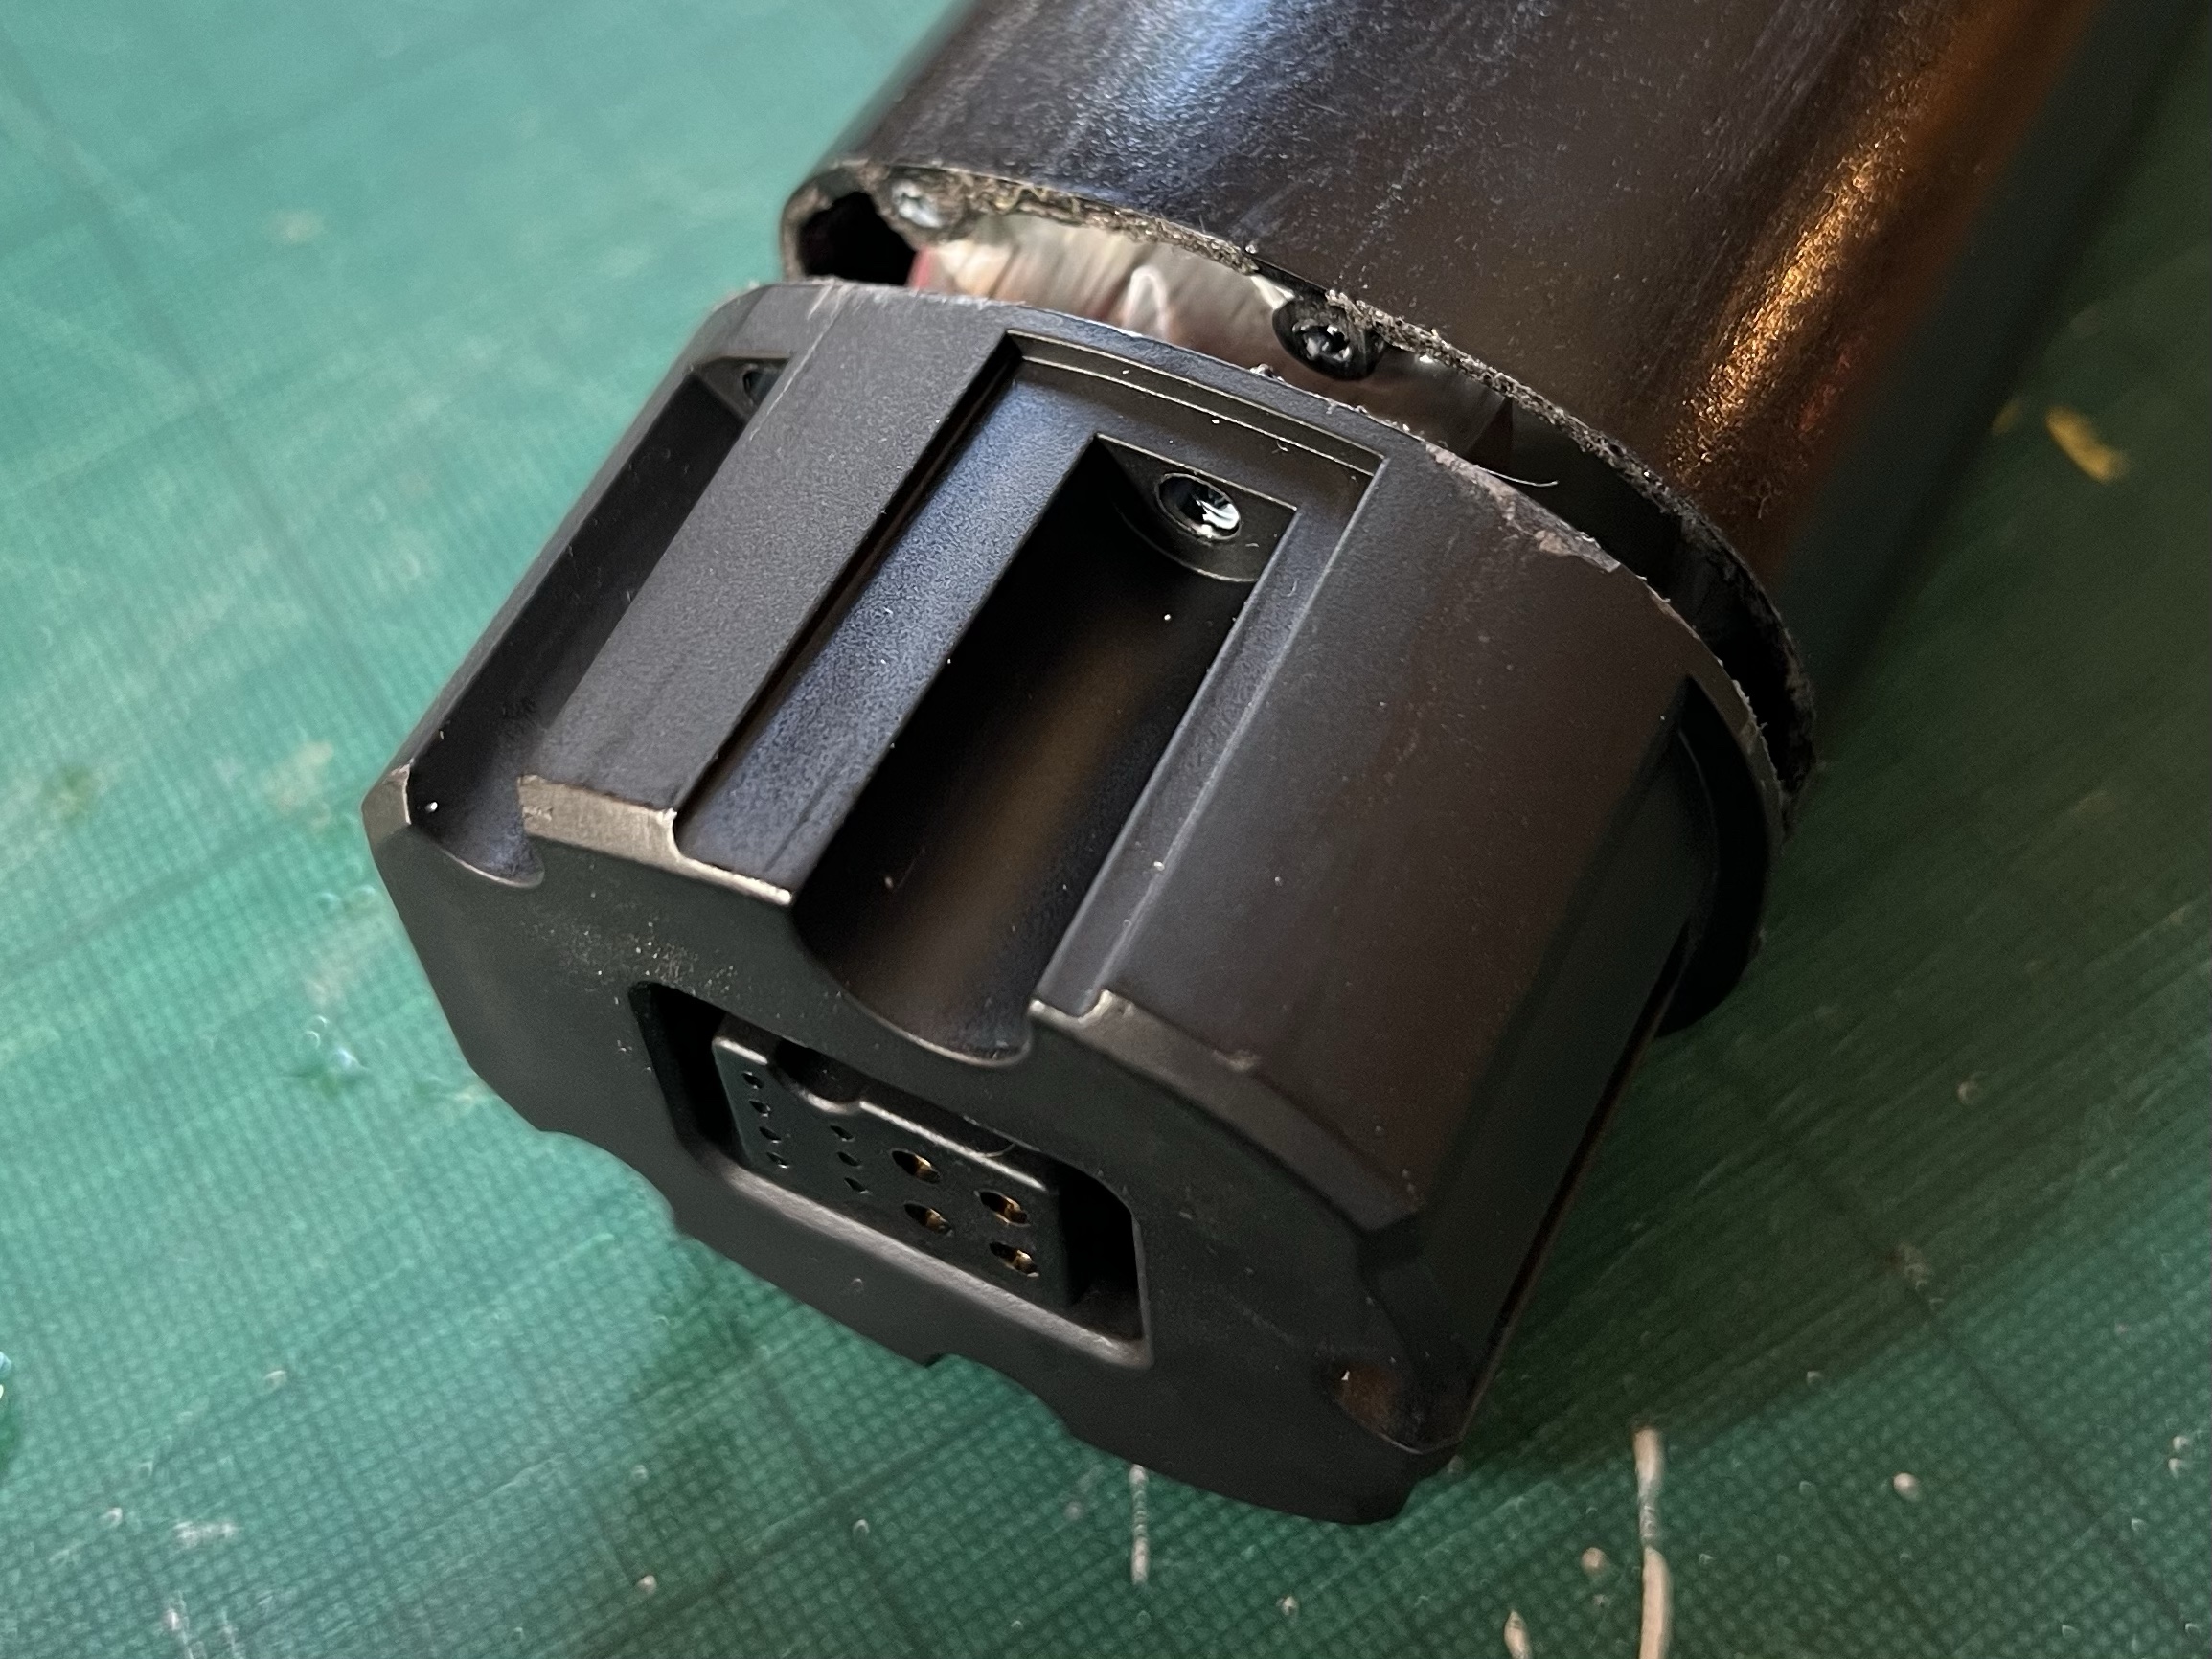
Having removed the cap with the handle, press firmly on the inside of the battery pack that is now visible. The whole assembly of cells and circuitry should slide out of the other end of the casing tube.
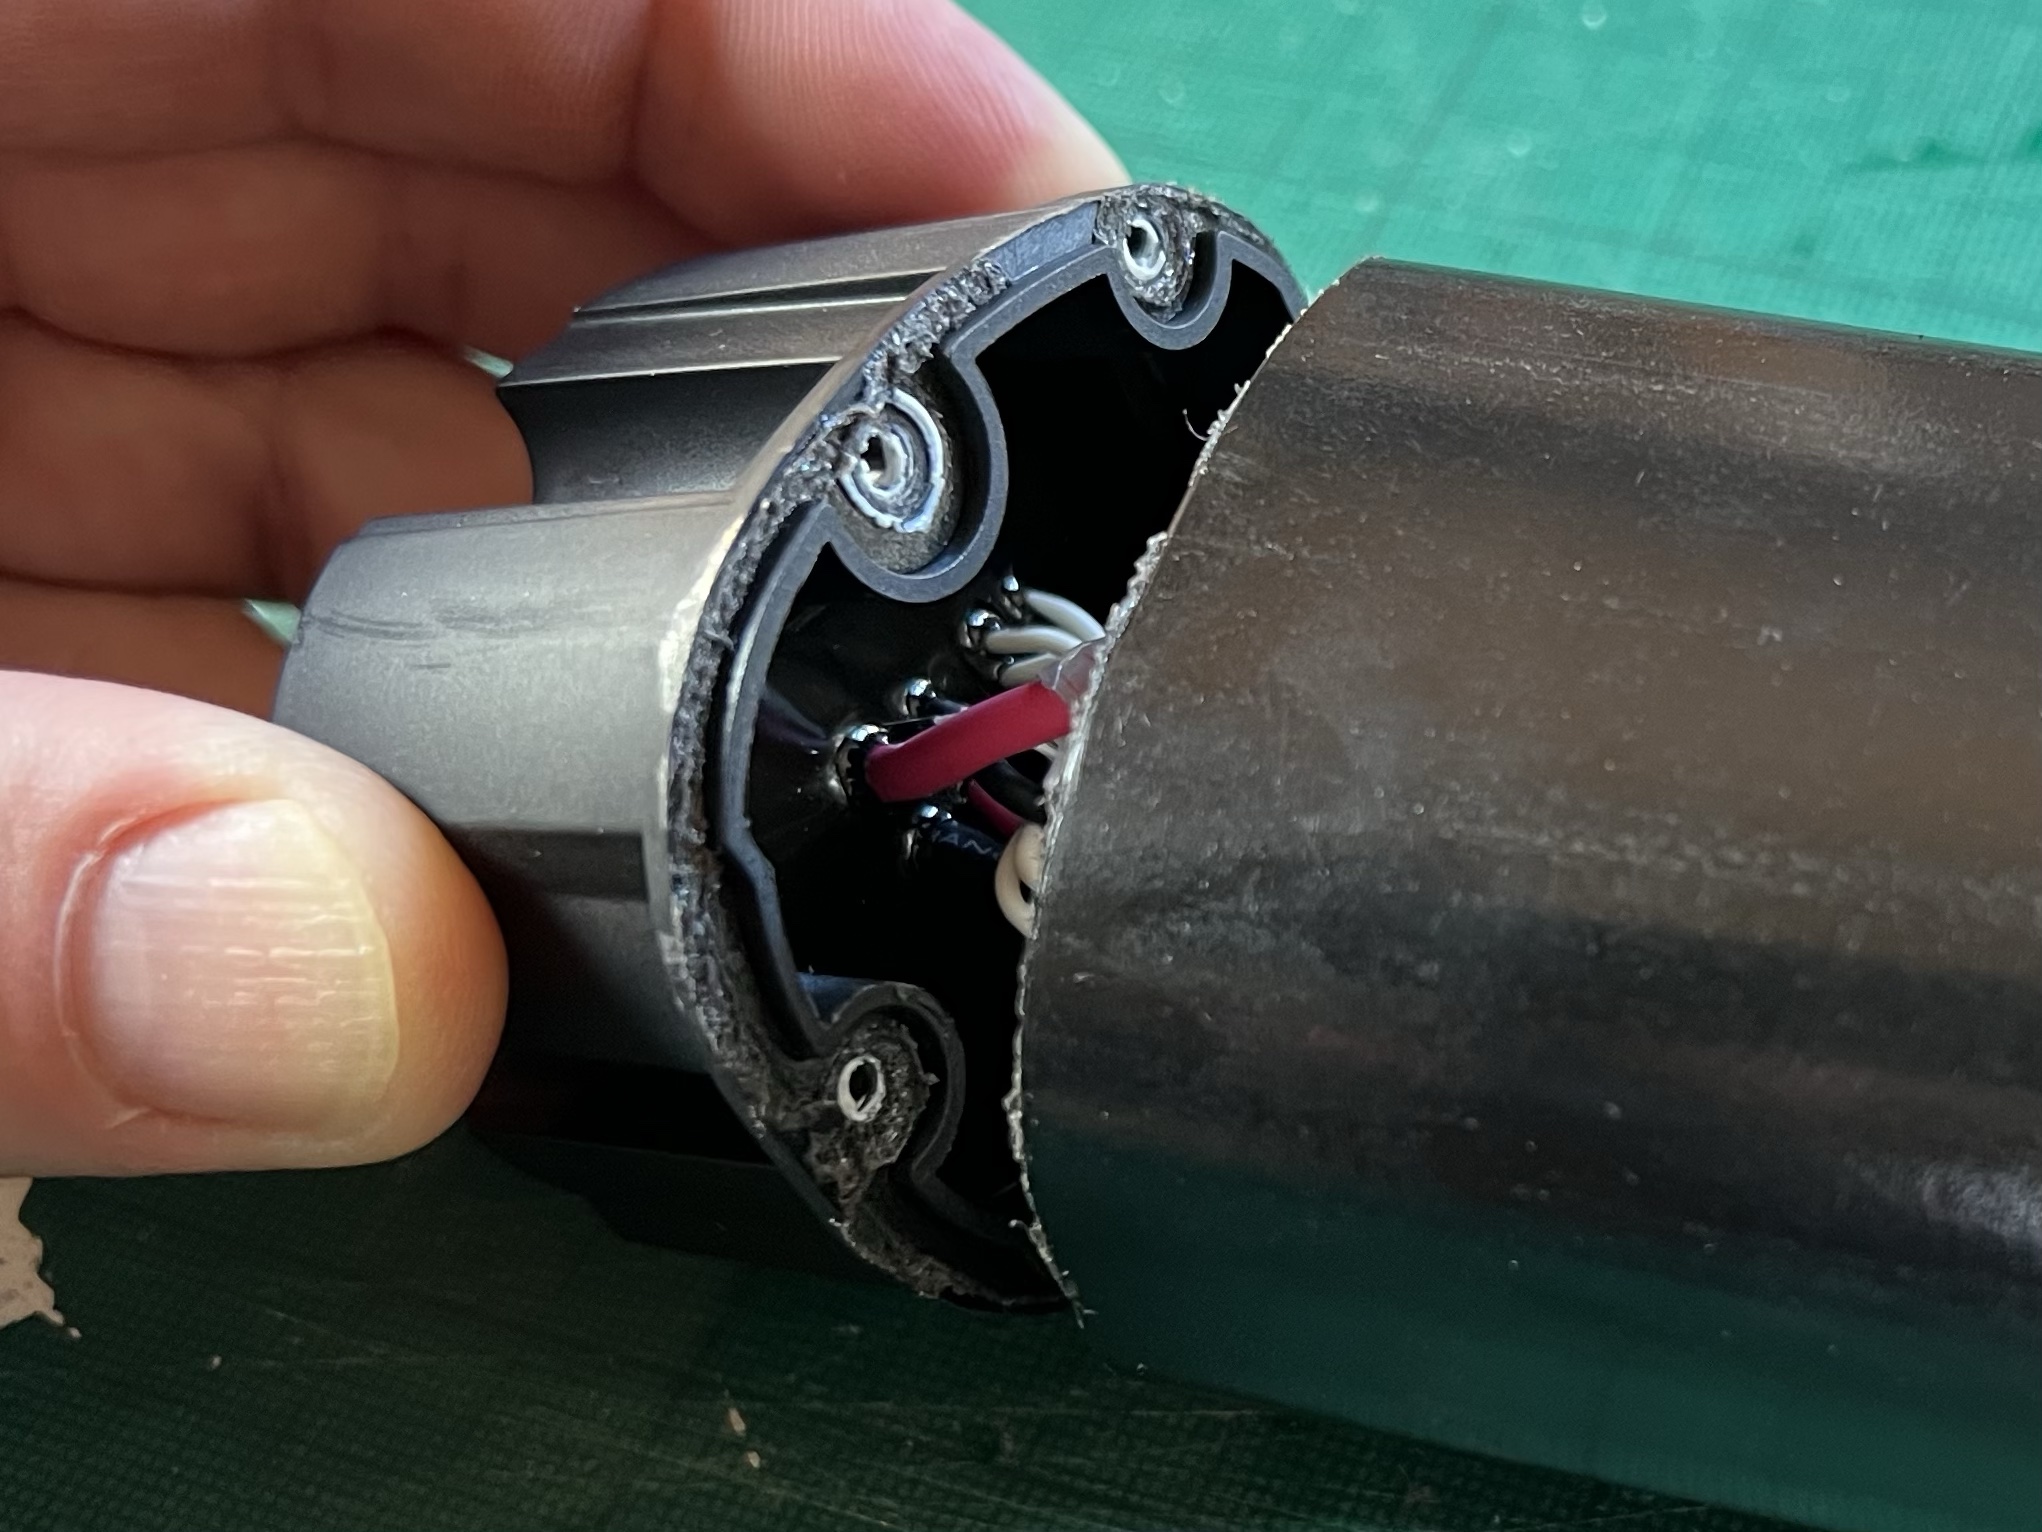
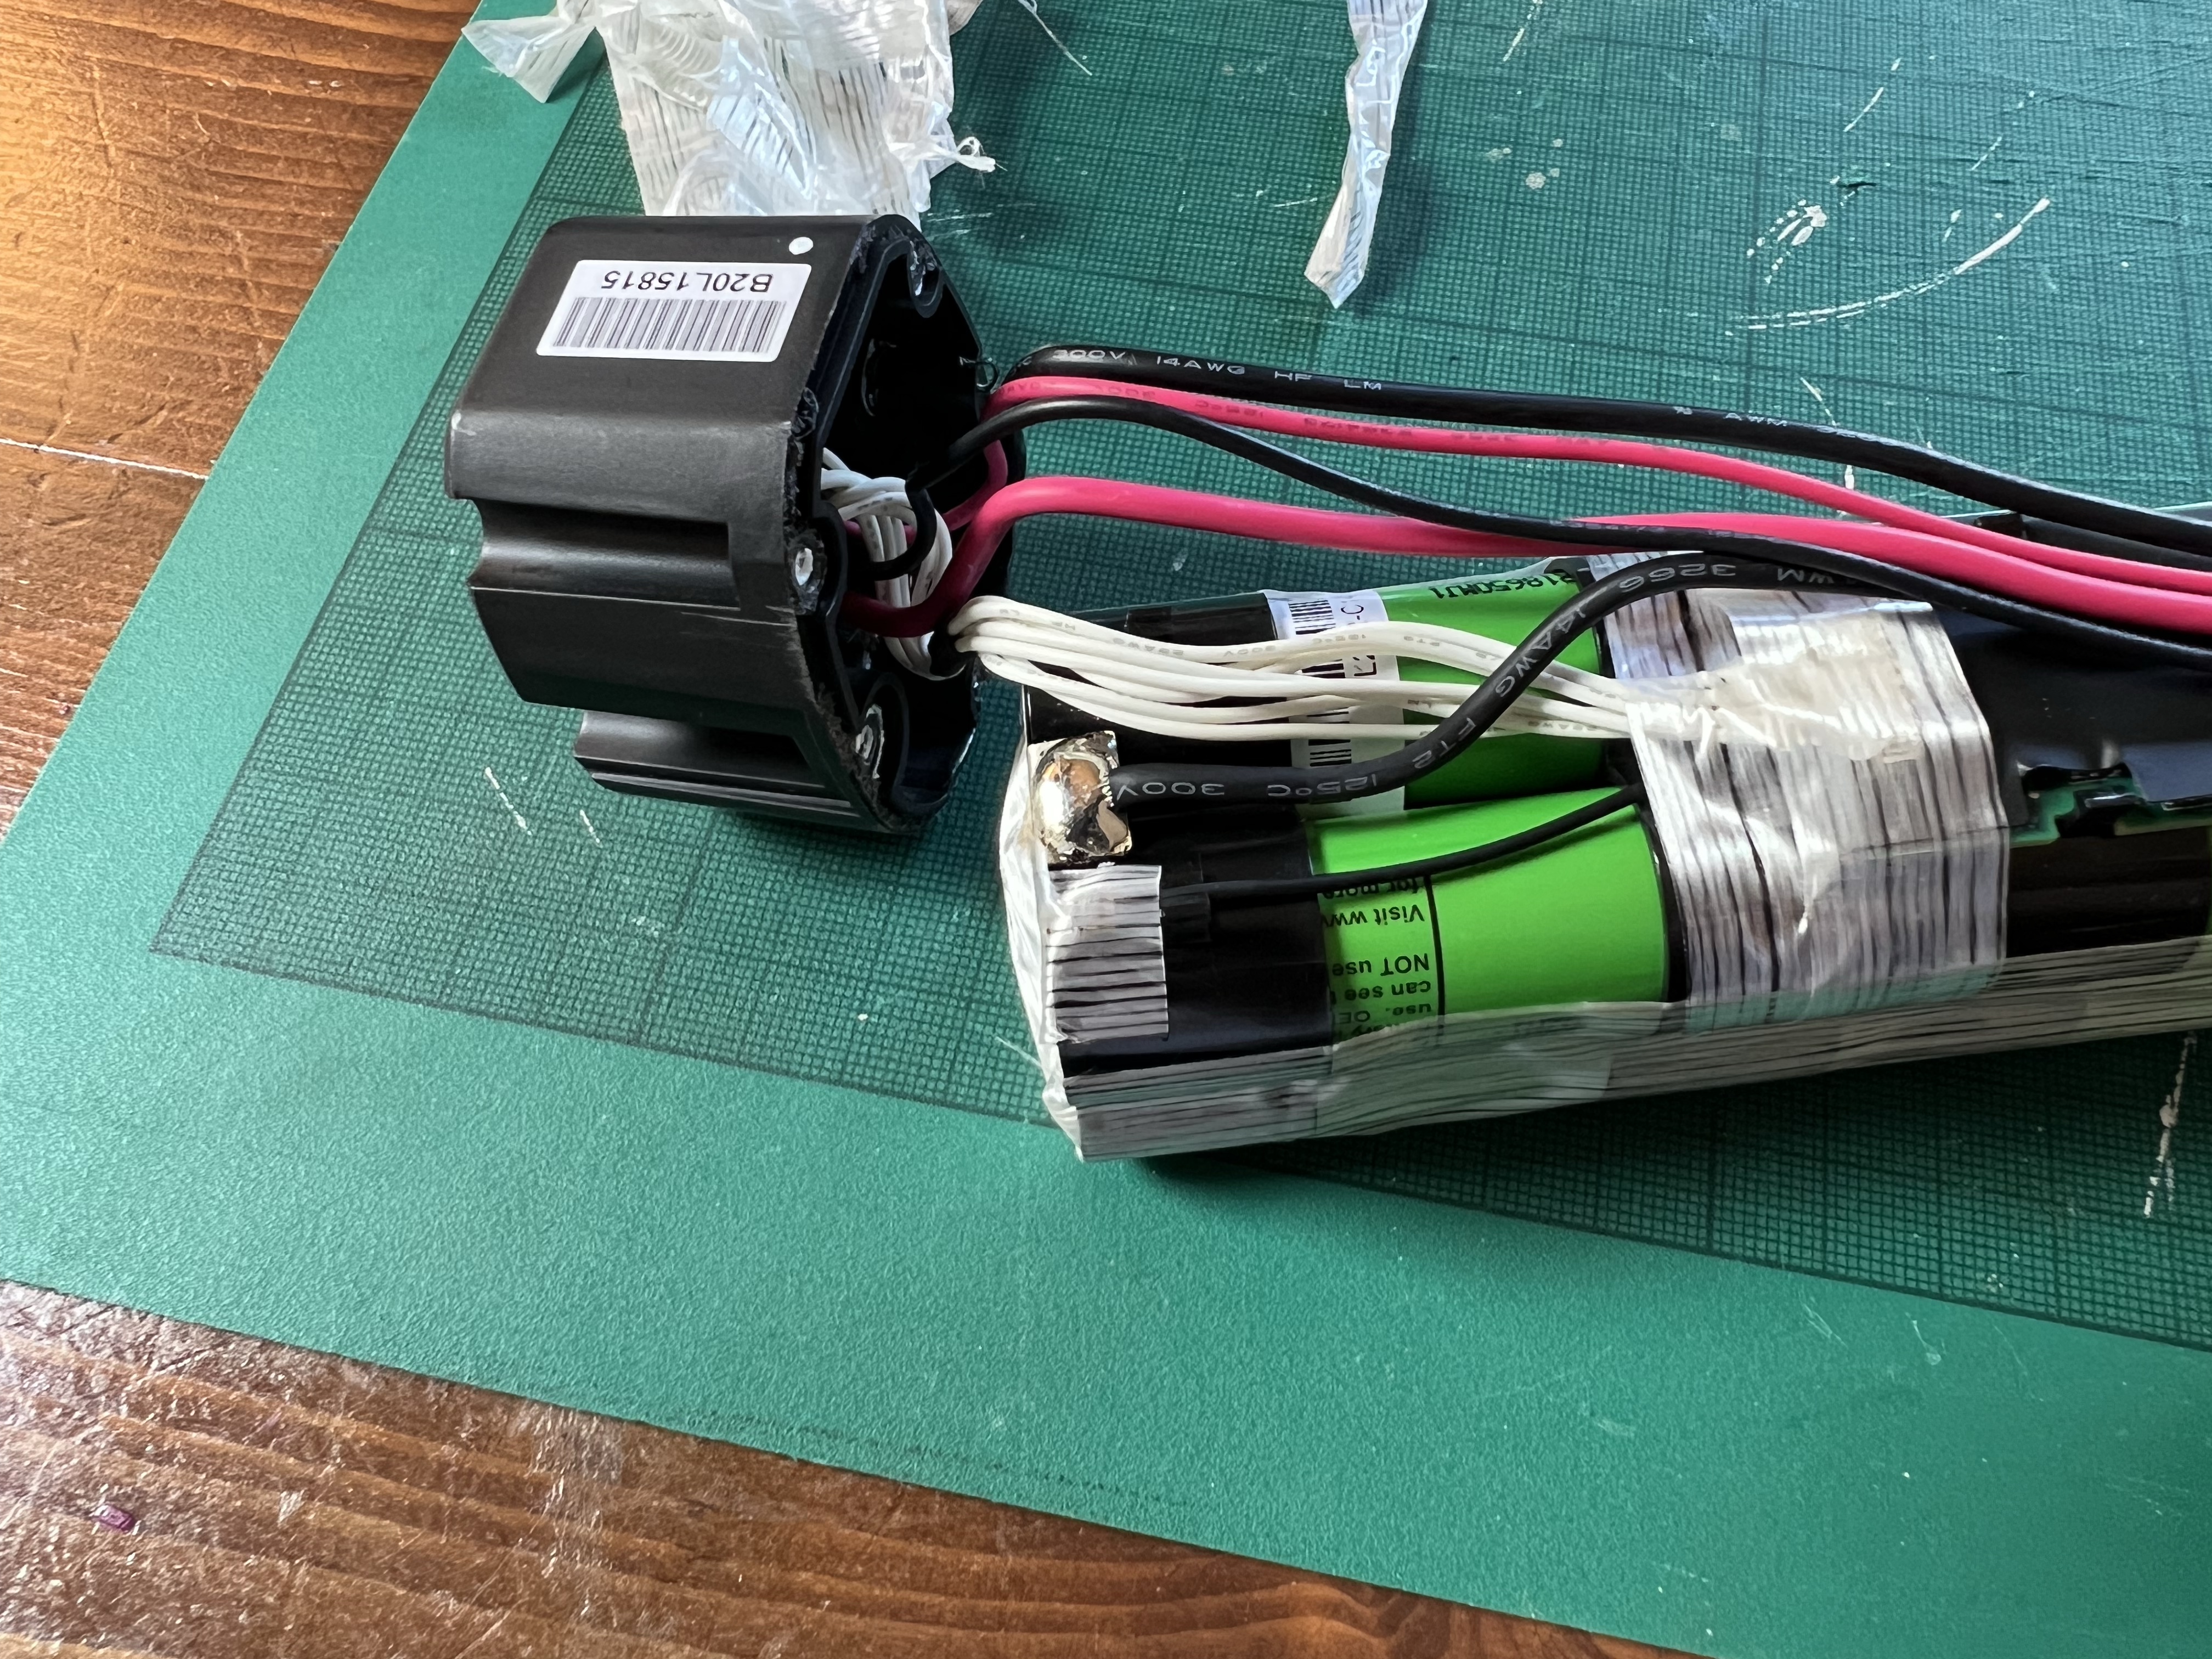
Like many battery packs assembled from individual cells this whole thing has been spot welded together and then wrapped in glass fiber reinforced tape to provide physical and electrical protection.

Carefully unwrapping the tape reveals the pack’s make-up, including the safety precautions the manufacturer has added to extend the life of the bike and to prevent it from causing house-fires.

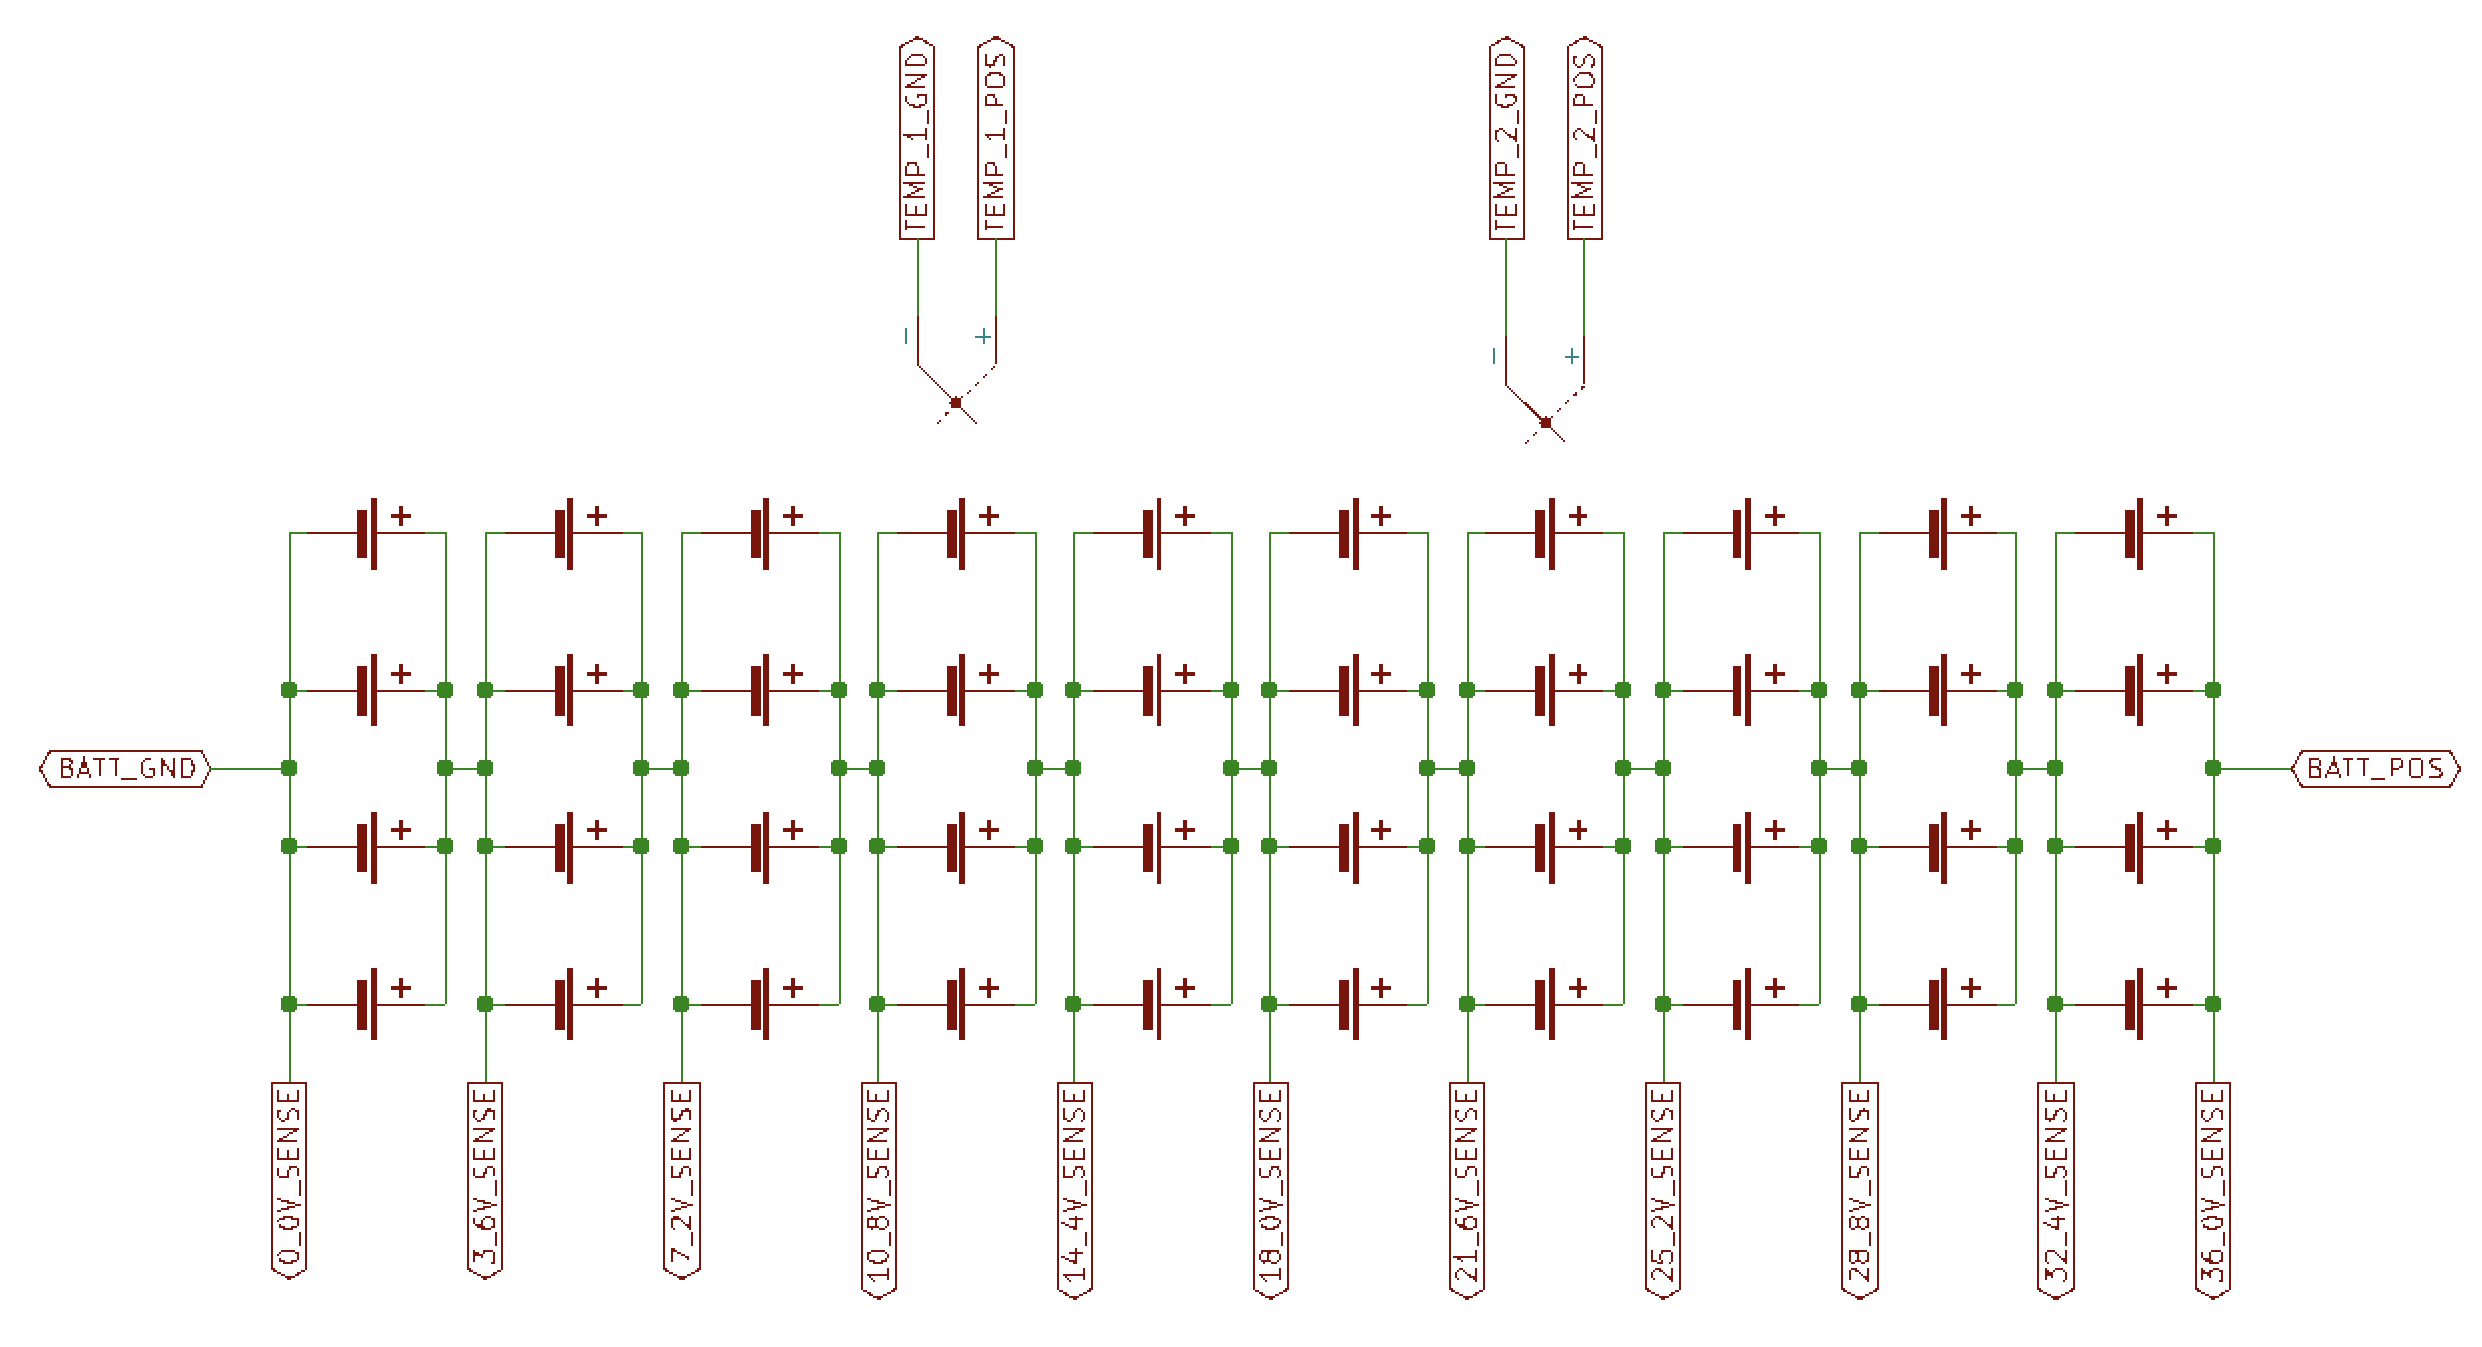
There are two temperature sensors embedded in the battery pack, each 1/3 of the way along its length. These will allow the charging circuit to detect any uneven charging in the pack and shutdown before a thermal run-away can cause damage or start a fire.
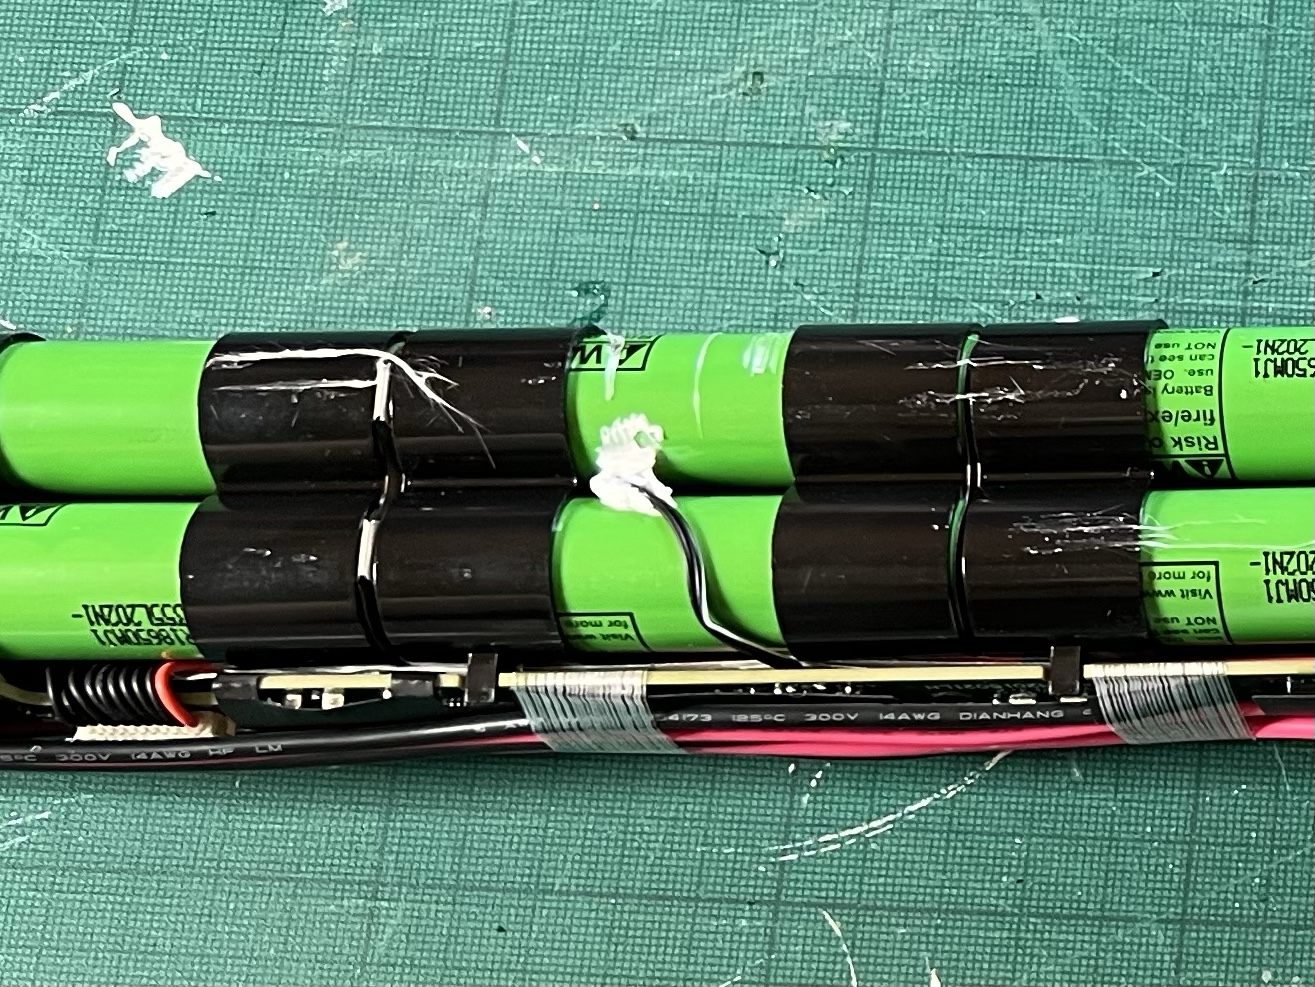
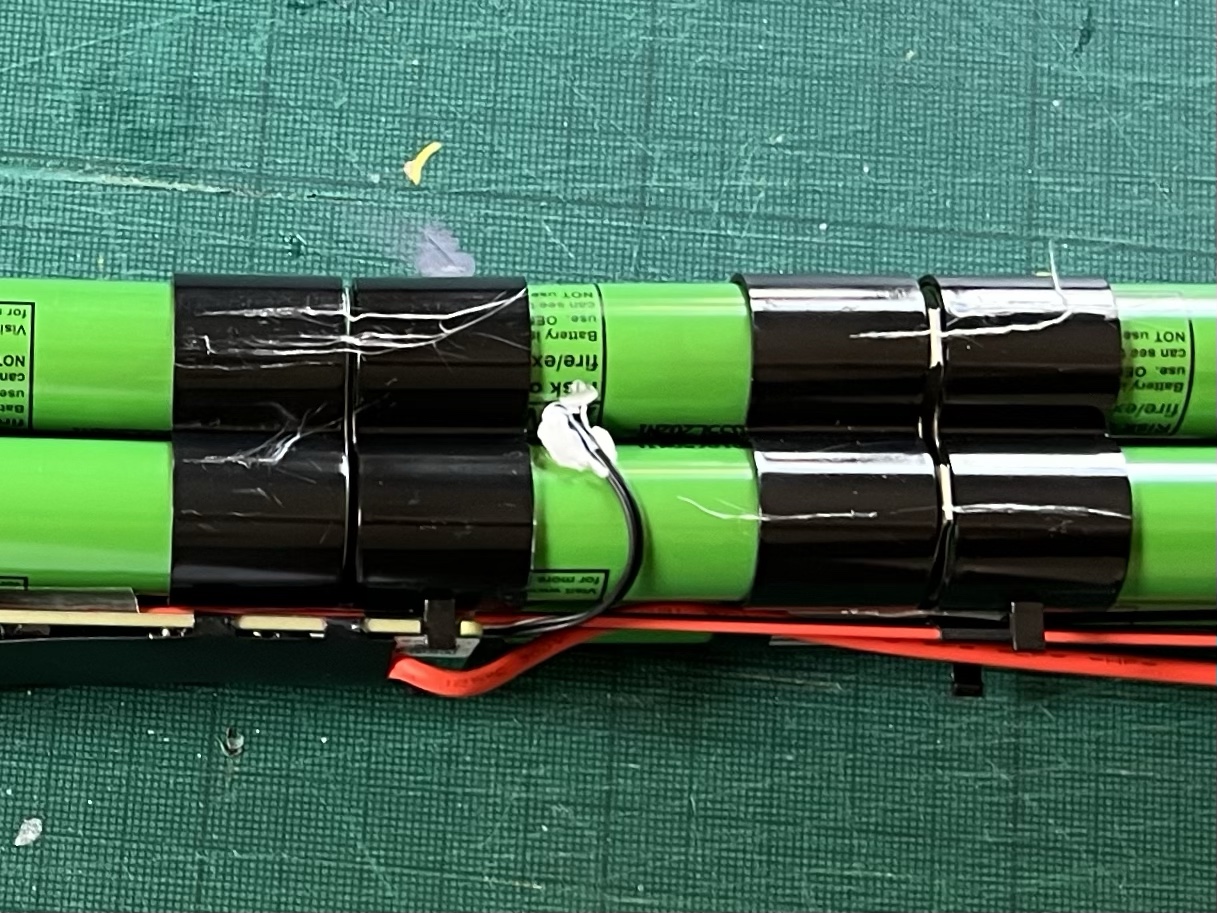
There are also voltage sense wires connected every 1/10 of the pack’s length at each group of four cells. These allow sub-voltages to be measured both before and during charging, preventing power being applied to an overly discharged pack and keeping the pack balanced.
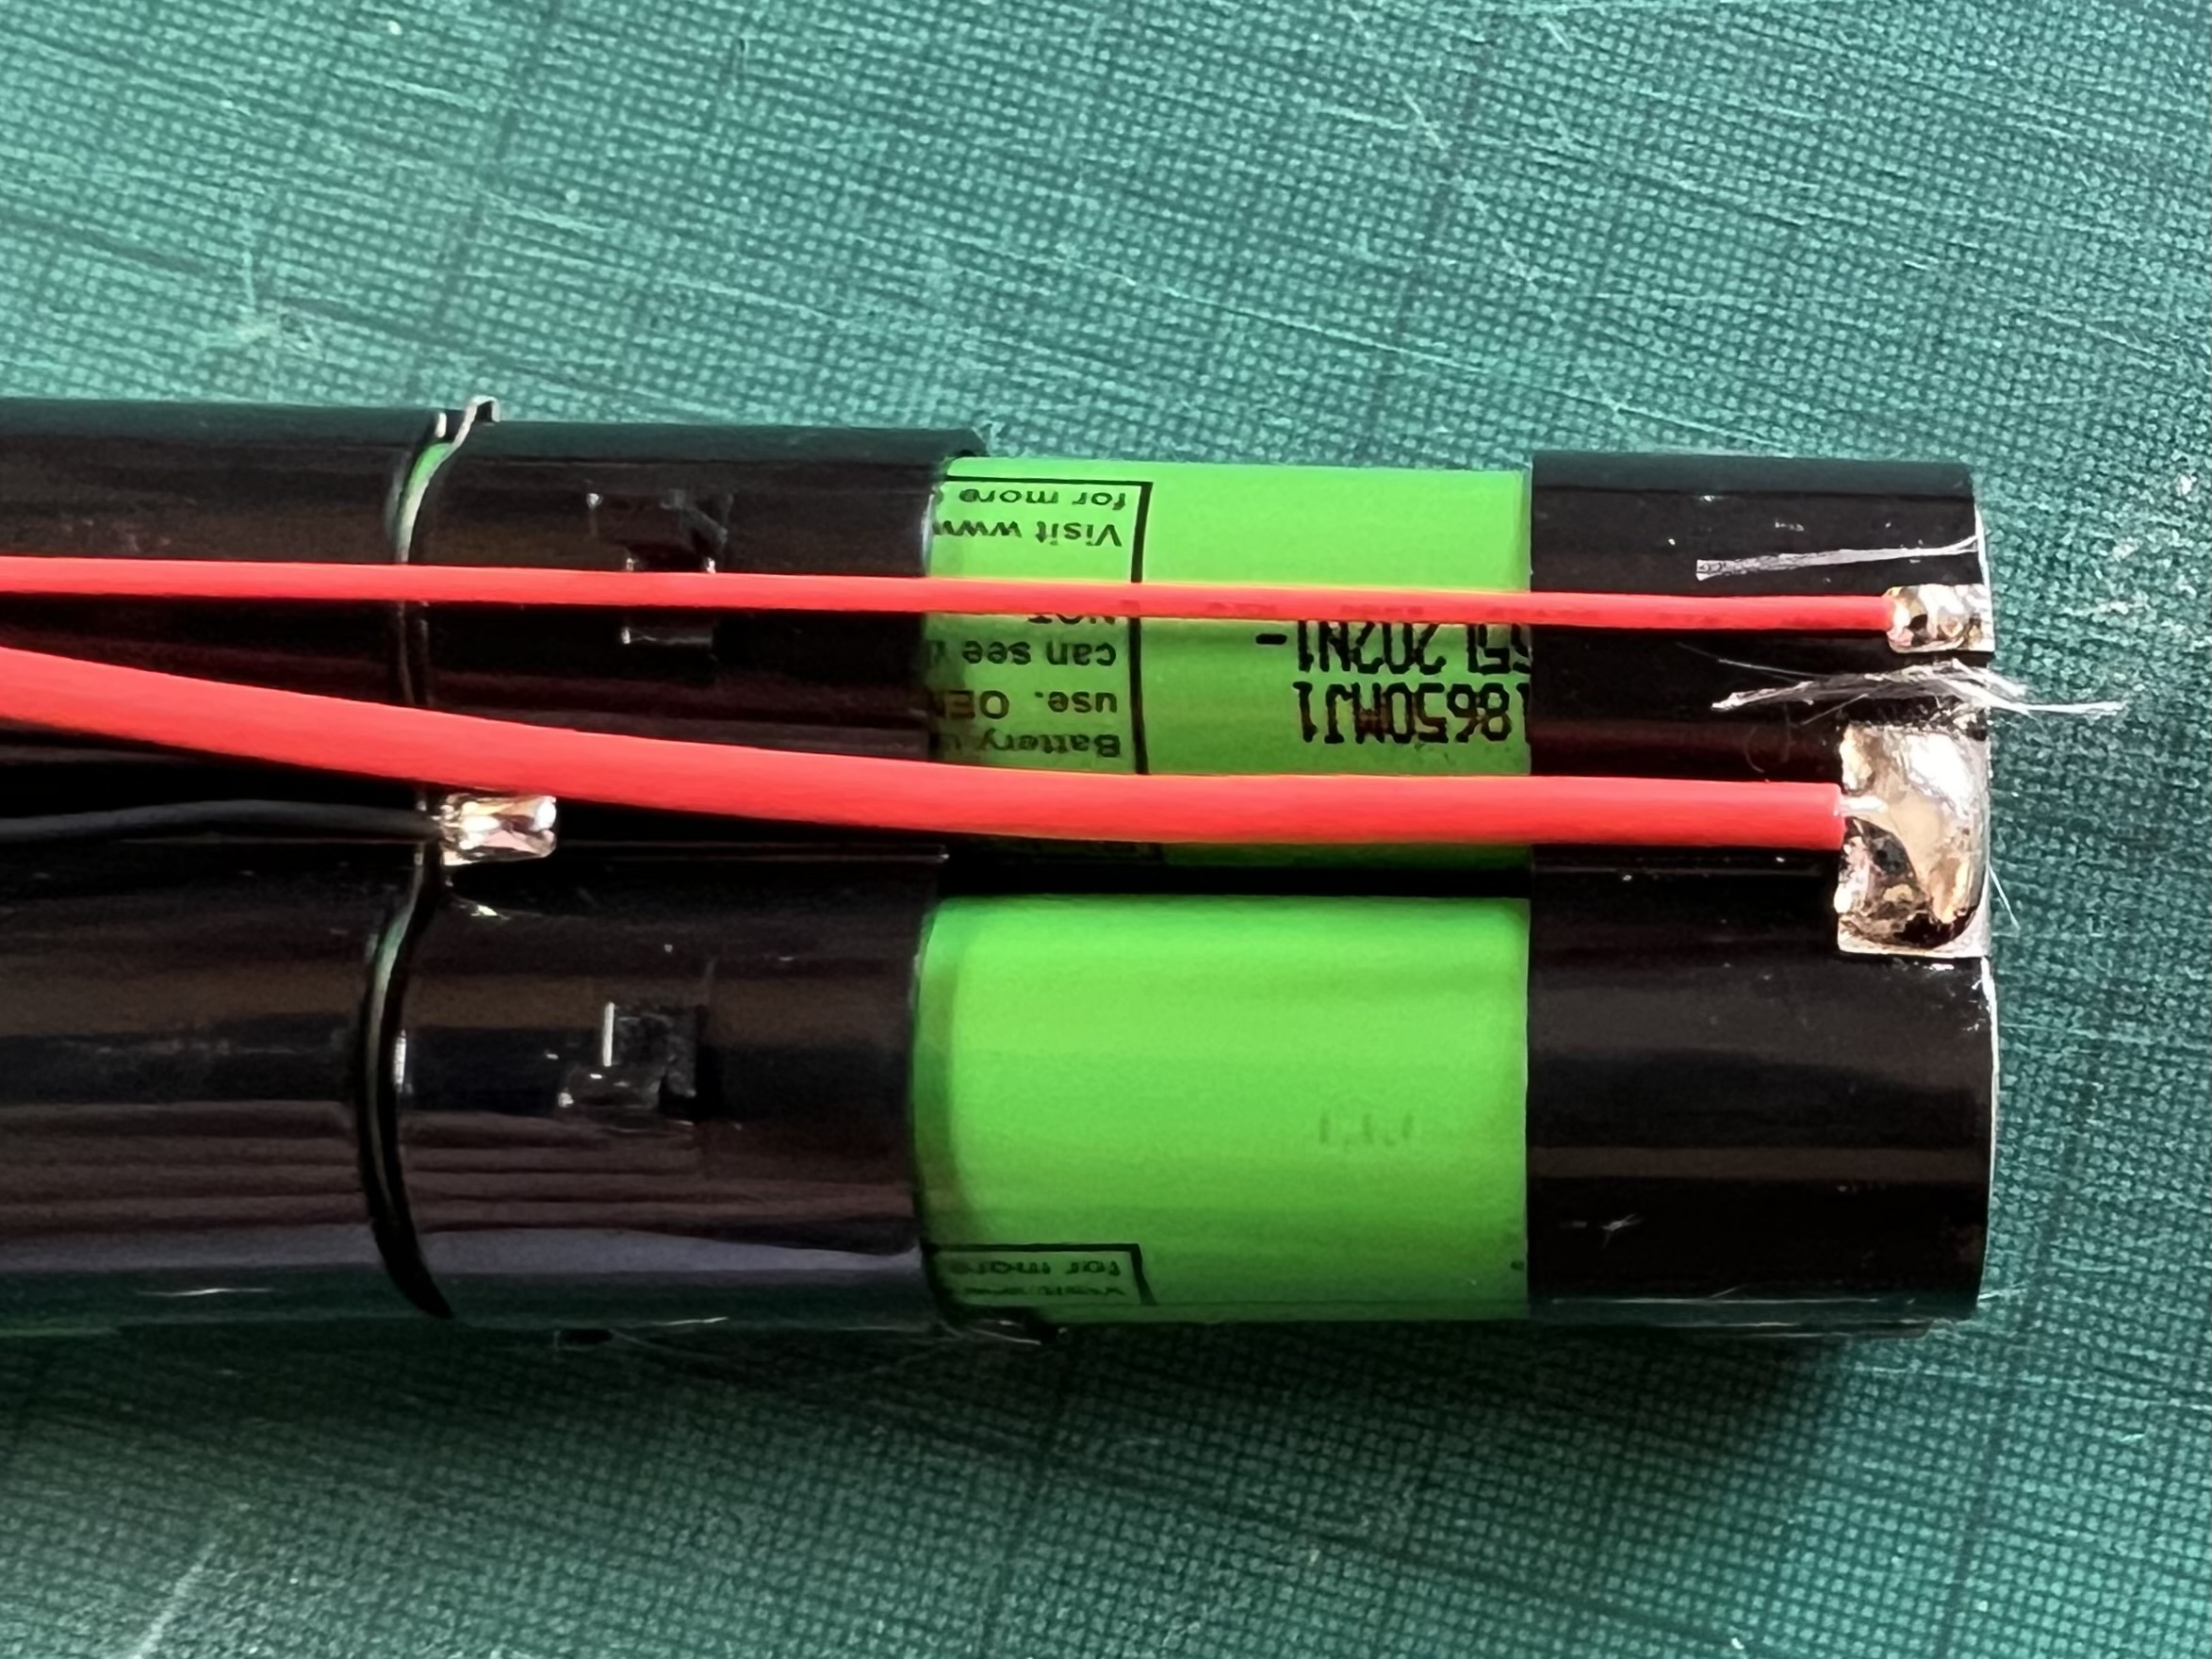
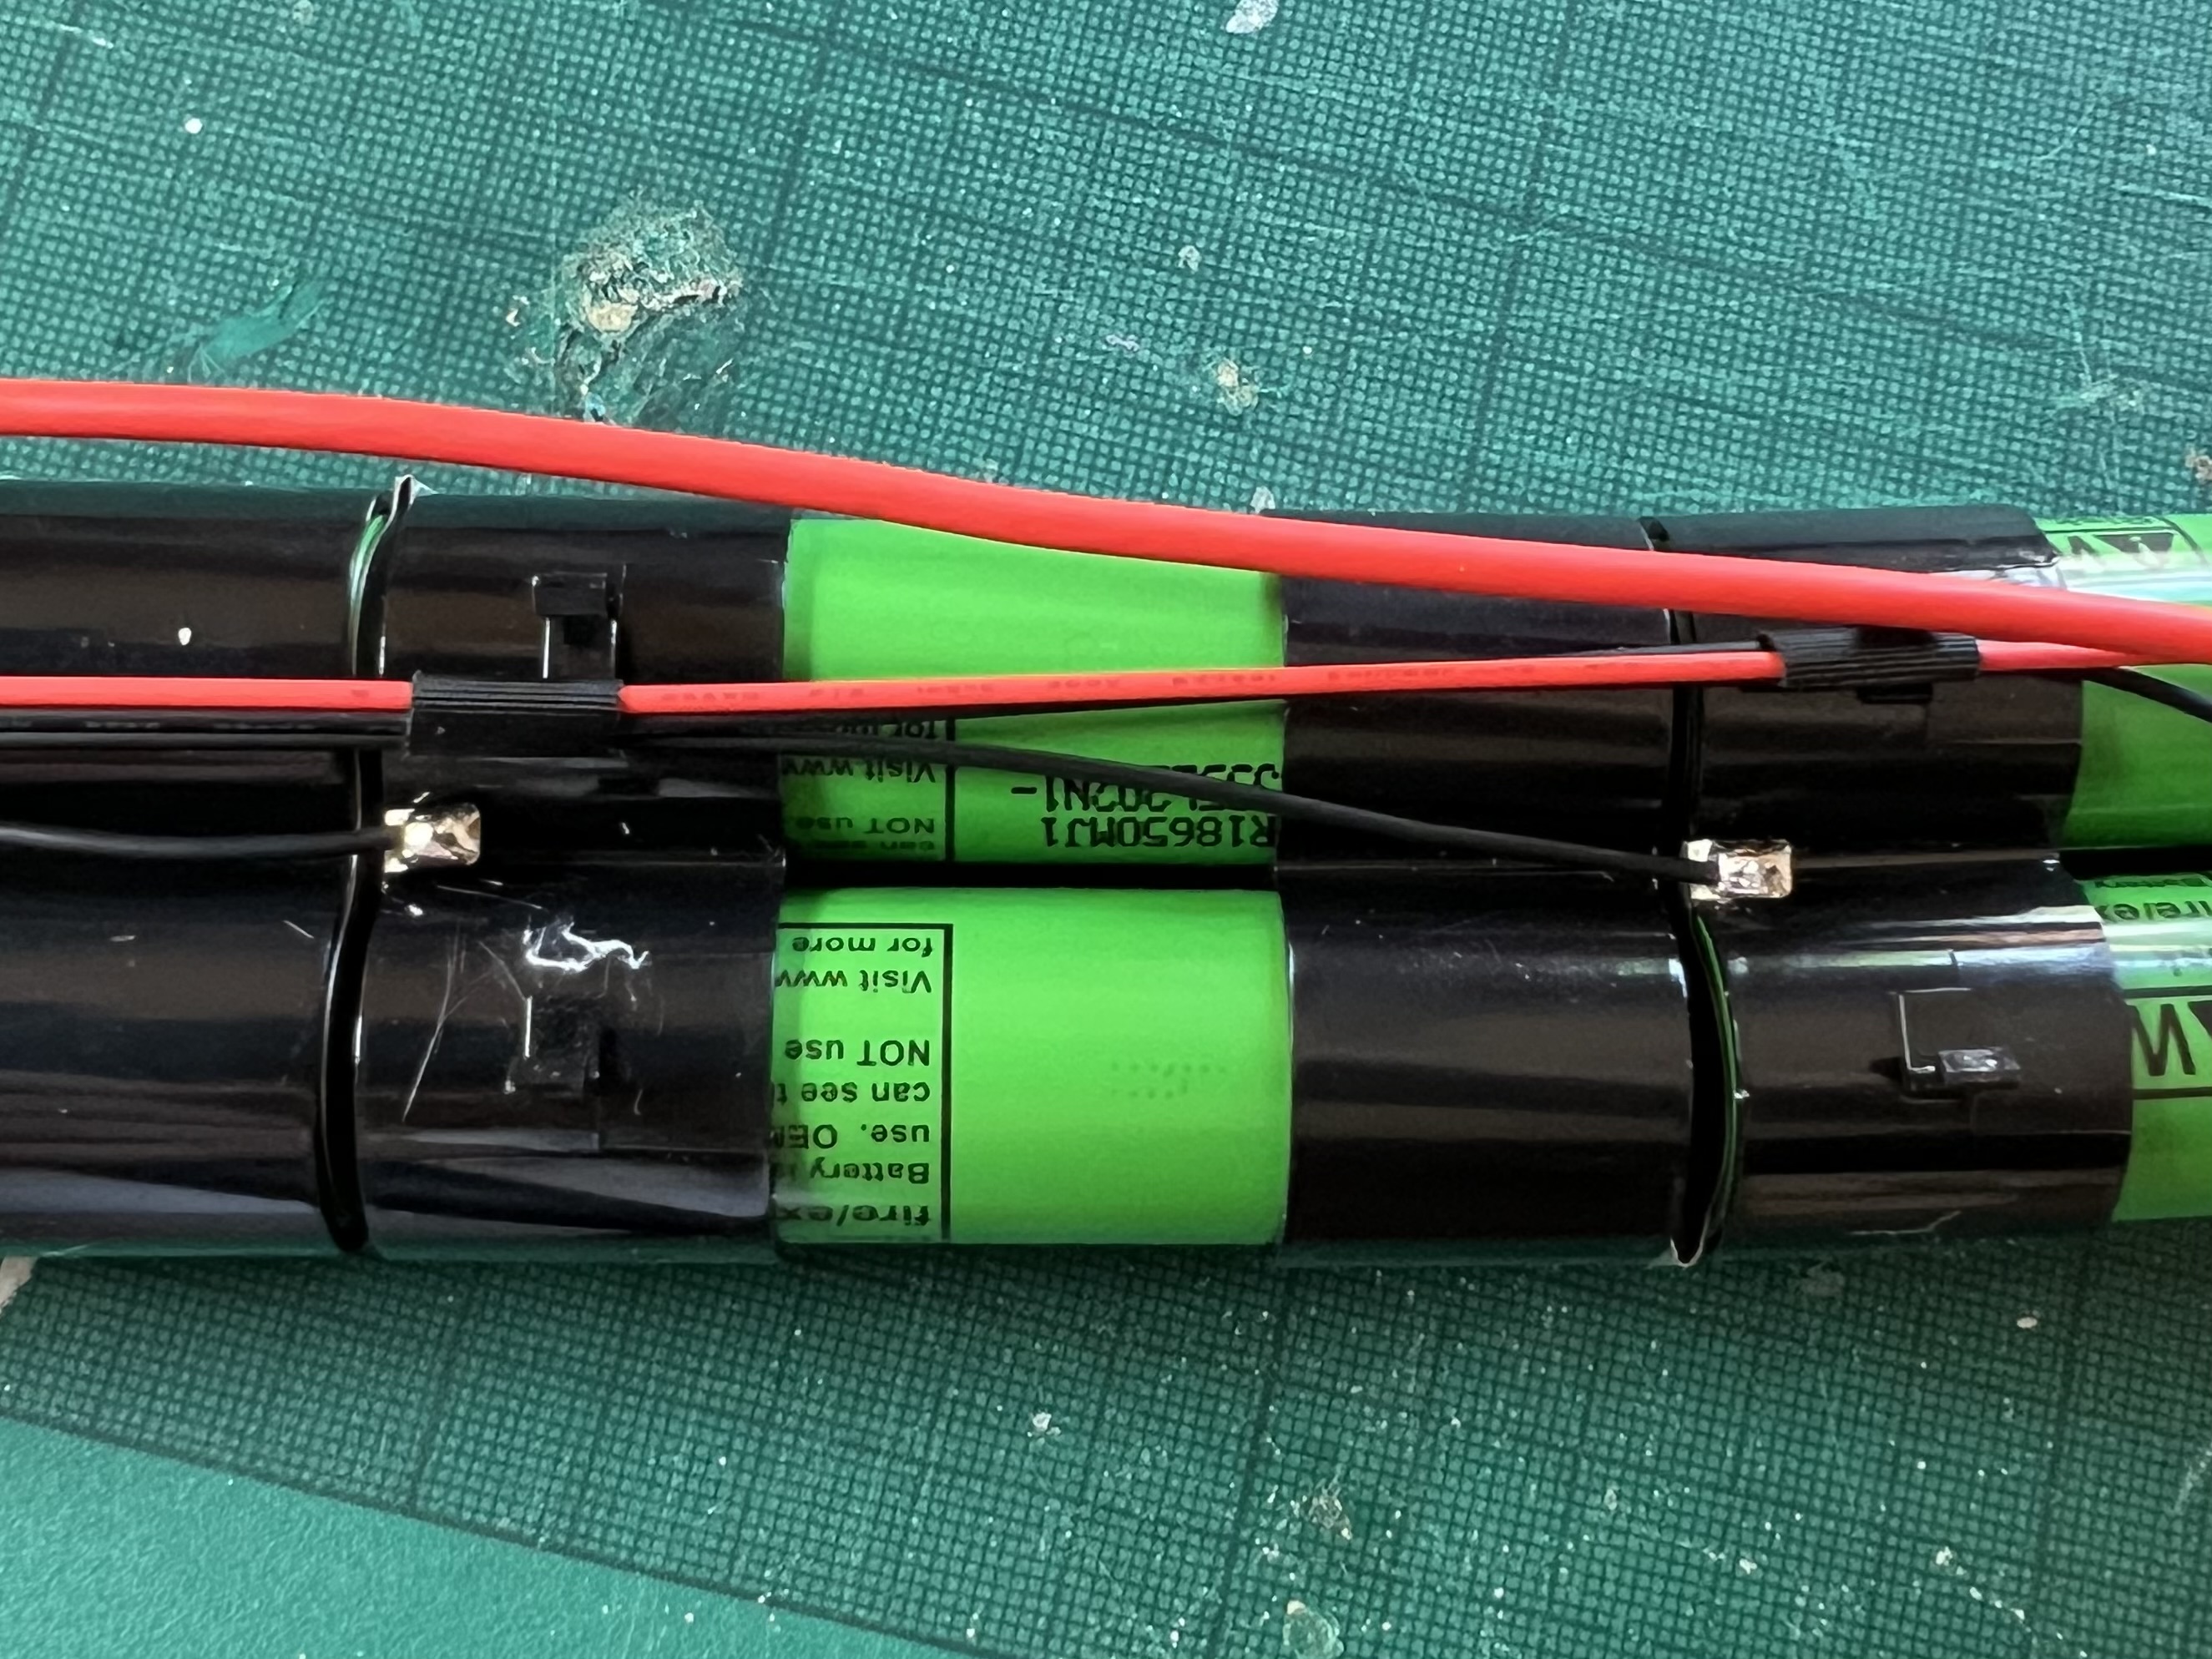
Reverse engineering the pack allows us to build the following crude schematic. We can see that it will not be possible to charge individual cells, but each group of 4 could be charged as a smaller sub-battery.
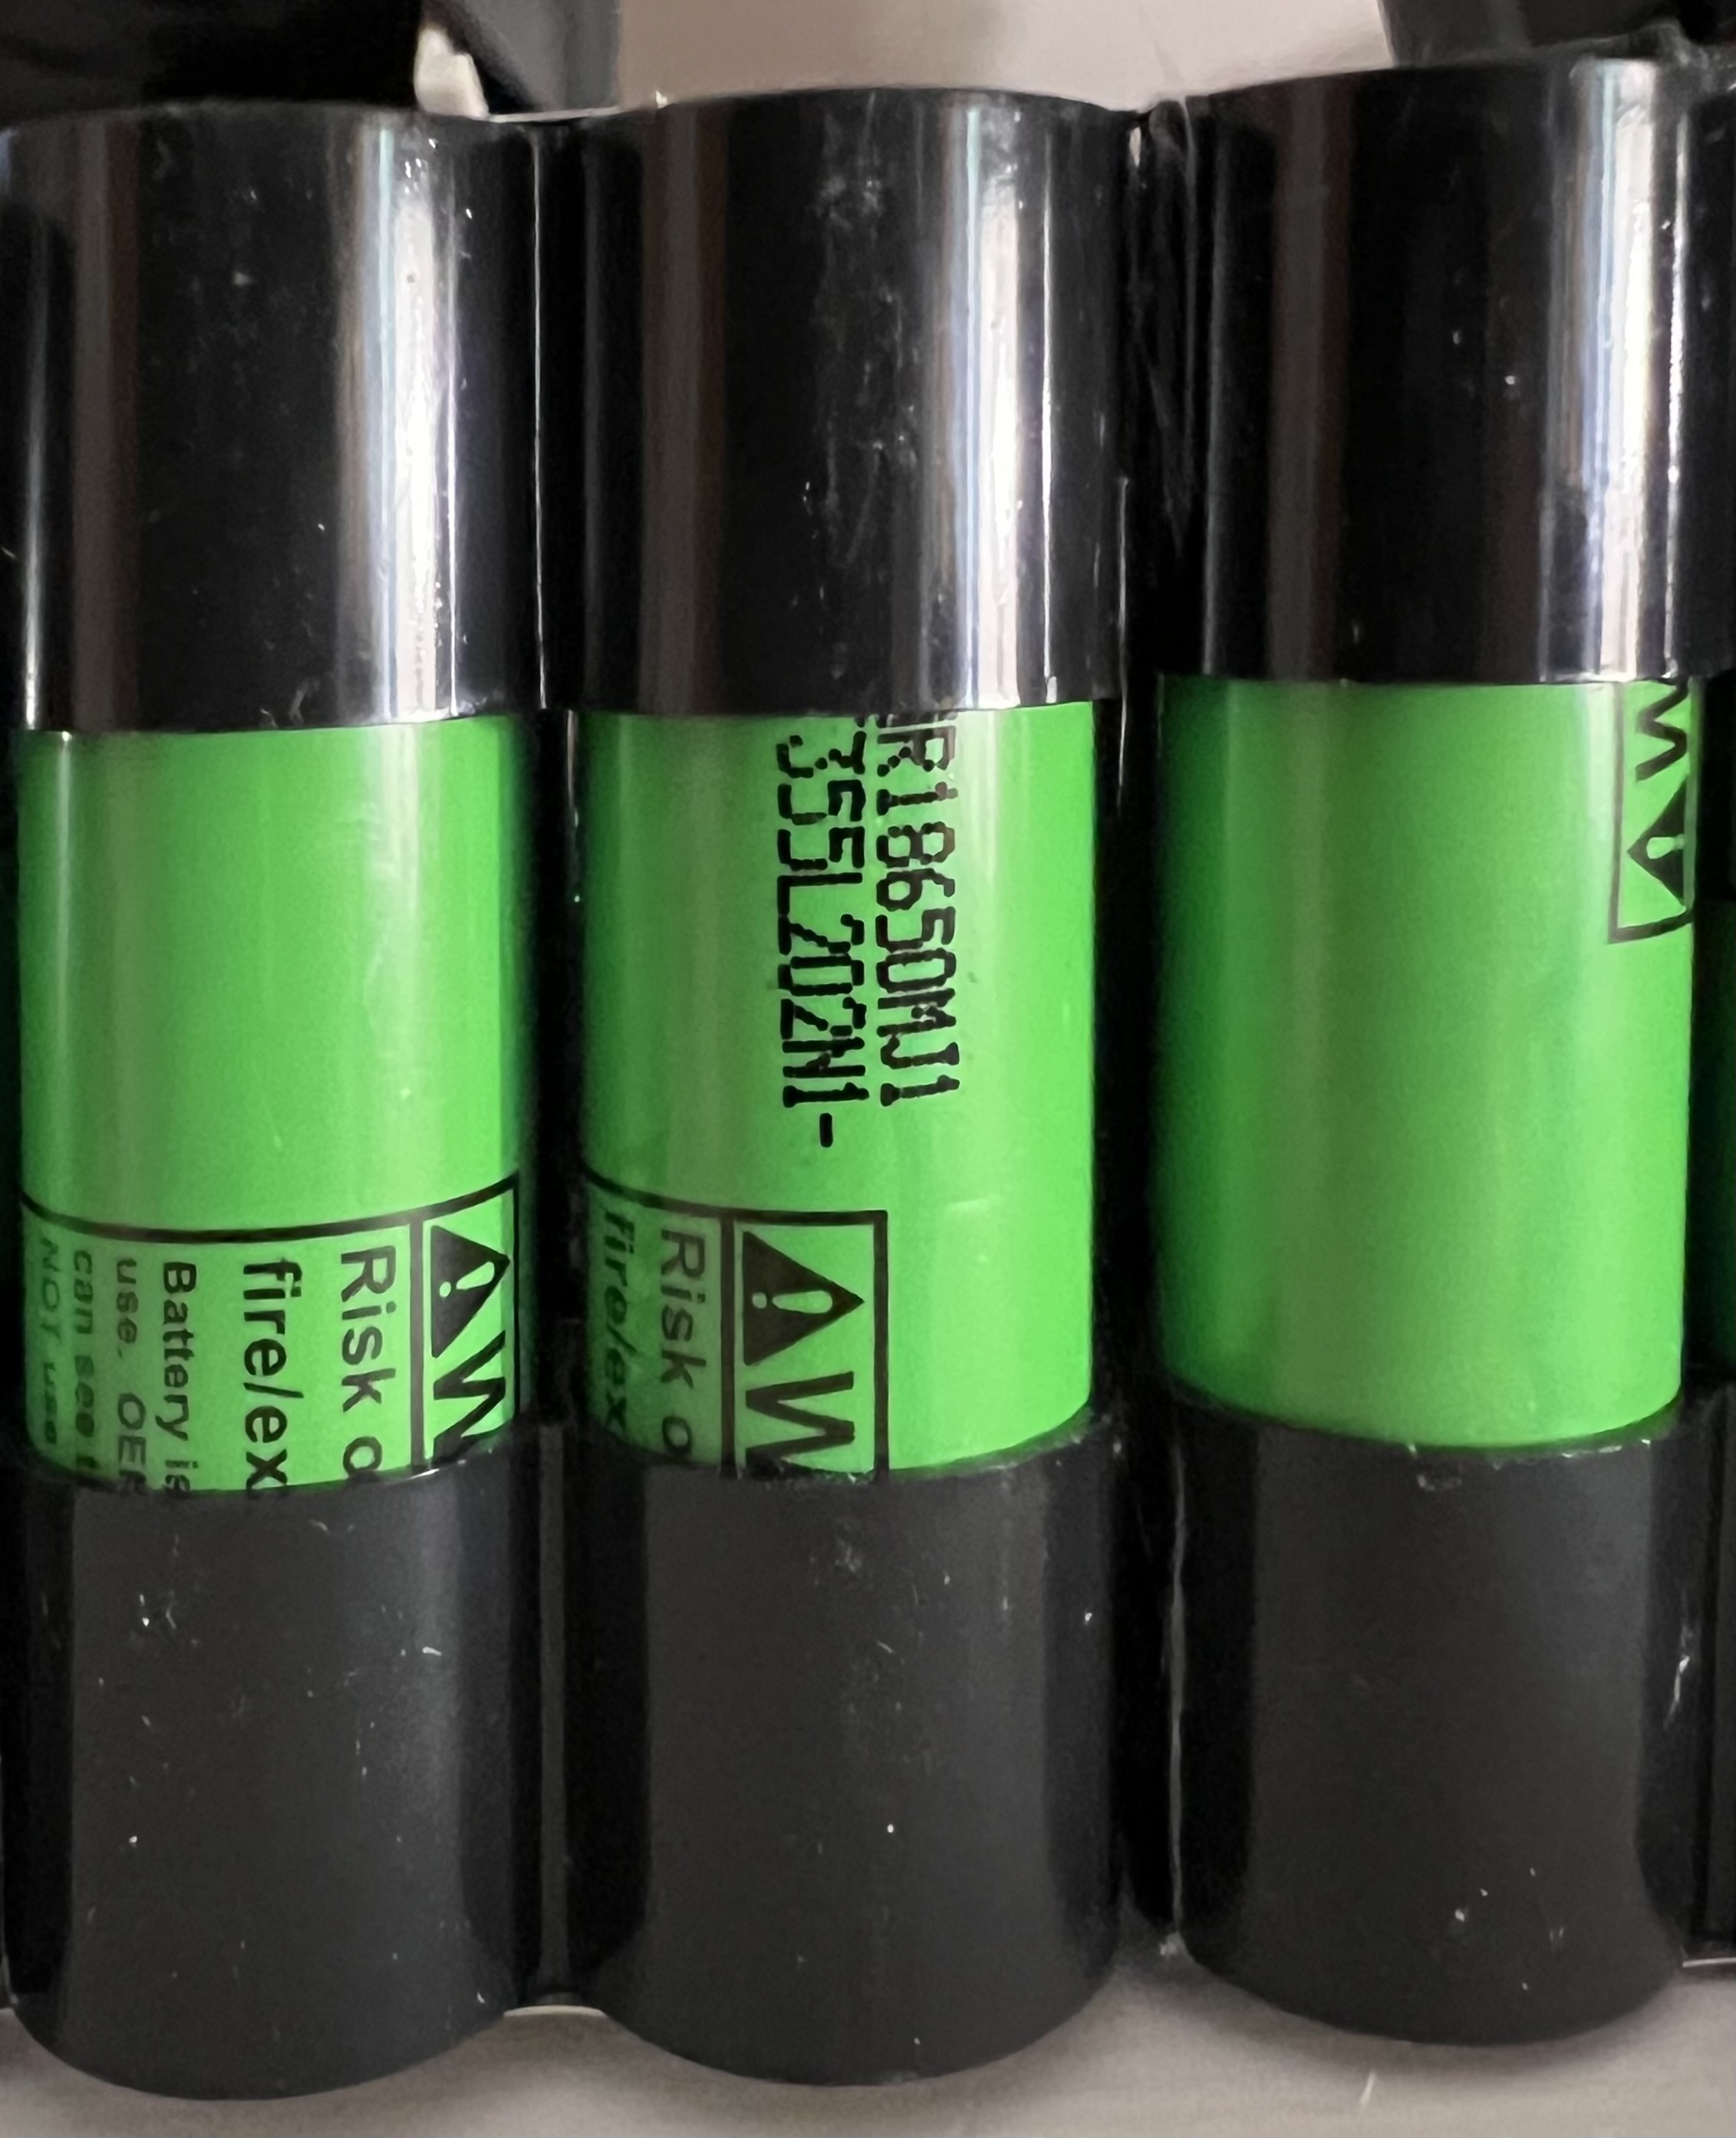
To determine what constant current and constant voltage values we need to set on our power supply, we first need to determine what cells we’re dealing with. Searching the web for the partial product code “R18650MJ1” reveals that this is most likely an LG INR18650 MJ1 Lithium-Ion cell.
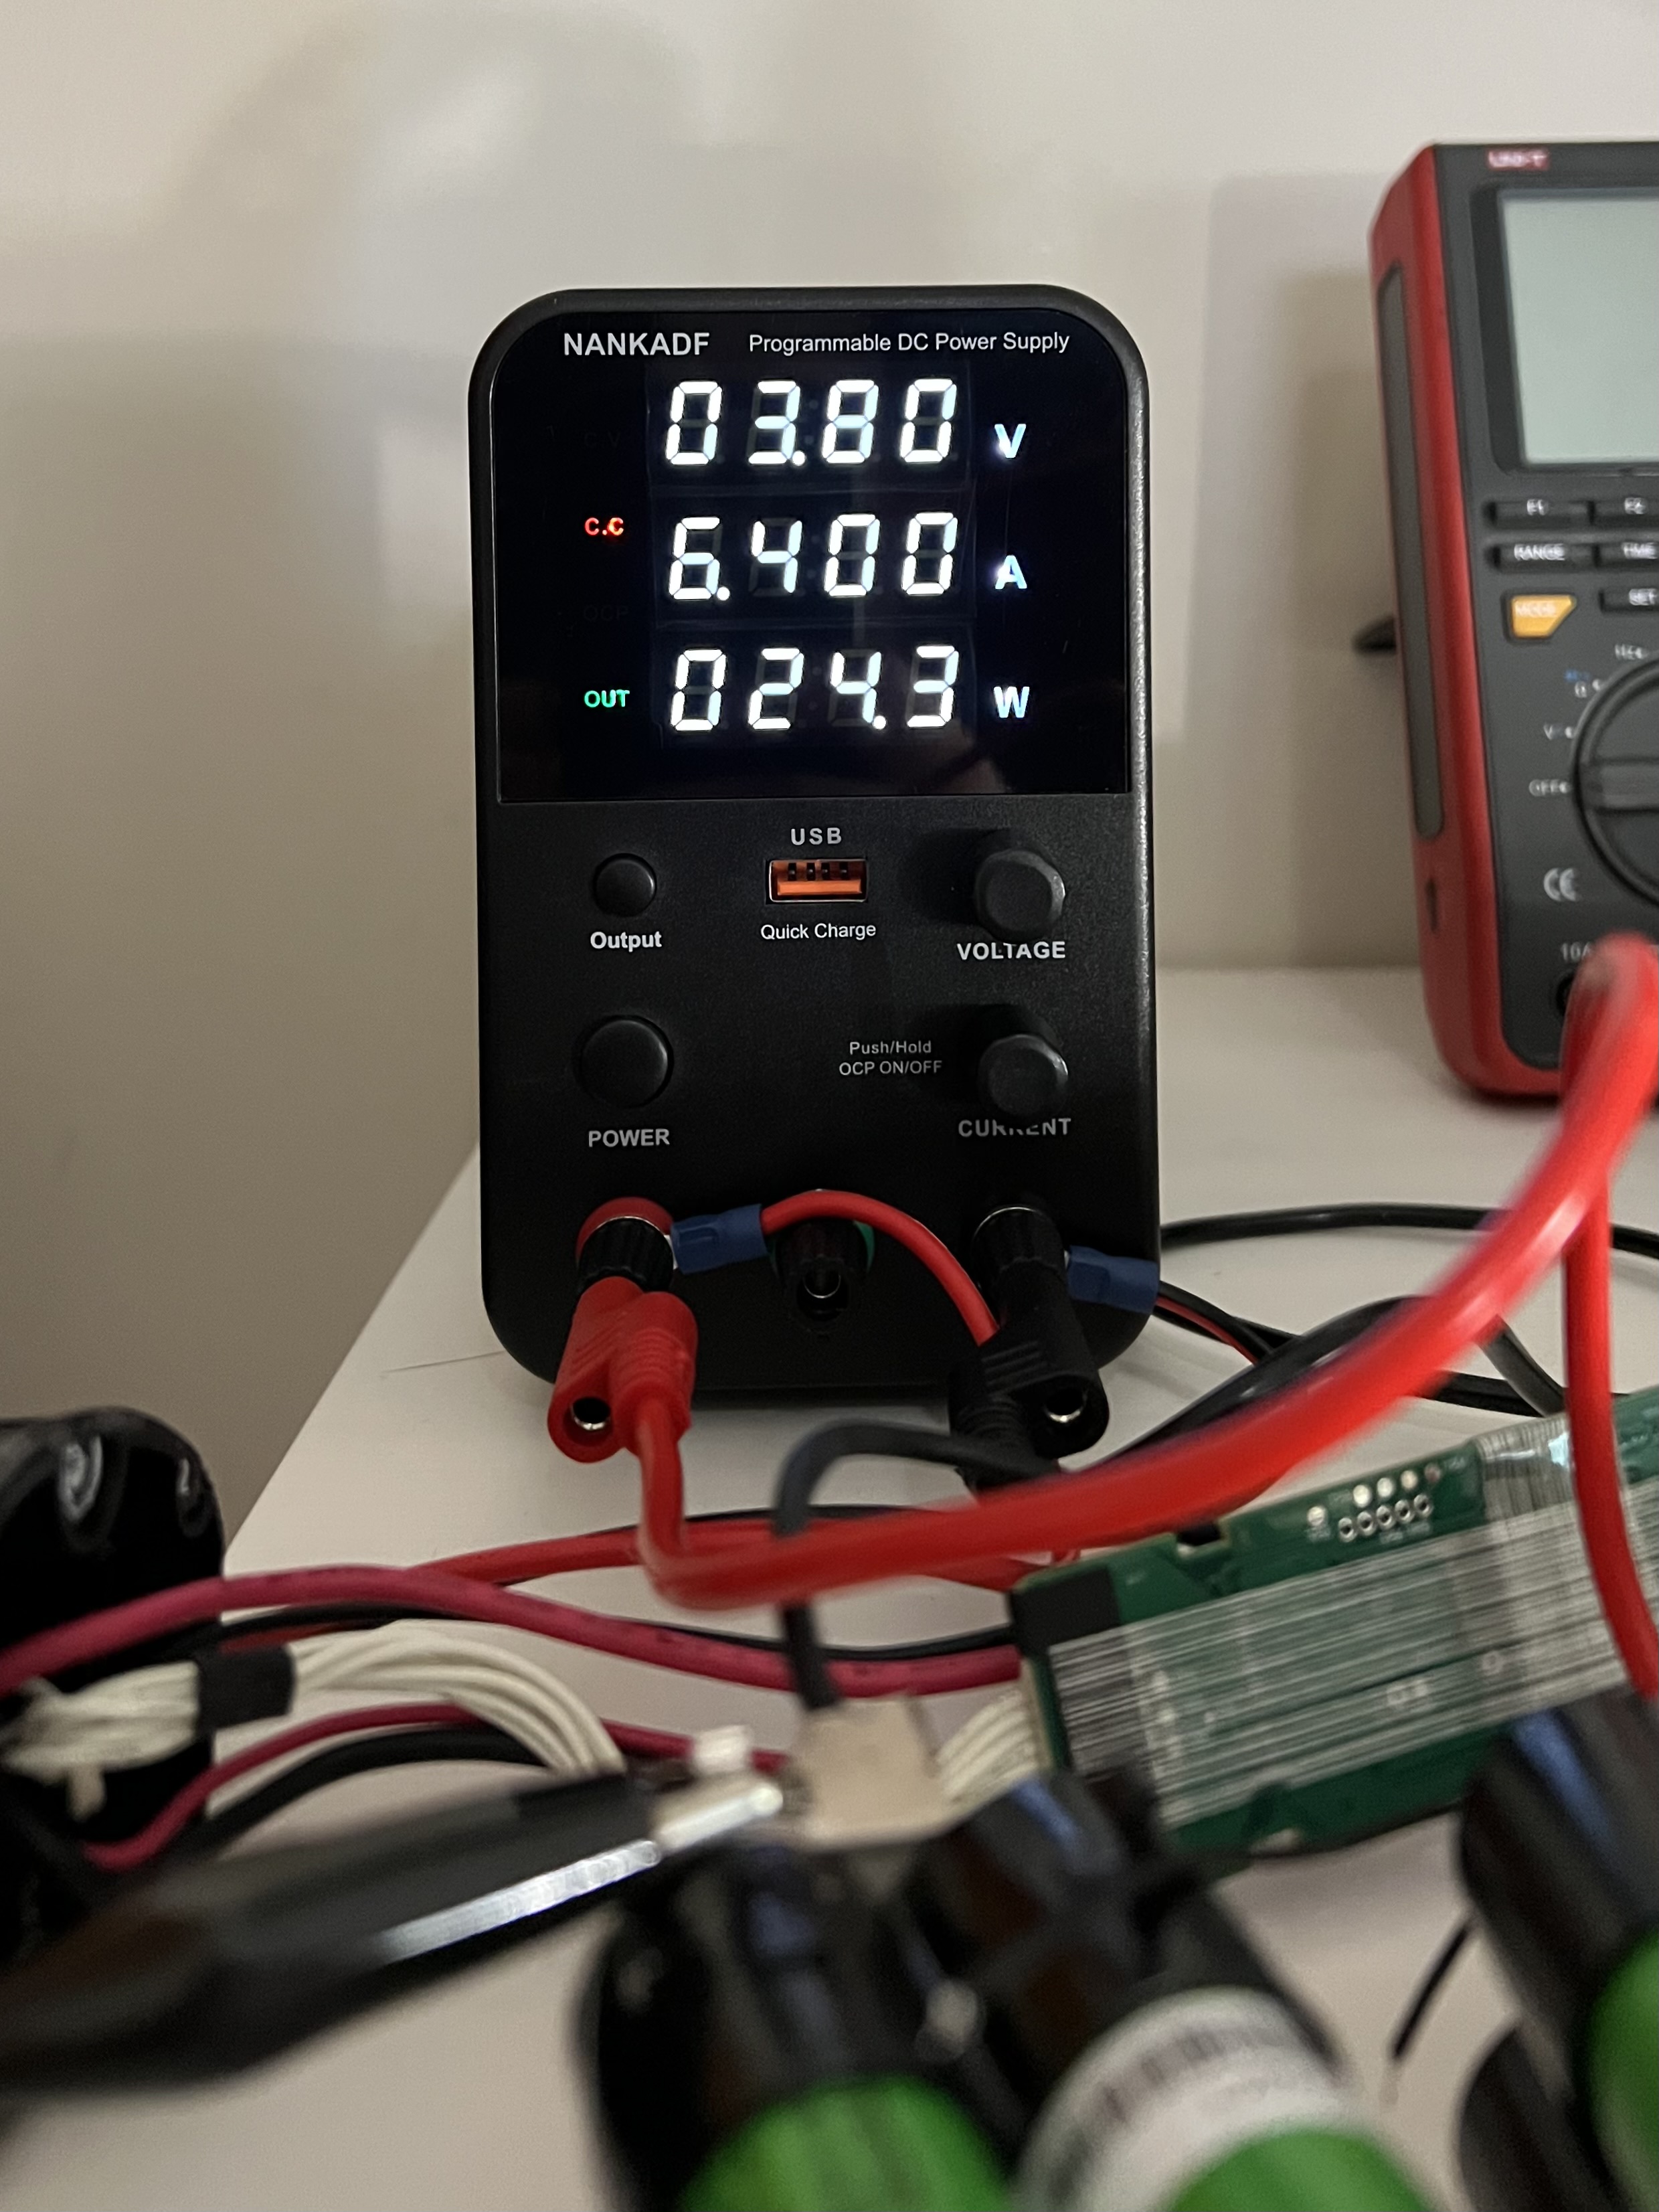
Consulting the LG datasheet suggests that single cells can be charged at 1.7A constant current followed by 4.2V constant voltage. We’ll be charging 4 cells at a time, in parallel sub-batteries, so we’ll need to use about 6.8A constant current. Since we’re unsure how safe each cell is, I decided to reduce the charge rate slightly to 6.4A total constant current, to give me a little overhead in case anything started to go wrong.
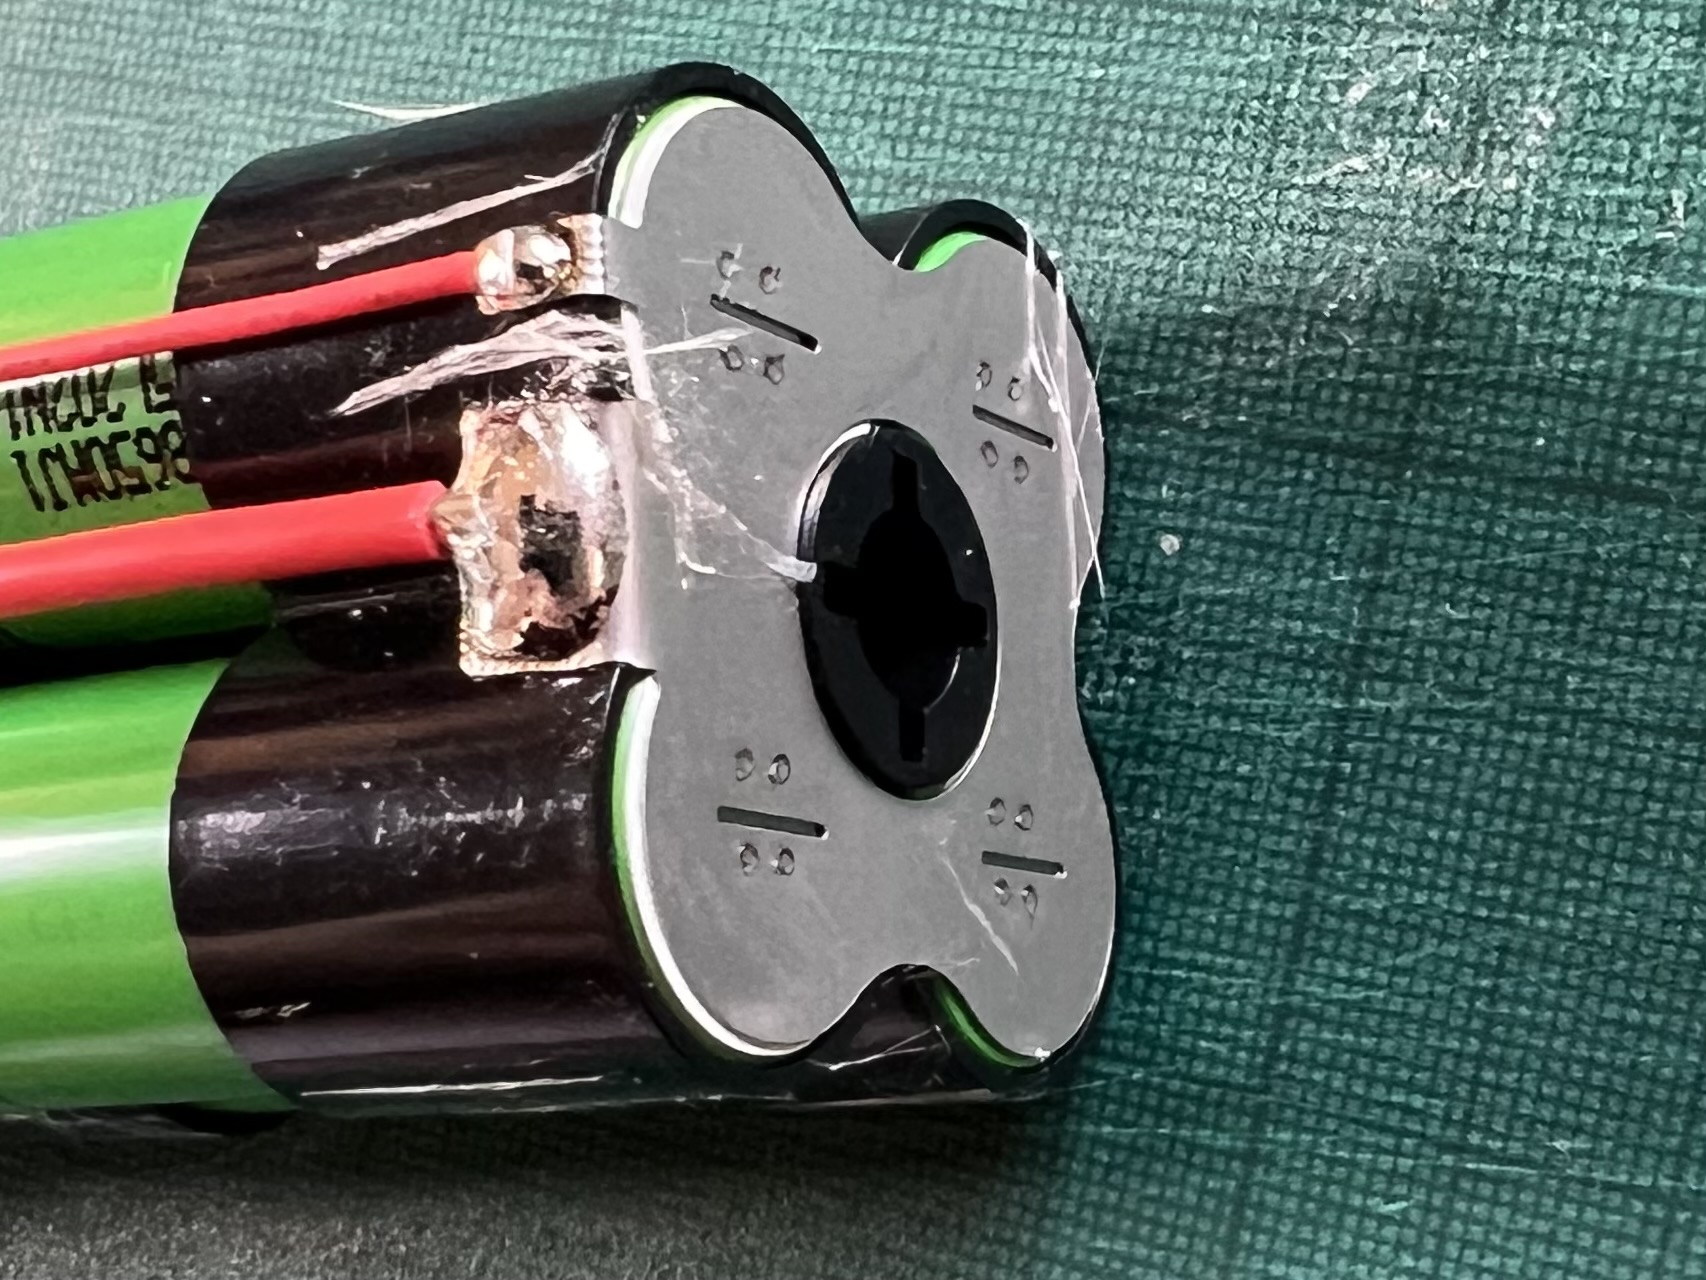
For safety’s sake, I de-soldered the positive end of the battery pack and the adjacent sense wire to break the circuit and ensure there would be no path for current to flow during the sub-battery charging. The positive terminal has quite a substantial amount of solder bonding it to the wire, so a fairly robust iron is needed to free the wire and clean the pad without heating up the surrounding cells too much. My Pinecil v2 was just about up to the job, but if you had to repair multiple batteries, I’d suggest picking up something a bit beefier.
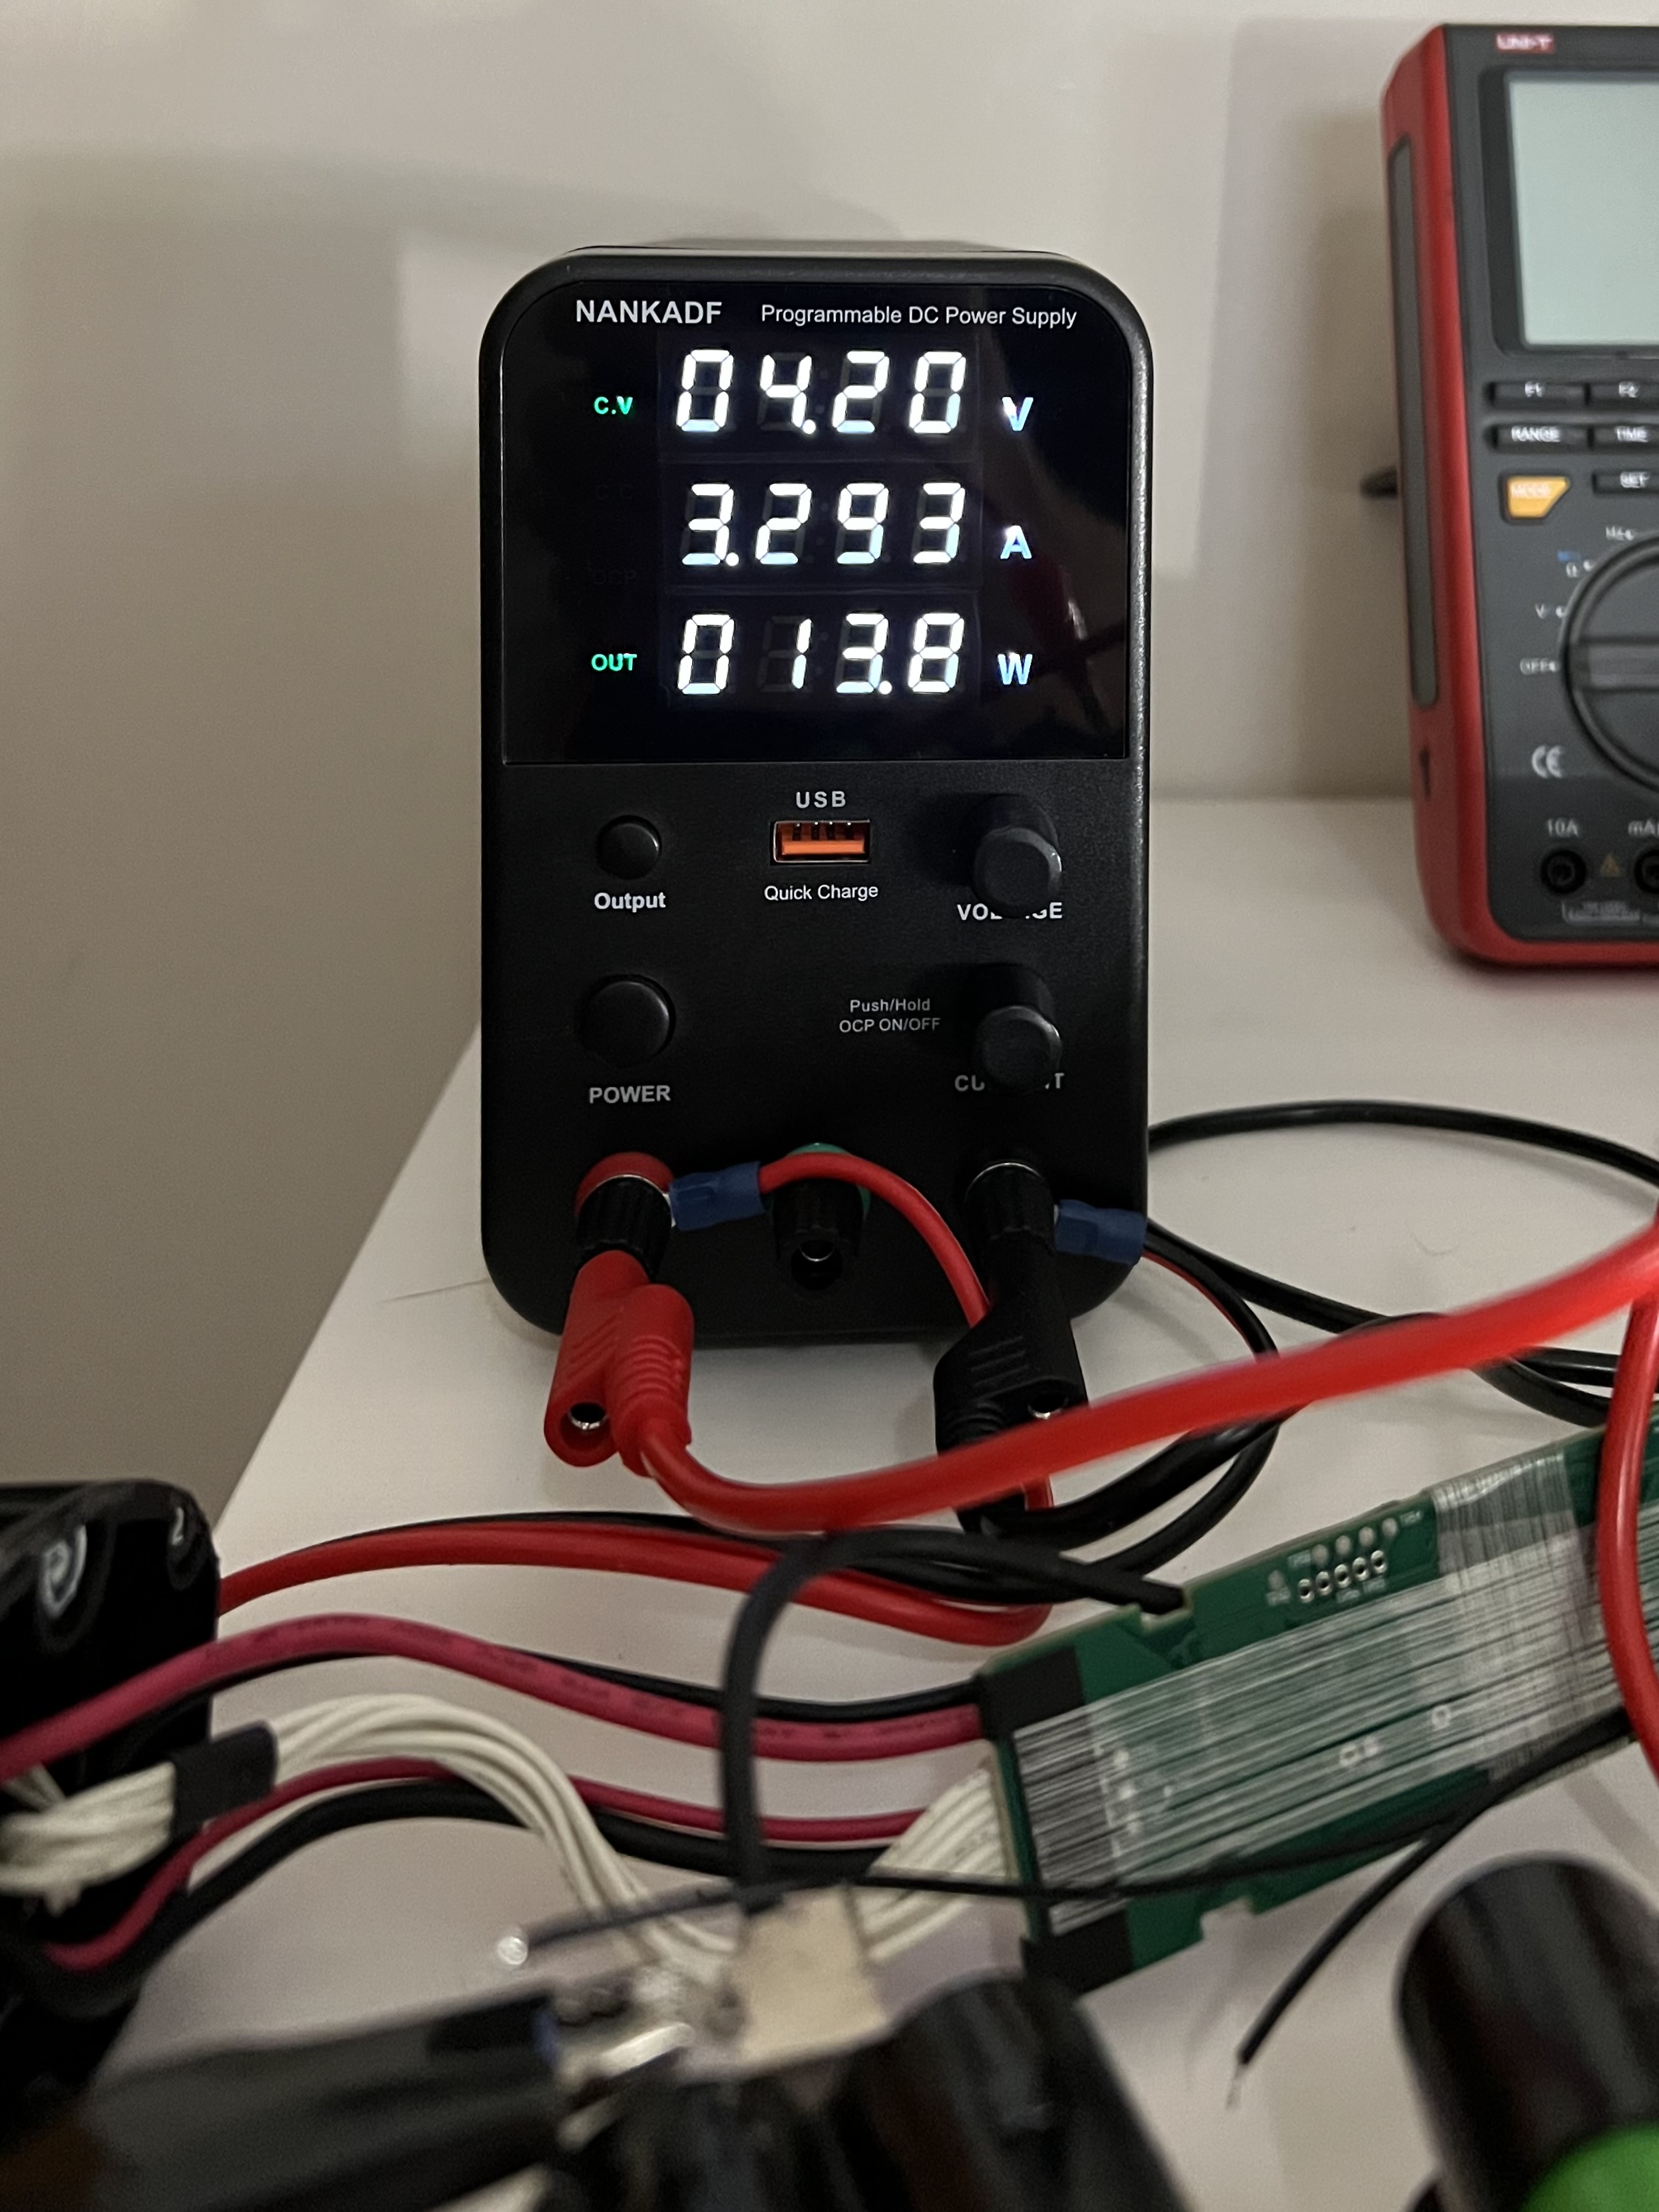
Crocodile clips can be connected across every sub-battery using the sense wire solder tags. This is easier if you de-solder these sense wires as it will leave you with more of the tag to clip on to. We can then charge the pack as if we just had 10 cells that each needed 6.4A and 4.2V.
Once all of the cells have been charged, the sense wires and the main positive wire can be re-soldered, and the pack can then be taped back up. As you solder the main positive wire back on, there’s a chance of spark, so be aware soldering this connection around flammable fumes or gases.
The layout of the pieces of tape indicate the double duty it is being put to. The whole battery pack is wrapped for structural support, and the solder connections are wrapped to prevent the wires from rubbing through and shorting out. Finding a suitable tape proved tough, but eventually I managed to track down the GTIWUNG Filament Strapping Tape on Amazon, that has a similar arrangement of embedded glass fibers to the original tape. Be careful to use no more tape than strictly necessary as squeezing the battery pack back inside the casing tube is a tight fit.

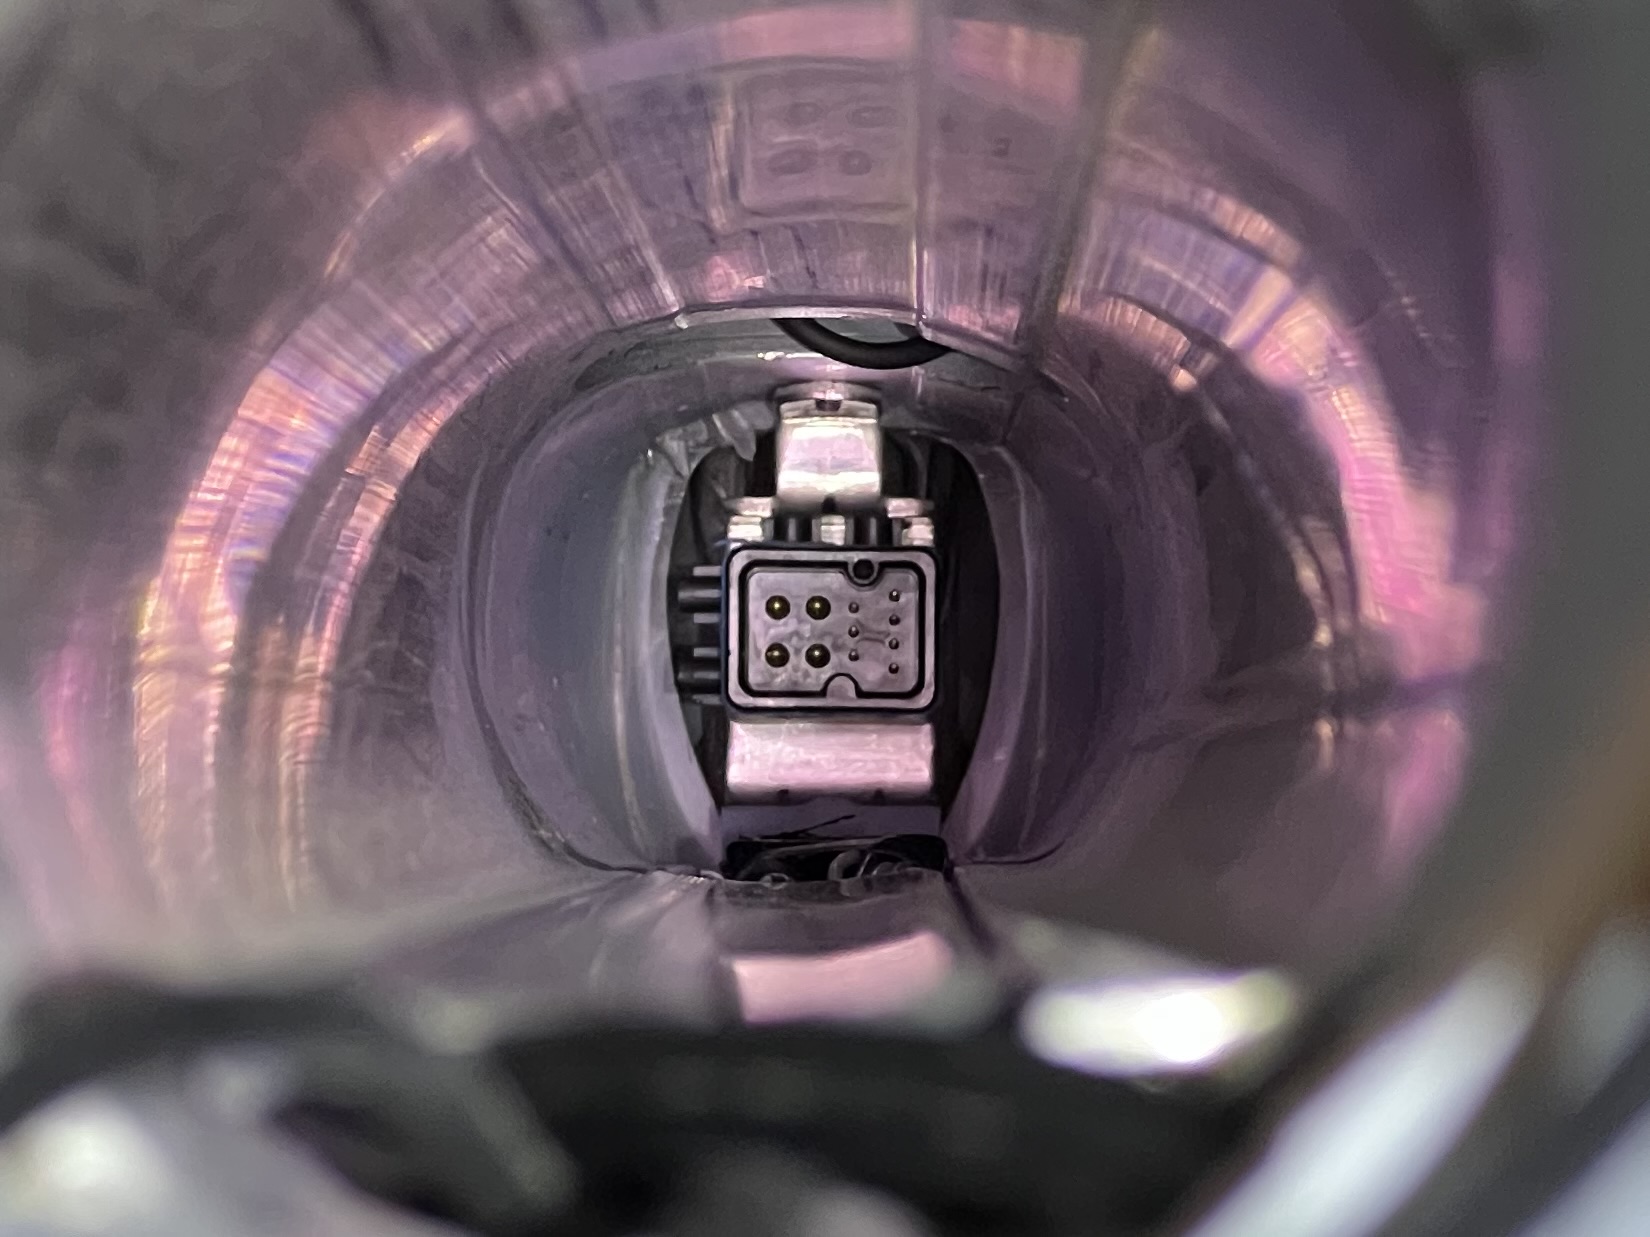
Once you’ve reassembled the battery pack, all that’s left is to re-install the unit in the bike’s down tube and plug in the charging lead to see if you’ve brought the bike back to life. If you’re unsure which way round to insert the battery pack, shining a torch inside the down tube will reveal the orientation of the counterpart connector.
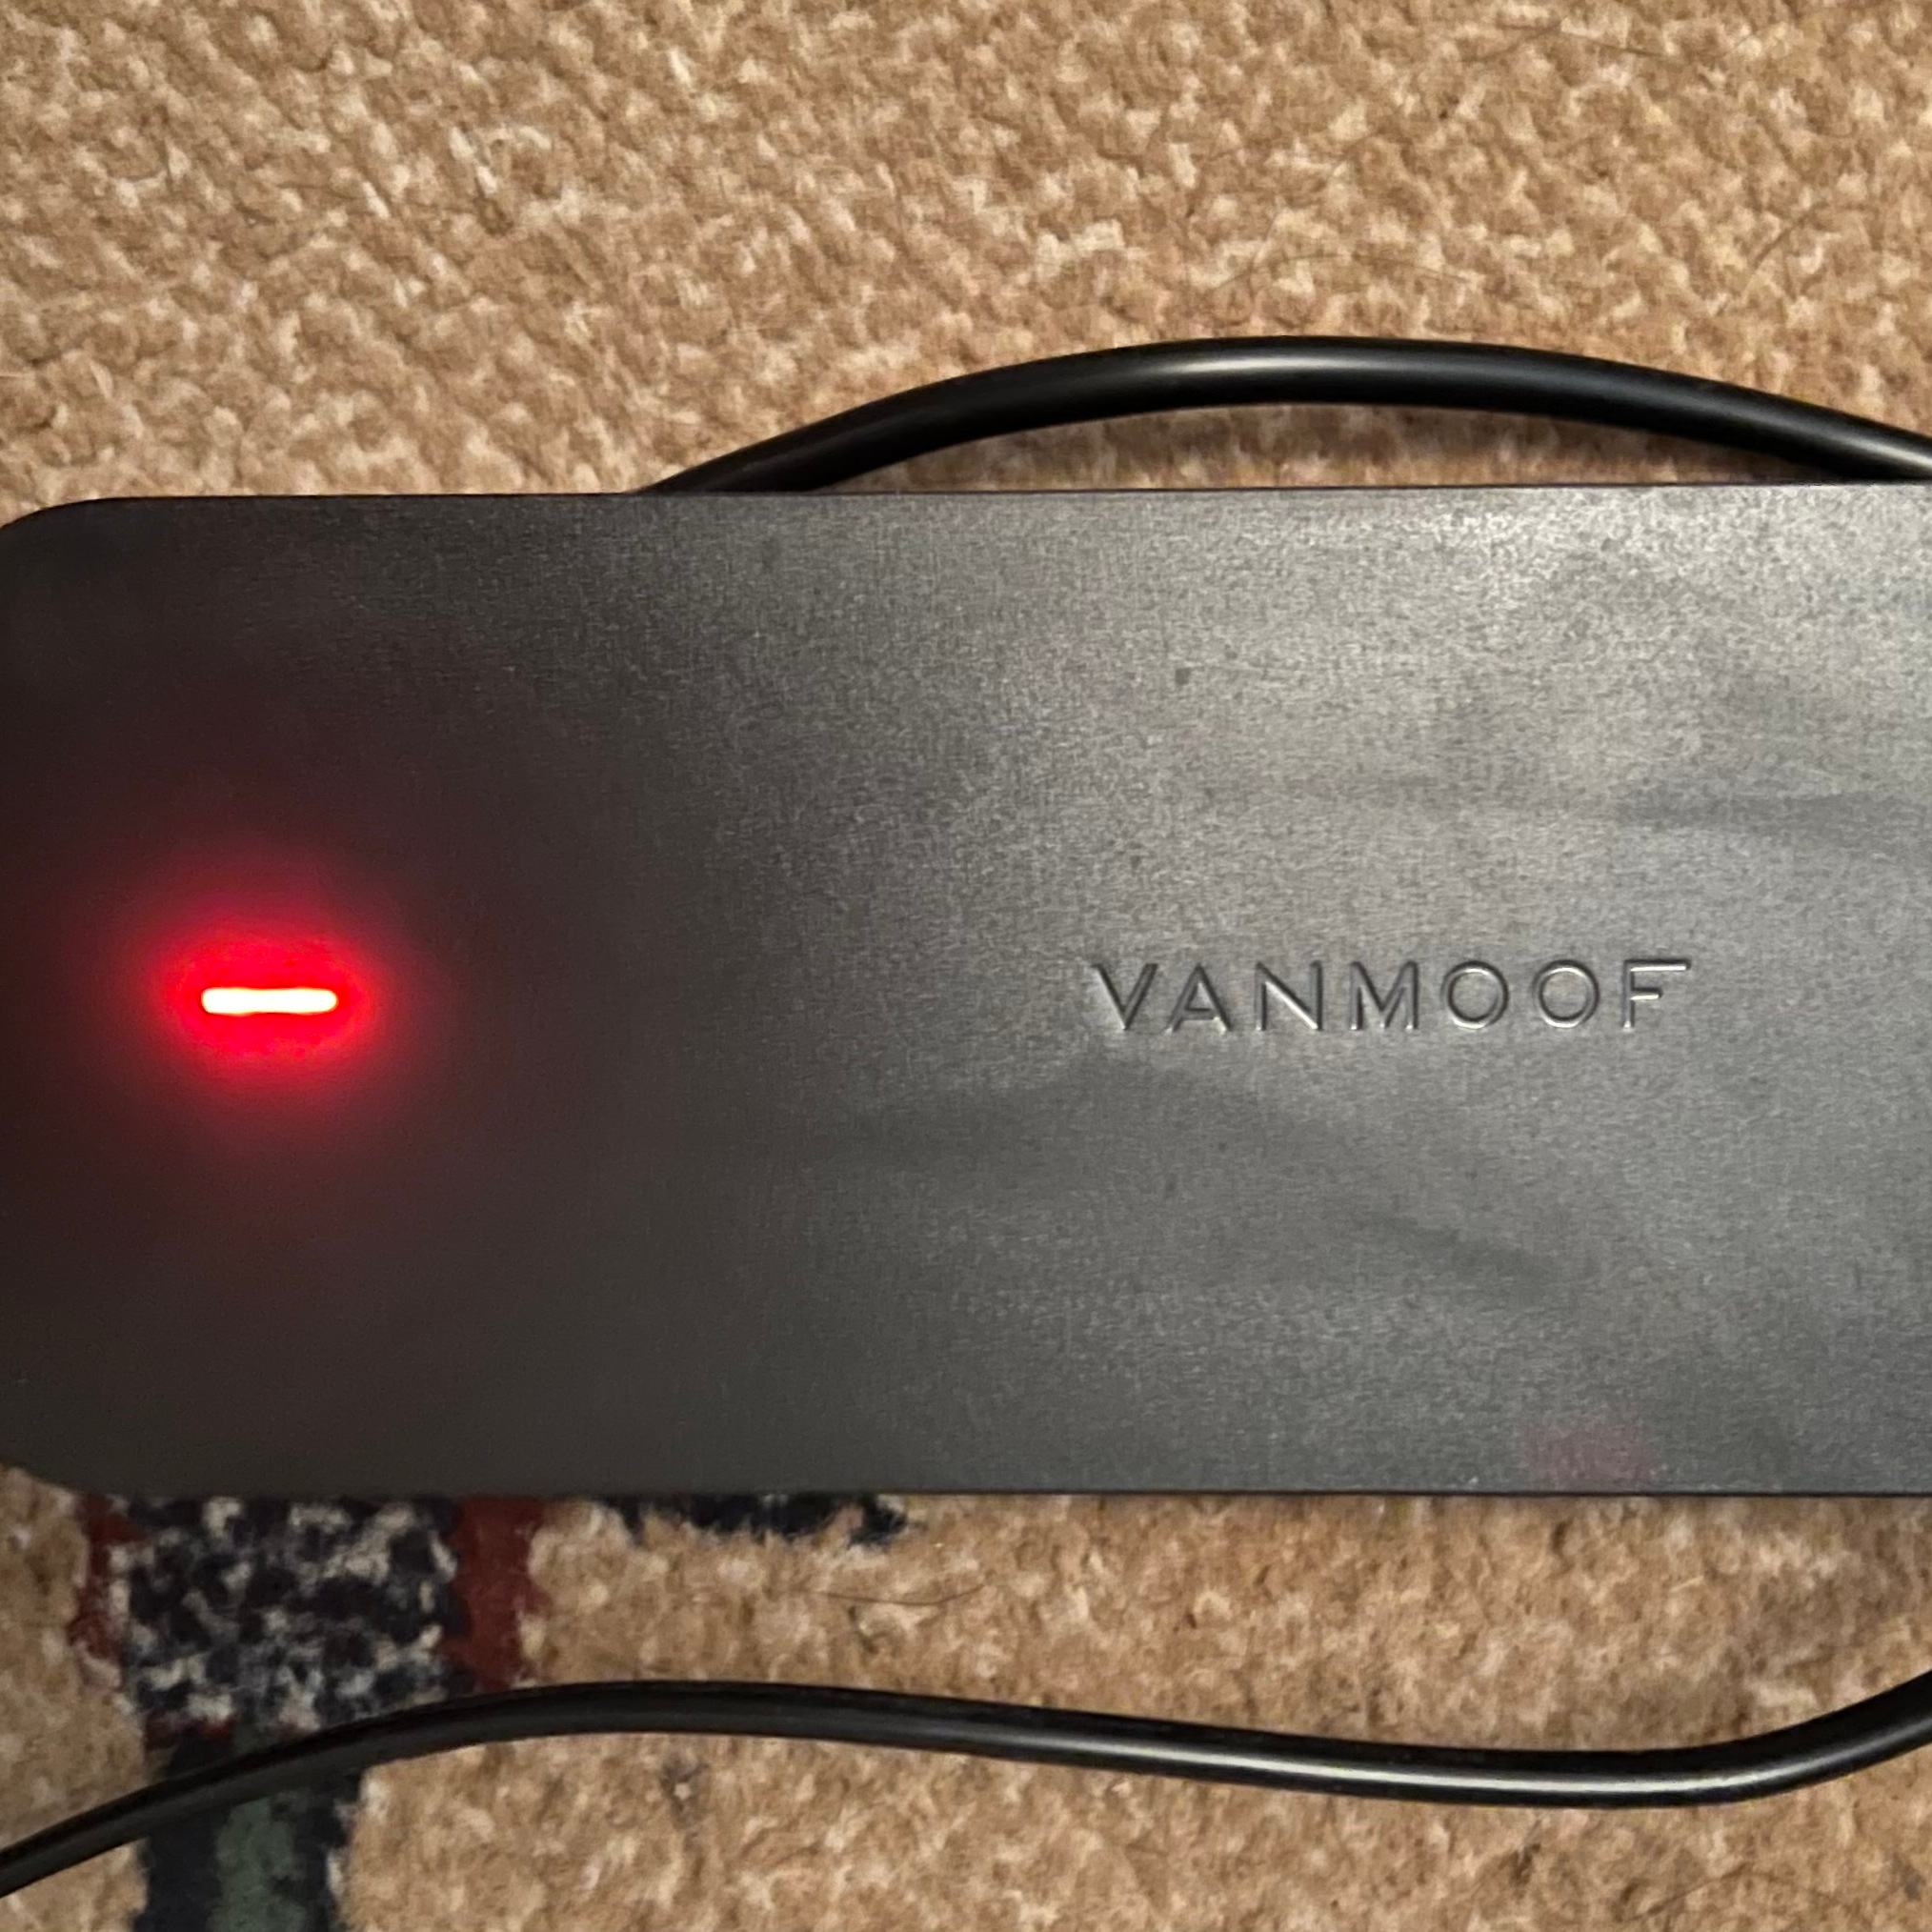
If you’ve successfully brought the bike’s primary battery back to life, you should be able to observe the charging brick turn from green to red to indicate charging has started and it should stay red to indicate that it is continuing to charge.
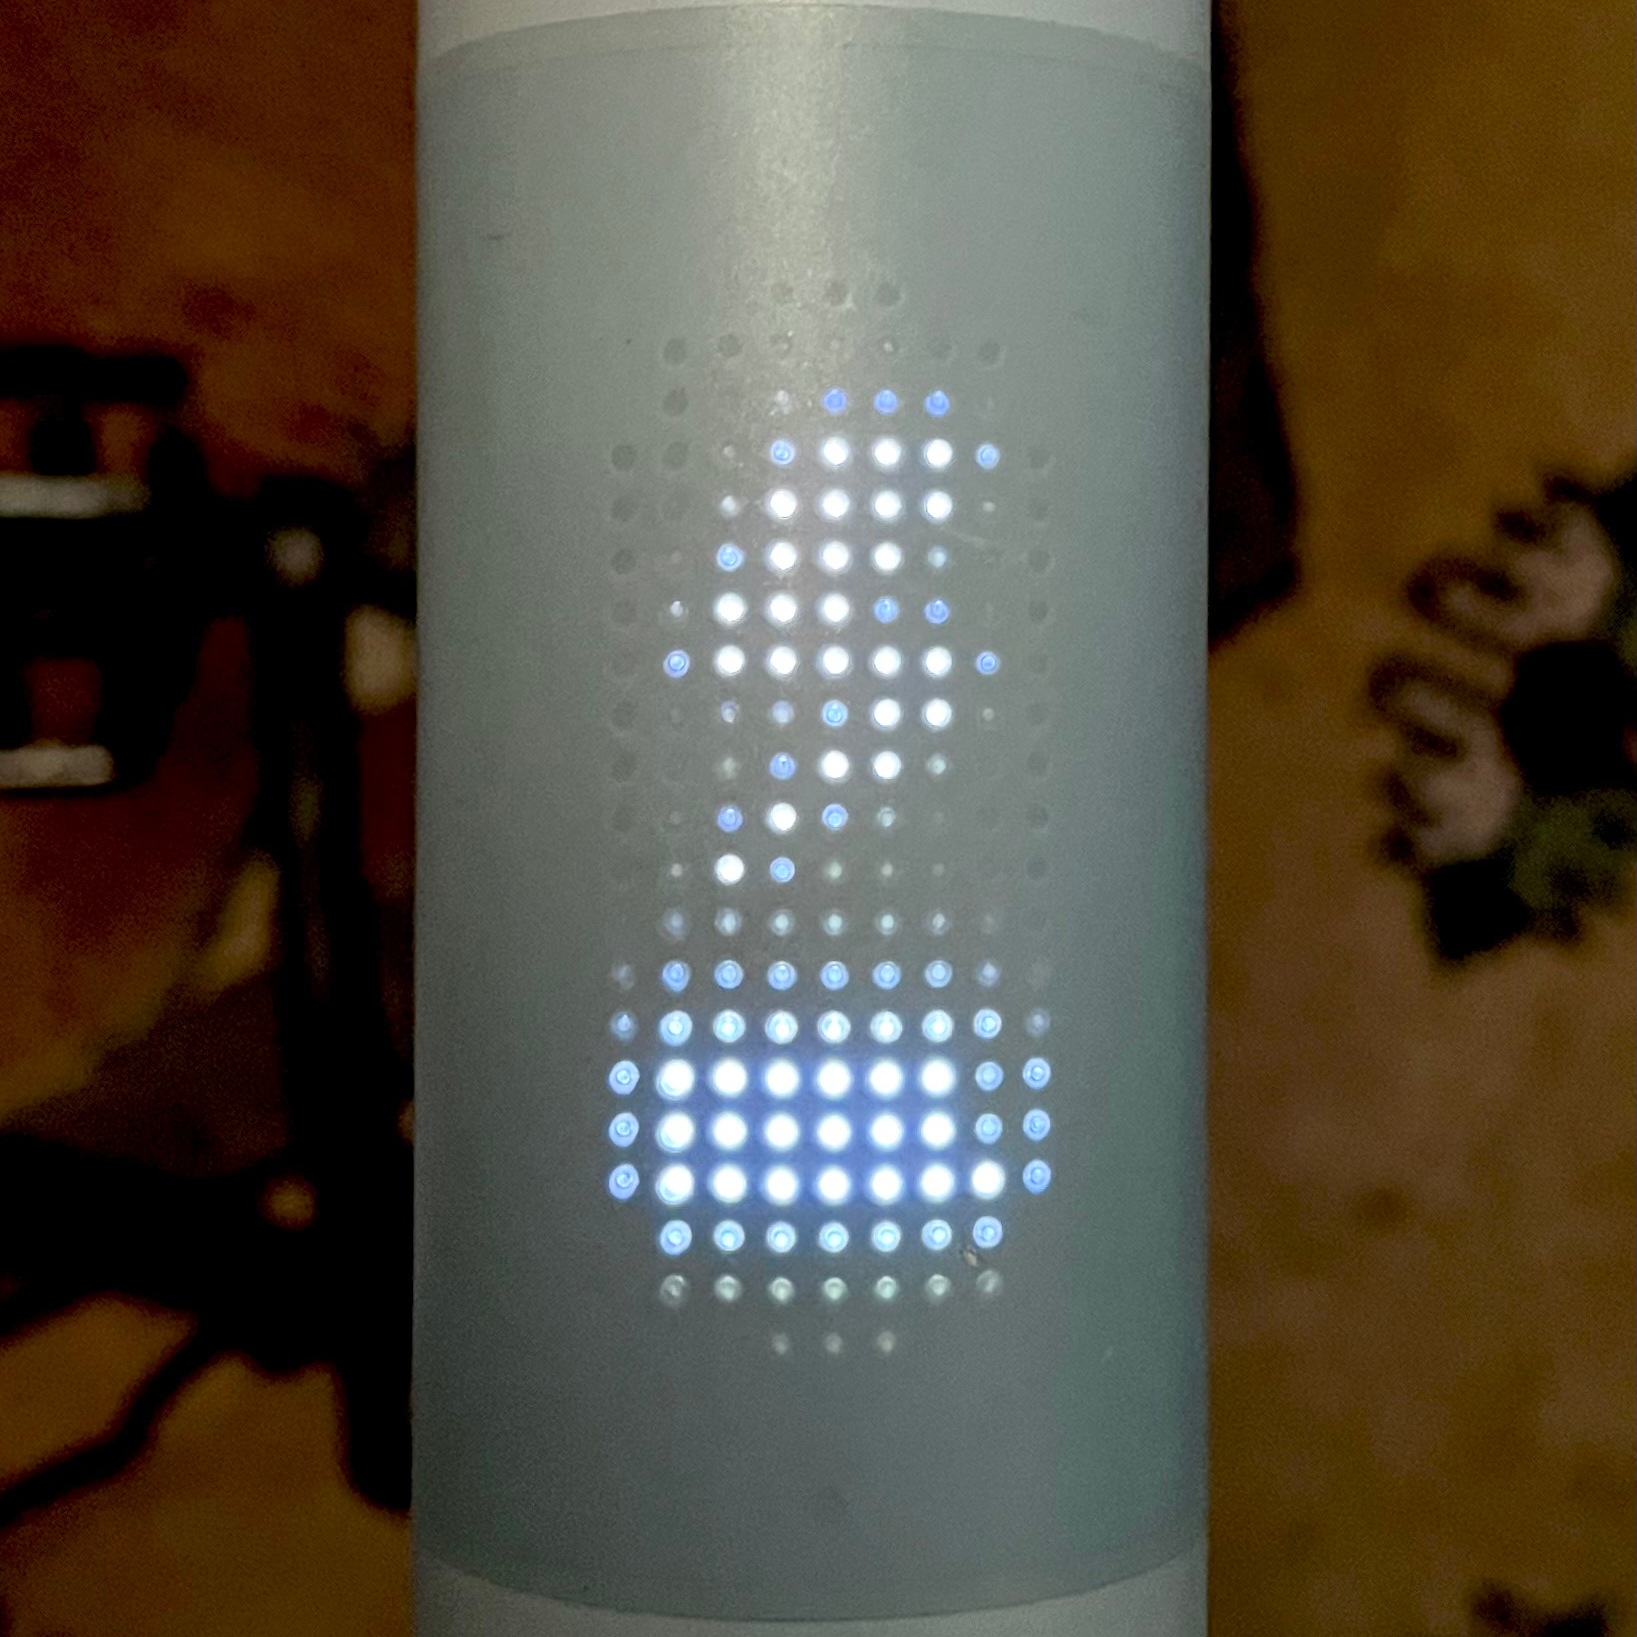
The matrix display on the bike’s top tube should also indicate a successful charging cycle has begun by pulsing a lightning bolt above the battery level indicator.
Update — 2025-04-30
The inline content such as datasheets disappeared from this post when I migrated blog platforms. It's now been re-instated.
Comments
mike- we have an A5. both small and main batteries were dead. i brought back the BMS by using a USB charger to pins 1 and 4 of the debug port. i am now thinking about manually charging the main battery. another poster (youtube: ebikerepairs) suggested an S5 could be charged with 35v at 0.5a to give it just enough juice to allow the main charge to recognize the pack and take over. does that sound right to you? i’m not willing to tear down the battery pack.
Hi Lincoln, That should work but I’ve no idea how long you should apply that voltage and current for and it’s not something I’d recommend without being extremely careful. It’s pretty much how the VanMoof charges itself once it’s in the CV section of the charge curve, except it’s got voltage monitoring every 1/10th of the pack and temperature monitoring every 1/3rd of the pack to protect the cells. If any of the cells have discharged themselves to a dangerous level there’s a chance you could get a thermal runaway that could lead to a battery fire. Realistically, as long as your power supply really can supply 35V with a hard limit of 0.5A then I doubt 17.5W would build up sufficient heat quickly enough to cause too much mischief. If you have an IR Thermometer, I’d at least give it a wave over the pack while it’s charging to make sure it doesn’t get away from you. Cheers, Mike
Could you possibly have a go at mine, if I ship it to you? Thank you Tom Stewart
Hi Tom, I’m sorry, but no. I’m more than happy to take on the risk of charging a Lithium-Ion battery pack for myself, when I know the history of the pack. Rebuilding someone else’s pack and shipping it internationally is a risk beyond my comfort level. With the right equipment, particularly the power supply in the post, it’s really not too difficult to do it yourself. I’m happy to answer any questions you have, either here or by email, if you need any assistance. If you do still want someone else to take a look at it, I’d ask around the folks on Reddit. There’s got to be someone closer to you (or at least on the same continent) that will be able to help. Cheers, Mike
I’m trying to remove the battery, but I can’t get good access to the screws hidden in the chain cover. Could you please tell me a little more about how you accessed it?
Hi Koichi, One of the best tools I’ve found for getting access to bolts in hard to reach places is the Wera Zyklop Mini 1. It’s a tiny ratcheting wrench that can get in to places that hex keys or bit drivers can’t quite reach. My only other advice is to remove as much of the chain guard as you can. The only part that can’t be easily removed is attached to the bottom bracket but it’s quite flexible and with a bit of work and persuasion can be made to sit out of the way. In the second photo in the post you can see how I’ve wedged the chain guard on the other side of the chainring to give me access. Cheers, Mike.
Thanks for making this website, i have made a VanMoof s3 work again by charging the little single cell in the smart controller. Very helpful and well documented site.
Hi Stuart, Thanks for your kind message. I’m glad you found these posts useful. Cheers, Mike.
The problem wasn’t the 4045A or the VMS Chip on the main board? Did you check continuity on the fuse? I’m currently experiencing a flashing skull that the smart controller shows flashing on and off. Before I get into fixing this whole thing, it’s probably going to take some time.
No, I was lucky enough that my problem was just overly discharged cells. Since rebuilding and recharging everything I’ve not had any of the same problems come back. I’ve managed to keep the pack charged since then but I have had the dreaded Err44 pop up recently.
Err44, ah man. https://www.reddit.com/r/vanmoofbicycle/comments/169tfra/swap_your_broken_vanmoof_eshifter_for_a_3dprinted/ This might be worth checking out. You might be able to 3D print a new gear shifter. As for my charging issue, I guess it’s going to take some attempts for me. I hope my issue is similar to yours, since I really don’t want to have to replace the fuse. I’m an EE but it’s been a long time since I’ve done circuit soldering.
Have got the bike out of shipping? mode now with the lock code, unfortunately i am now getting error 20 message. Does anyone have any ideas?
Hi Stuart, Yes, once I got my bike out of shipping mode, I also found further battery problems. All of this second post is how I overcame those issues. Without manually refreshing all of the cells within the primary battery, I couldn’t get it to charge at all. Since I’ve done the refresh, I’ve had no further problems charging the bike. Cheers, Mike.
Also charger stays with a green light when plugged in.
That definitely sounds like the controller’s not happy with the primary battery.
Mike, were you able to figure out a rough pinout for the connector on the battery? The specifics I’m trying to suss out are what each of the 4 large/high-current pins are for.
I’m afraid I never beeped them out or traced the wires, sorry. I always just assumed one pair was for connecting the charger to the battery and the other pair was for the connection between the battery and the motor. I’ll have a dig through my photo roll to see if I have any extra pictures from when I had the pack disassembled.
I have some cells under 1 volt. Would you recommend trying to bring them back, or is it not worth the risk? Thank you so much!
Are all the cells below 1 volt, or just some of them? If they’re uniformly low, then you might be able to charge the pack, just very carefully. Figure 2 in this article implies you can use a 0.1C charge current to pre-condition the battery until you get it up to 3 volts. https://www.digikey.com/en/articles/a-designer-guide-fast-lithium-ion-battery-charging If you have only a few cells, or 4-packs of cells, that are that low, then they’ve discharged themselves unusually in comparison the whole pack. That’s indicative of something more serious with the cells and I’d be looking to identify and replace any that are damaged. That’s way beyond my skills though.
Hello. Great guide! thanks! I have a problem, maybe somebody can help me: I have a X3,very few km (450km). I have left it unused for a year and when I want to use it again it does nothing. I disassemble the smart cartridge and change the Li-Po battery. It comes back to life, it connects to the app but now it tells me error 19 and the battery in the app flashes. I understand that it is the main battery so I remove it, and with the source I take it to 34v. When I insert it back, it detects it and starts charging, I leave it all night and it charges to 100% and it does not give me ANY ERROR. I think everything has been solved but now when I want to start it, the lock appears, and the 5 second countdown, and when I move forward, it does nothing, and it locks when it reaches 5. No matter what I do, I cannot unlock it, it is as if the engine does not start. Does anyone know what it could be? Also, I am surprised that the speaker volume is super high. Thanks.
Hi Javier, that sounds like your bike’s rear wheel is locked with its kick-lock. That’s the “button” you can find on the rear wheel that interfaces with the castellated ring attached to the brake disc. Normally you unlock it with the app or using the three-digit button press code on the handlebars. Once unlocked, you need to move the bike forward enough for it to detect rotation of the wheels. As long as you spin both wheels within the countdown, it should stay unlocked. I’ve no advice for problem solving the kick-lock, unfortunately, it’s always just “worked” on our bike.
Hi Mike, Thanks for sharing all this information, much appreciated! Then a question, which charger (brand/model) for the single cells do you recommend? Br, Wouter
Hi Wouter, I used the same power supply to charge these cells as I did to charge the cell in the Smart Cartridge in my other blog post. It’s a “NANKADF” brand 30V 10A unit, available from Amazon. I’m sure a proper “branded” power supply would be better or more reliable but this one worked well for me. https://www.amazon.co.uk/gp/aw/d/B09C8LWV9W/ Cheers, Mike
Hi Mike, During one of the repairs I came across a battery that was deeply discharged. The cells were just above 0.3V per group. I brought them back to 30V very slowly by 50mA, using also a lab supply. May I ask how discharged your cells were? I’m kind of hesitant to charge these deeply discharged cells back to 42 volts. What do you think? Thanks in advance! Victor
Hi Victor, None of my cells had gotten that low, I think all of mine were still about 1v. Was the whole pack uniformly discharged, or was it just one section that was as low as 0.3V? If the whole pack was at the same level, and it all seemed to charge back up to 30v without any thermal problems, I’d keep going to 42v. It sounds like you’ve followed the “pre-conditioning” processes detailed in this paper, so you should be fine to step up the current and do a normal CC/CV process up to final voltage. https://www.digikey.com/en/articles/a-designer-guide-fast-lithium-ion-battery-charging Obviously, keep an eye on the temperatures just in case any of the cells are damaged. Cheers, Mike
Hello Mike, I've noticed you have commented that there's a e-shifter simulation circuit to overcome the error 44 on Vanmoof bikes. Can you give me more information on it? Is it commercially available as a drop-in replacement somewhere? Thanks!
Hi Carlos, I'm afraid I've no more information at this stage. I've only recently picked up this work again, so I've not made much progress yet. I've started reverse engineering the e-shifter and I'll hopefully have a rough prototype ready in a couple of weeks. Getting something ready for wider use will take a while longer. Cheers, Mike
Hi Lincoln/Mike, I have a VanMoof A5 with a dead battery. Were you ever able to figure out how to charge the battery? Thank you! Austin
Hi Austin, I'm afraid I'm not going to be much help. I've never even seen an A5 in person, let alone taken one to pieces. If you can work out how to remove and dismantle the battery, charging it will be broadly similar my experience here with an X3. Give the folks on Reddit a shout. They're normally pretty helpful folks. Cheers, Mike
2023-10-13
