Bringing a VanMoof X3 or S3 Back to Life – Part 1 – Smart Cartridge
The VanMoof X3 was a perfect city bike for my partner but, after being stashed over winter, the battery had gone flat and it refused to take a charge. When this happens it’s possible that the bike’s charging circuits are detecting an “overly” discharged battery and are trying to protect the Lithium cells from damage. VanMoof’s bikes are technically clever but many of the components are proprietary and options for replacing or repairing parts are pretty thin on the ground.
In this technical support document, VanMoof let slip that there is a small secondary battery responsible for the electronics in addition to the primary battery used for driving the motor. I had a theory that perhaps this battery had gone flat which was in turn preventing the electronics in the Smart Cartridge from kickstarting the charging circuit for the main battery.
In this post I will lay out the steps and tools required to extract and deconstruct the Smart Cartridge from an X3 and recharge it’s small internal battery. These instructions, while not identical, will be understandable for owners of a VanMoof S3 not just the VanMoof X3 we own.
Before you start, follow the first half of this document from VanMoof to remove the Smart Cartridge from your bike. The video below is taken from that page. If you’ve removed all of the screws shown below but the Smart Cartridge still doesn’t want to slide out, remember there is one screw behind the seat tube that’s very easy to overlook.
Once you’ve got the Smart Cartridge free from the bike frame, you can take it over to your workbench for dismantling.
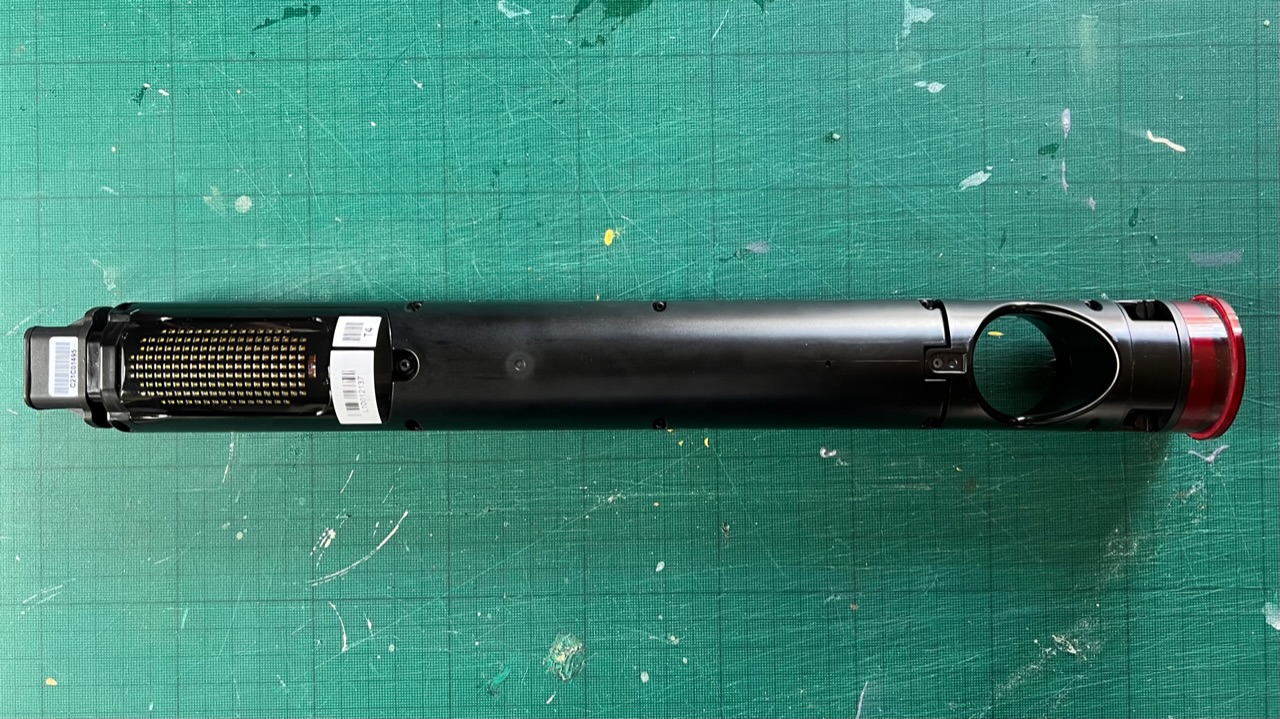
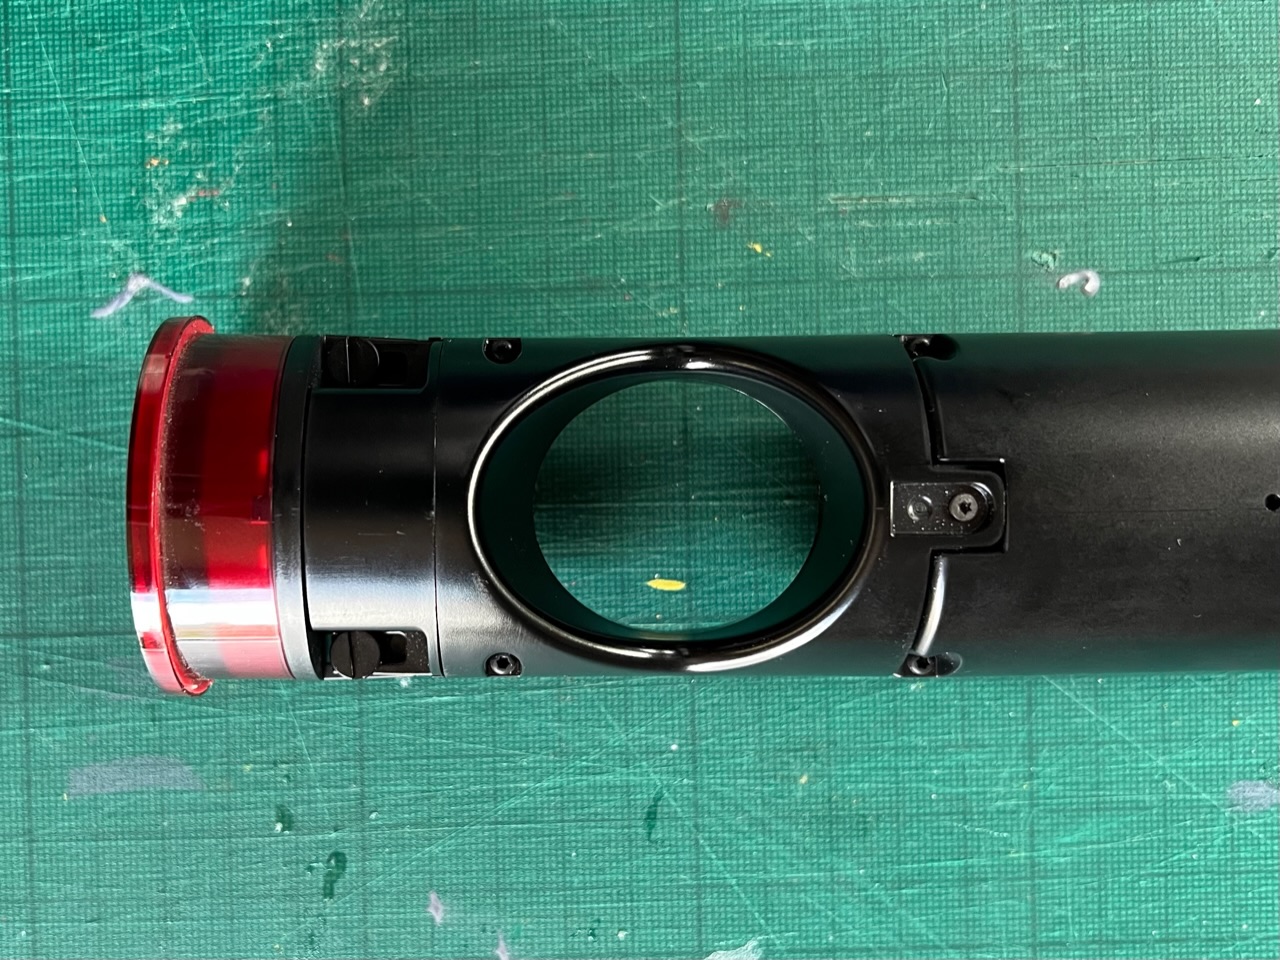
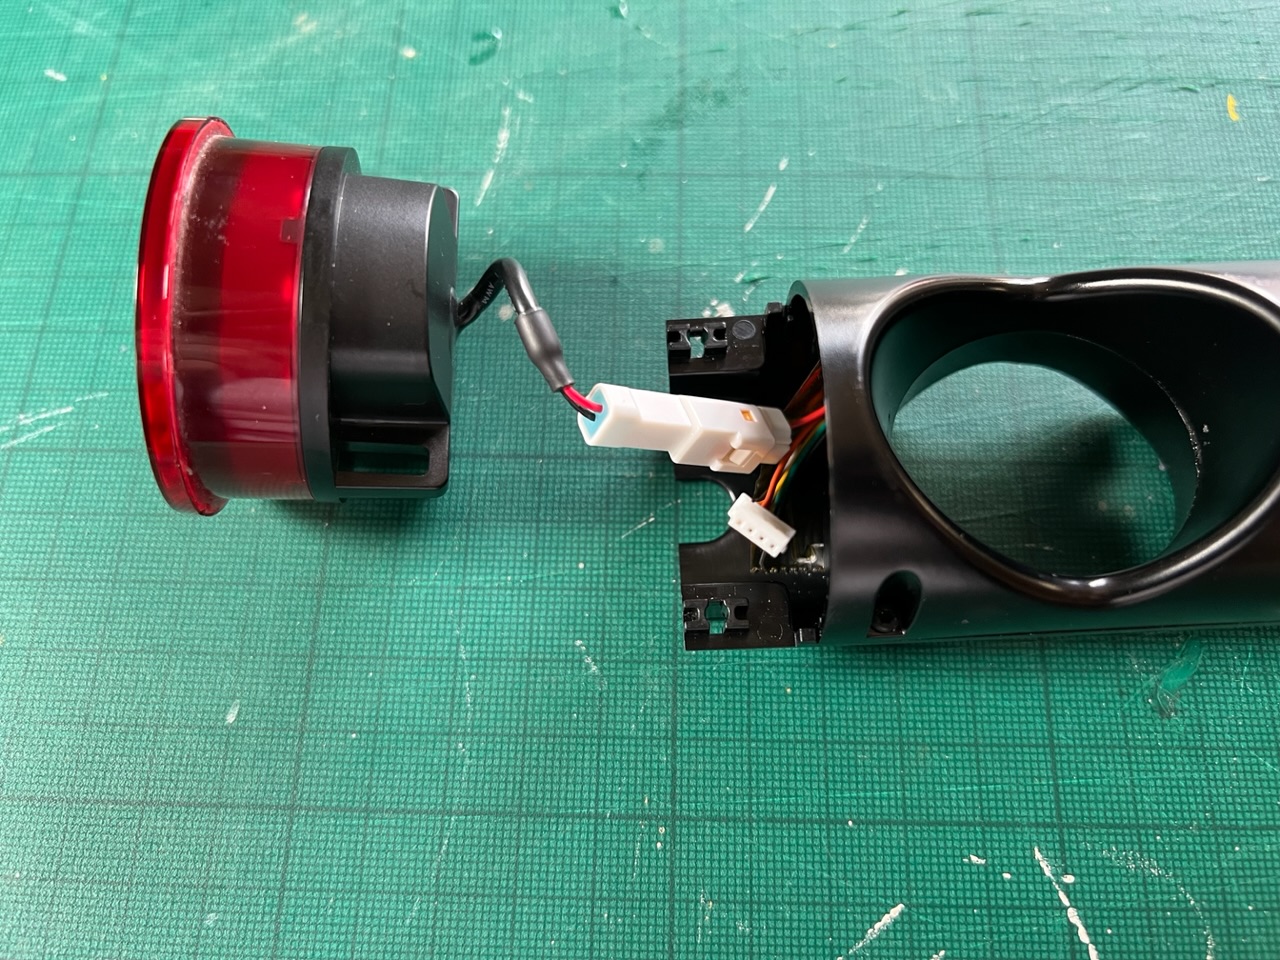
The real bulk of the Smart Cartridge is forward of the seat tube, so we first need to remove the extension that holds the rear light. A small flat-bladed screw driver can be used to turn the two plastic screws by 90 degrees, freeing the housing that hides the rear light’s power connector. The rear light can now be unplugged and removed. The rest of the seat tube extension can then be removed using a T6 torx screwdriver. There are two screws holding the top and bottom of the extension together and another two that hold the extension to the Smart Cartridge.
Now the Smart Cartridge has been stripped down to just the “brain”, you can open it up by removing the 8 T6 torx screws around its perimeter. When you separate the top from the bottom be careful as there are two sets of quite fine cables connecting the halves.
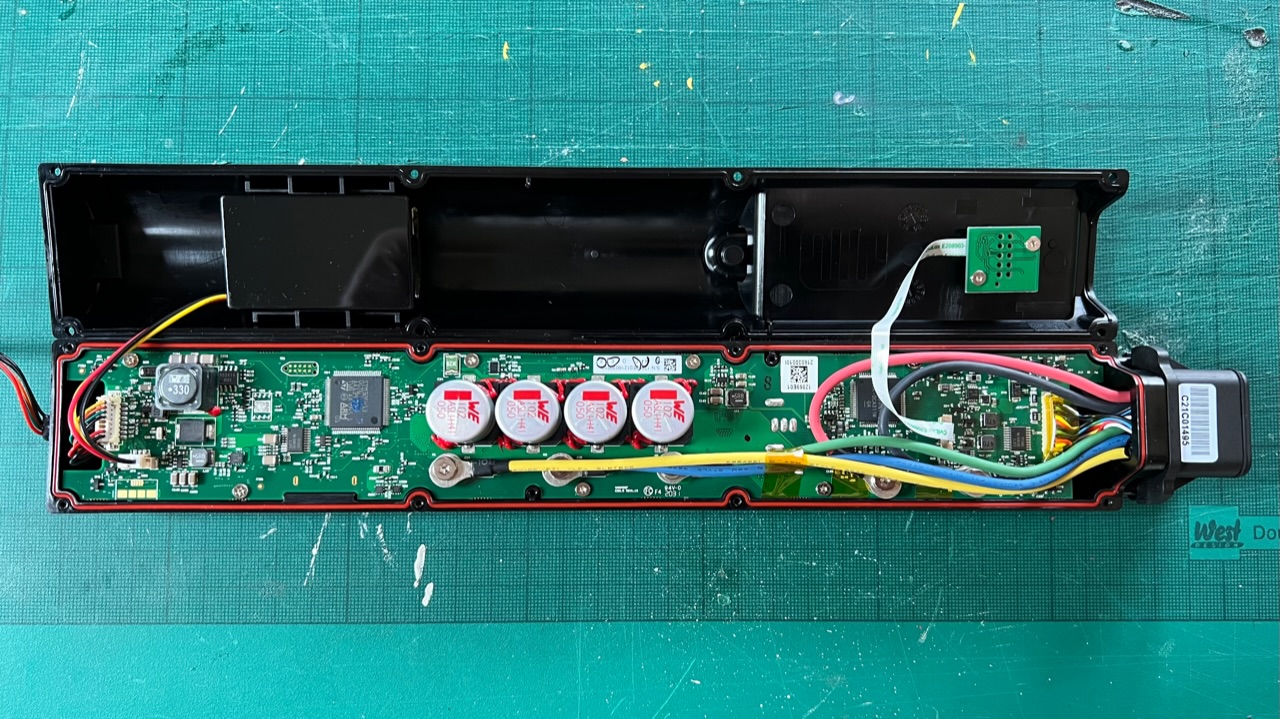
The main circuit board is connected to the dot-matrix display via the ribbon cable. This can be disconnected to give you more room to work, but is not necessary as long as you are careful not to damage the cable. The small Lithium-Poly cell is connected by the bundle of red, yellow and black wires. It can be removed from the top case by releasing the four clips. Unplug the connector from the main circuit board and you can remove the cell from the Smart Cartridge.
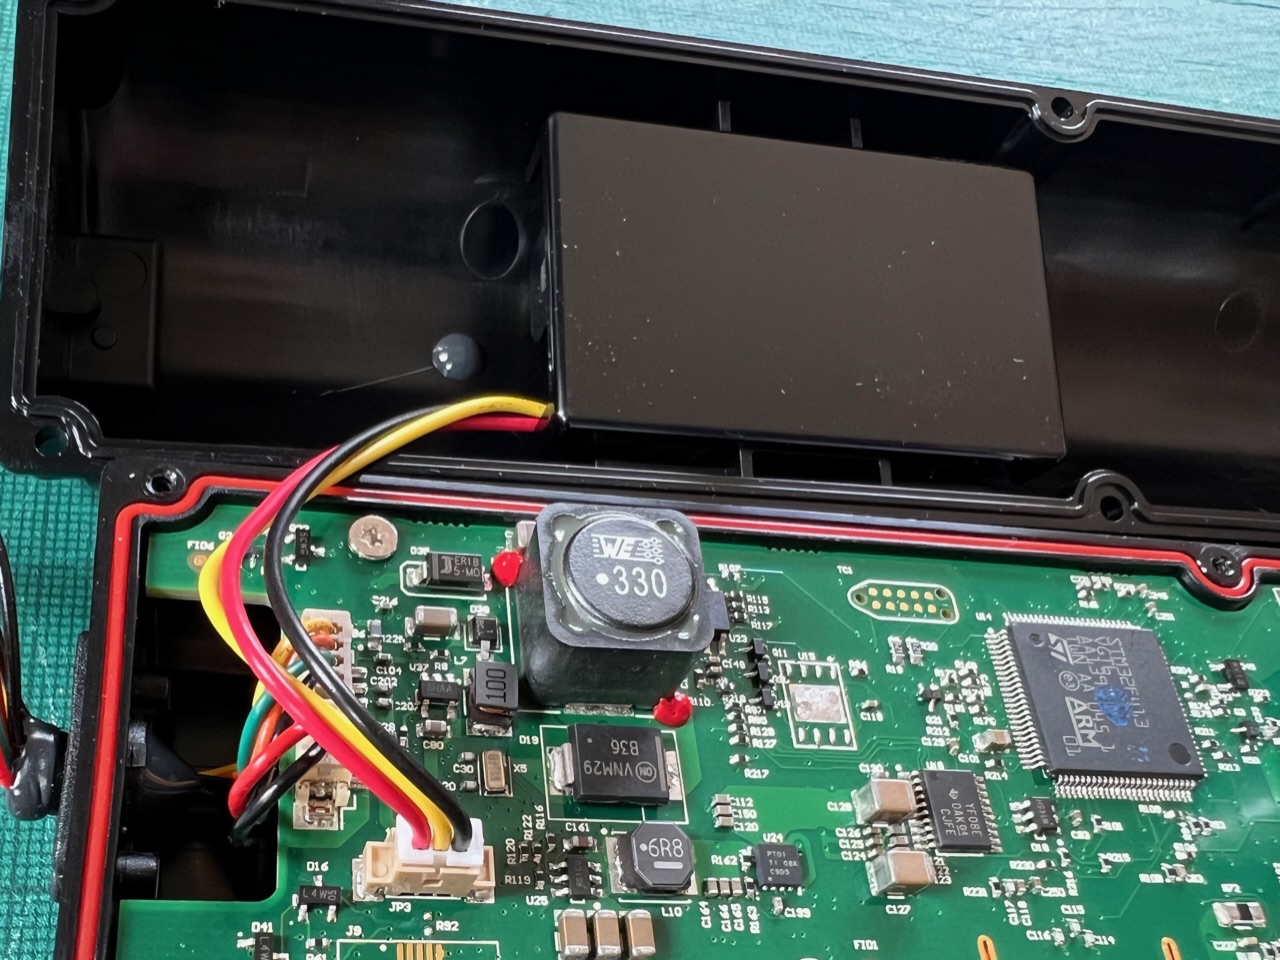
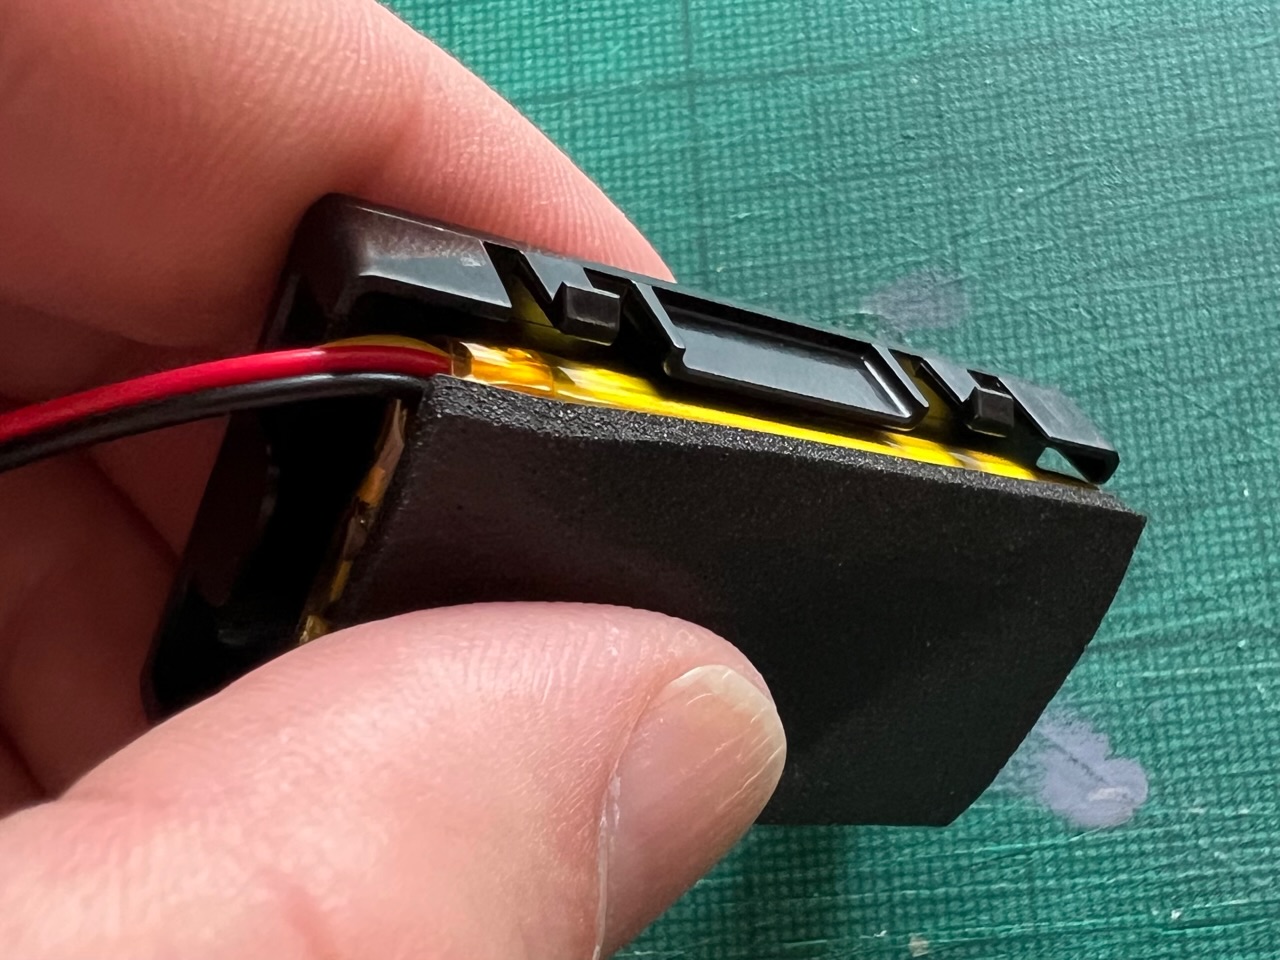
Carefully pull back the piece of foam and you’ll reveal the cell and you can read off its details. We will need this information to find a datasheet that can tell us how to charge the cell safely.
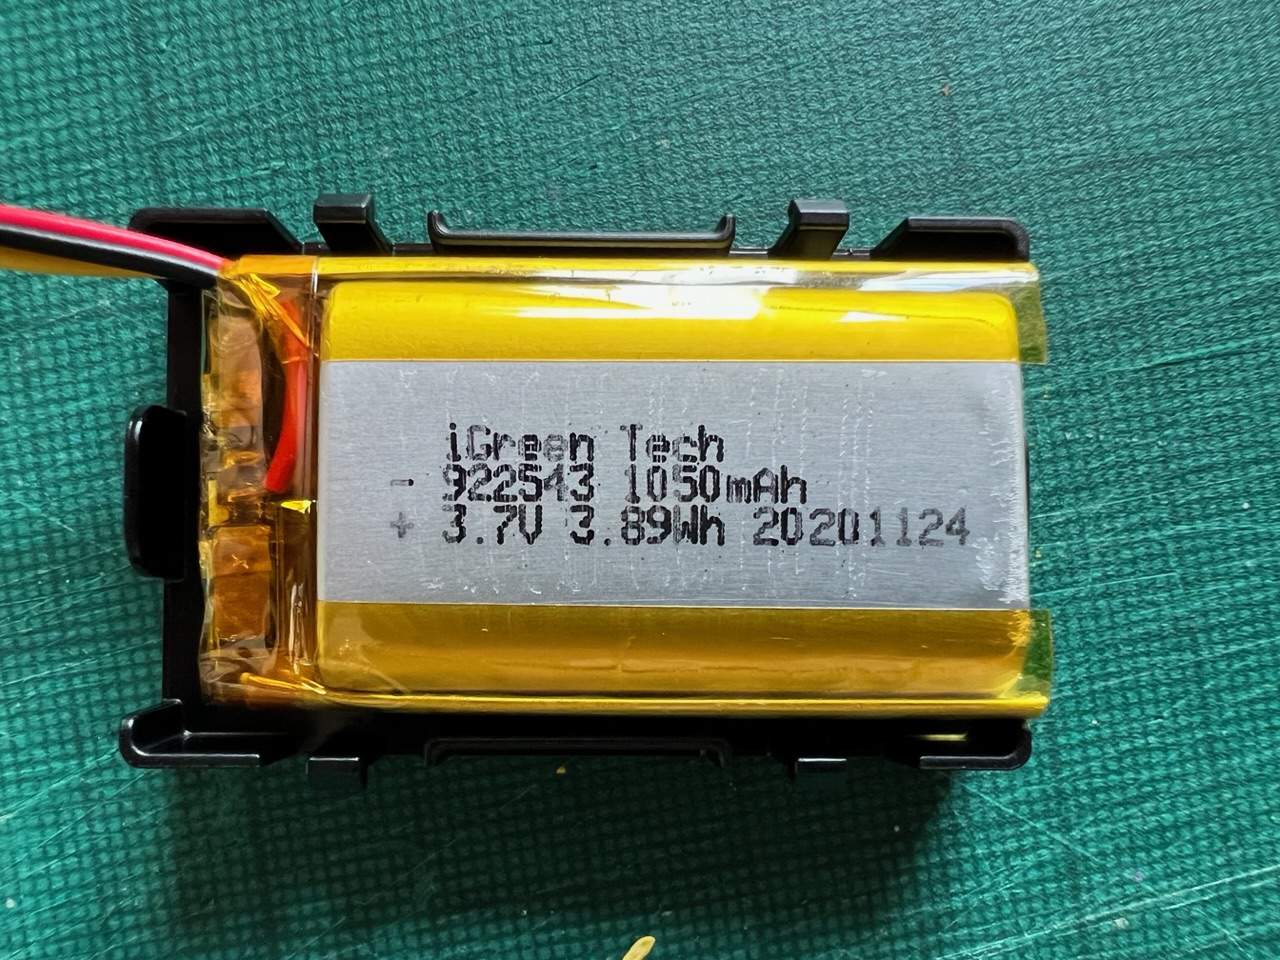
Searching the web for “iGreen Tech” didn’t give me any decent leads. There appear to be a number of companies around the world with that name, none of whom seem particularly relevant. Searching for “iGreen Lithium” does find one company that might be close, but it still didn’t get me any closer to a datasheet.
Instead, I tried a brute force search for all of the numbers on the cell, “922543 1050 3.7 3.89”. That was much more useful. It appears that 922543 is some sort of standard reference number for this kind of cell as many different “manufacturers” have sold 3.7V 1050mAh Li-Po cells with this code. I say “manufacturers” as it appears that a company called Shenzen BAK Technology will white-label their cell with your brand if you buy enough of them.
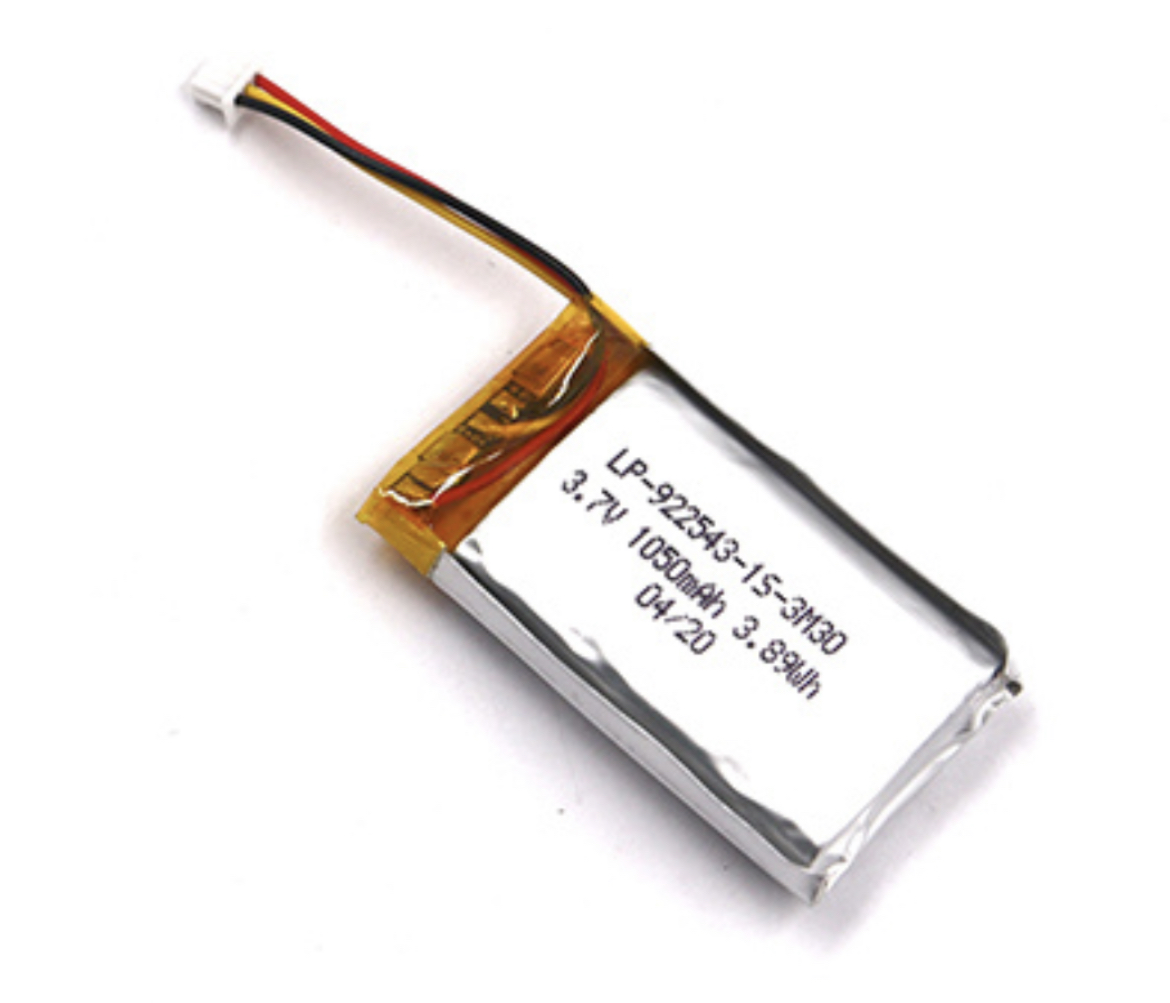
Further digging reveals that the Dubilier 922543 is compatible with the BAK 922543, so the datasheets should be similarly compatible. Finally, with all that in hand, I managed to track down a Dubilier datasheet for their 922543 Li-Po cell which matches our 3.7V 1050mAh specifications.
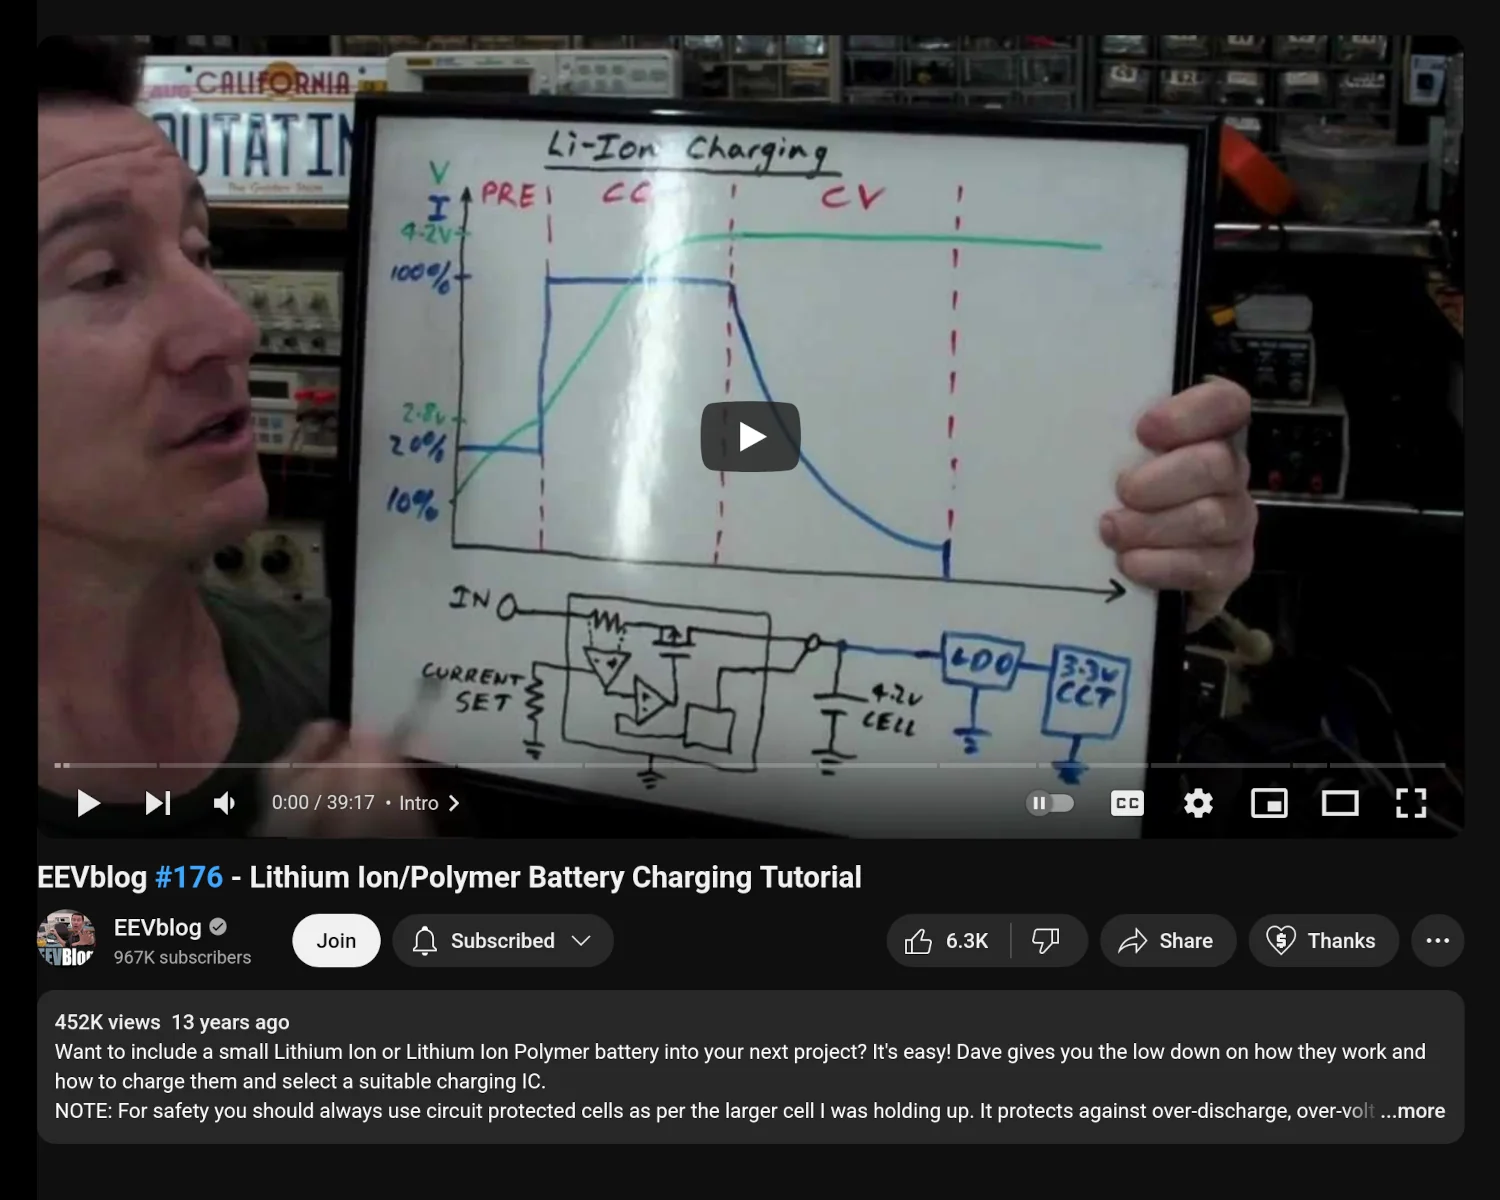
With that datasheet available, it’s time to figure out how to use the information contained within to charge the cell. This video from Dave Jones of EEVblog goes over all the details on how to charge Lithium-Ion and Lithium-Polymer cells.
Having consumed all the theory behind lithium charging, another video, again from EEVblog’s Dave Jones, has practical advice on charging Li-Ion and Li-Po cells with a bench-top power supply.
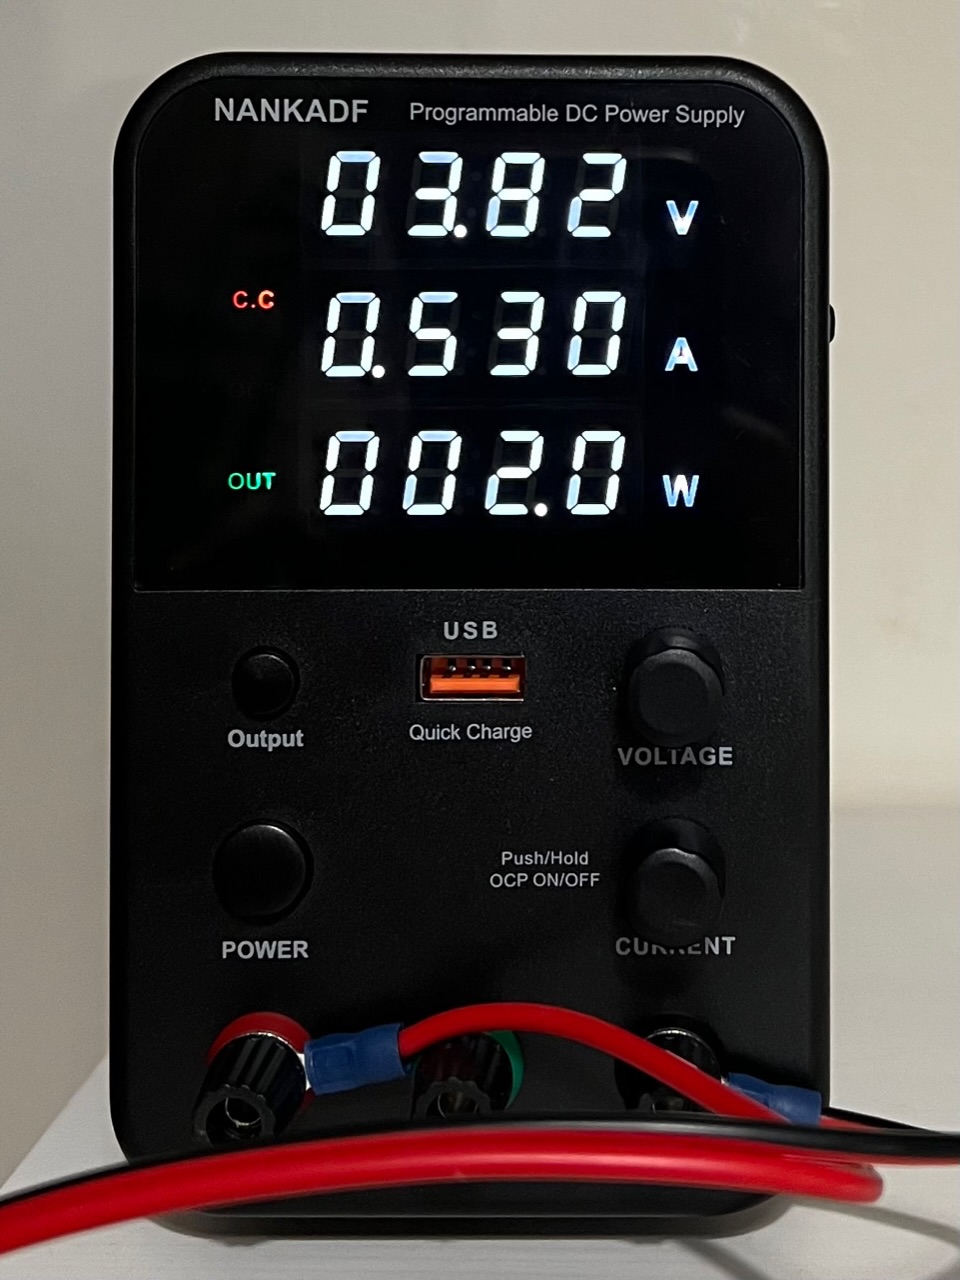
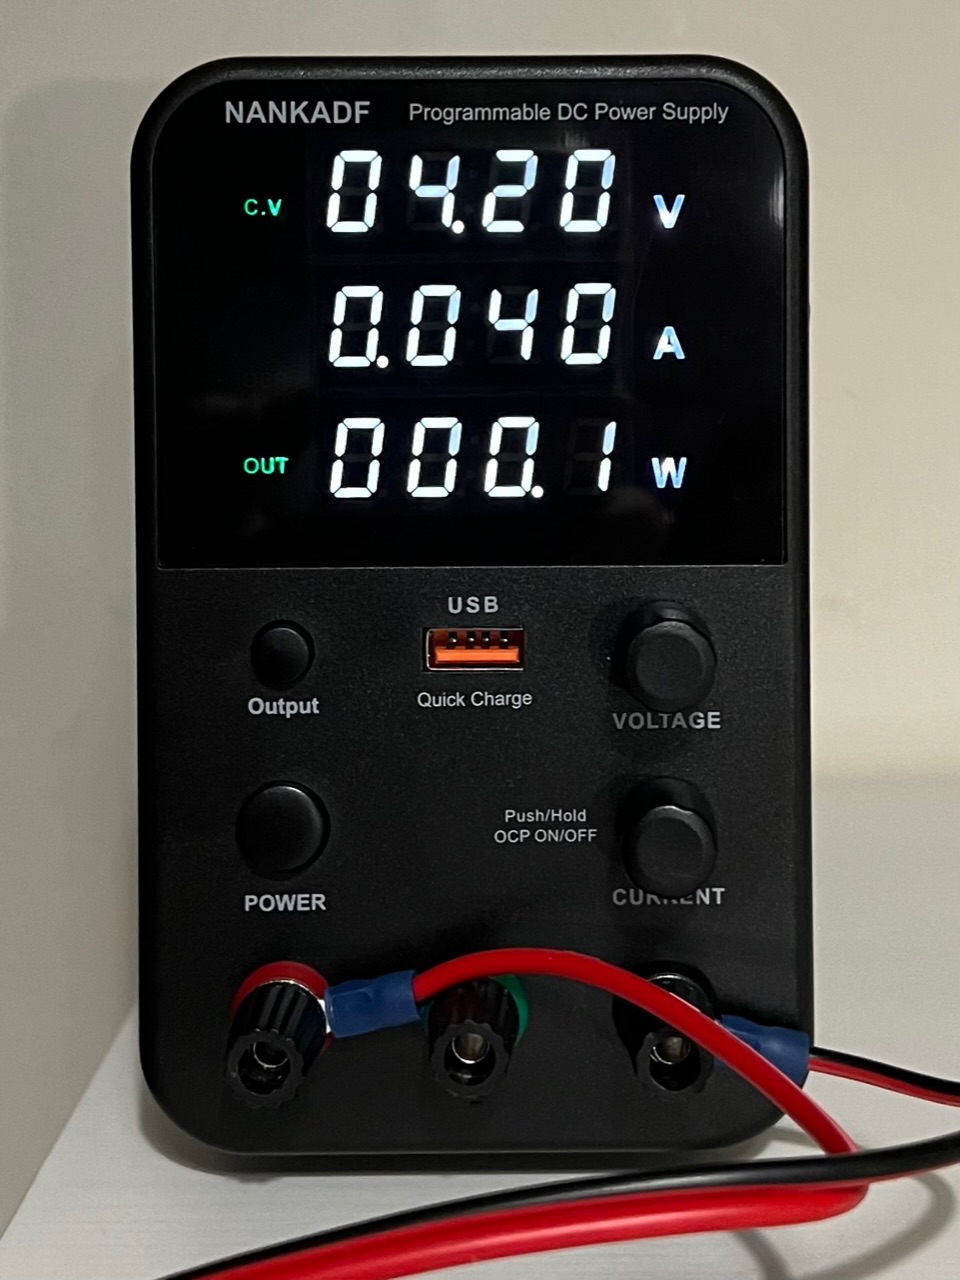
I have a NANKADF 30V 10A programmable supply, so following those videos combined with the datasheet, I set the power supply to 0.53A CC and 4.20V CV mode and connected the cell. At this point there is a danger that the cell may have been damaged by the excessive discharge and recharging it this way could result in a battery fire. I monitored the power and temperatures over the recommended 3.5 hours charging period and observed nothing untoward, indicating that the cell was good to put back in to operation.
Now the small Lithium-Poly cell is charged, reverse the tear-down process and rebuild the Smart Cartridge. If everything’s gone to plan the Smart Cartridge should spring back to life and indicate that it’s in “Shipping Mode”. There’s a good chance your bike decided to enter this mode when it originally detected the battery draining to try to prevent the batteries from getting “dangerously” low.
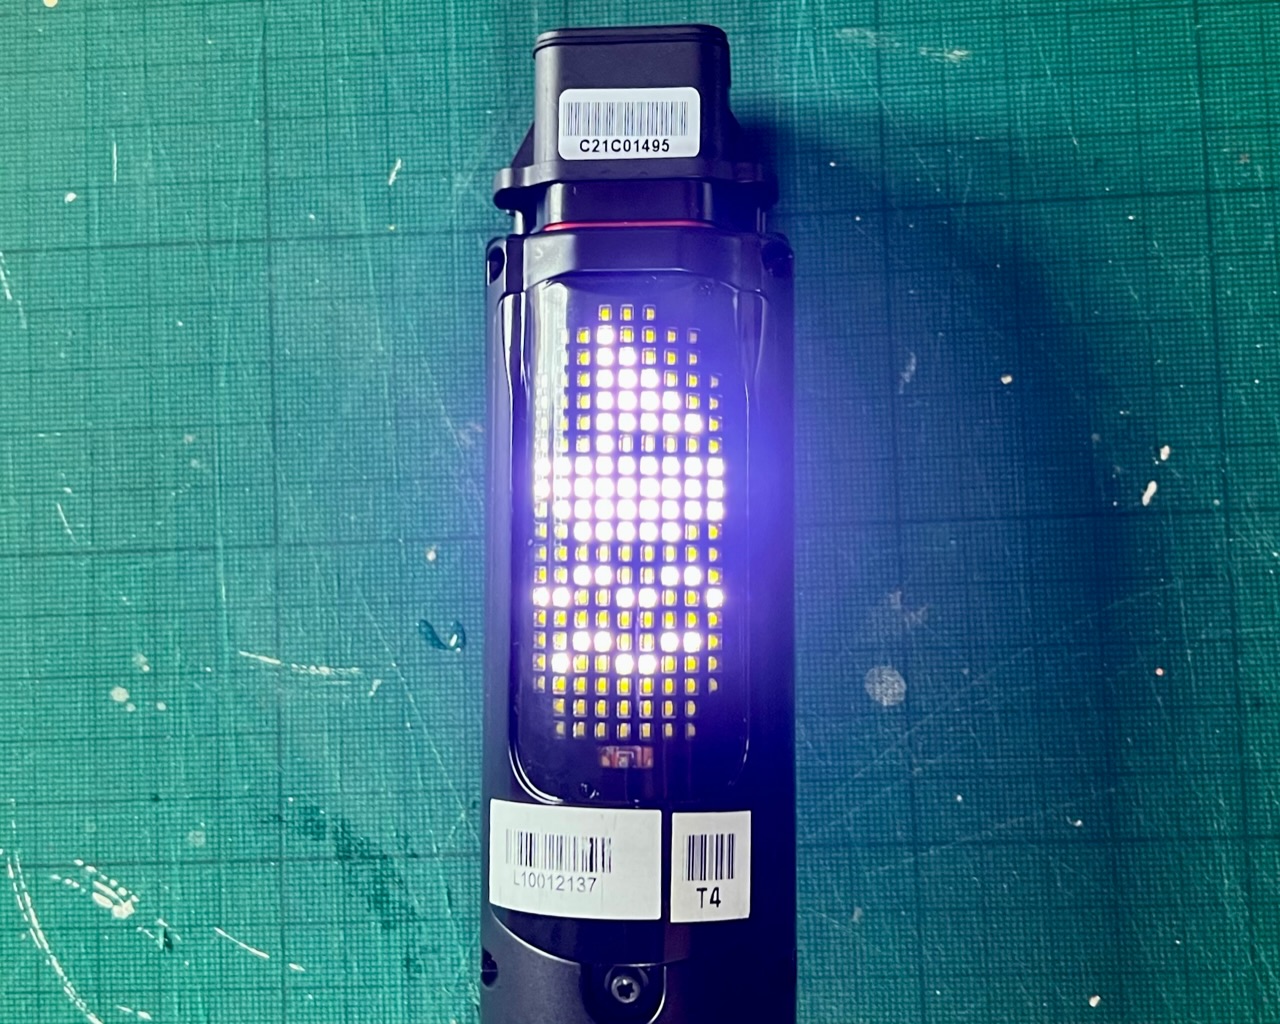
To get the Smart Cartridge out of shipping mode, follow the 3 step instructions in this VanMoof support document. That is, after re-inserting the Smart Cartridge in to the bike’s top tube, plug in your charging lead, press and hold the bike’s power button for two seconds, then short press any of the bikes handlebar or power buttons.
If an “unsafely” discharged Smart Cartridge was your only problem, your bike should reboot and begin to charge the primary battery in the bike’s down tube. If, however, your primary battery was similarly discharged to an “unsafe” level you’ll see the status light on the charging brick pulse red as it tries to start charging, but quickly return to green when the charge fails.
In Part 2 of this series, I detail the steps required to extract, dismantle and refresh the main battery pack.
Update — 2023-11-13
When I wrote this post, I didn’t want to include anything about how I physically connected my power supply to the battery as it was a bit of an off-the-cuff hack. However, I’ve since received a couple of comments asking from more information.
I just snipped the legs of a spare LED, bent them 90°, then inserted them in to the positive and negative places. The square profile of the LED legs meant they wouldn’t spin once connected, removing the risk of them shorting against each other.
I didn’t connect the centre pin as I didn’t have any facility for monitoring or logging that data. Since I was already using a CC/CV process and monitored the temperature of the cell during charging, I didn’t feel it was worth the extra effort.
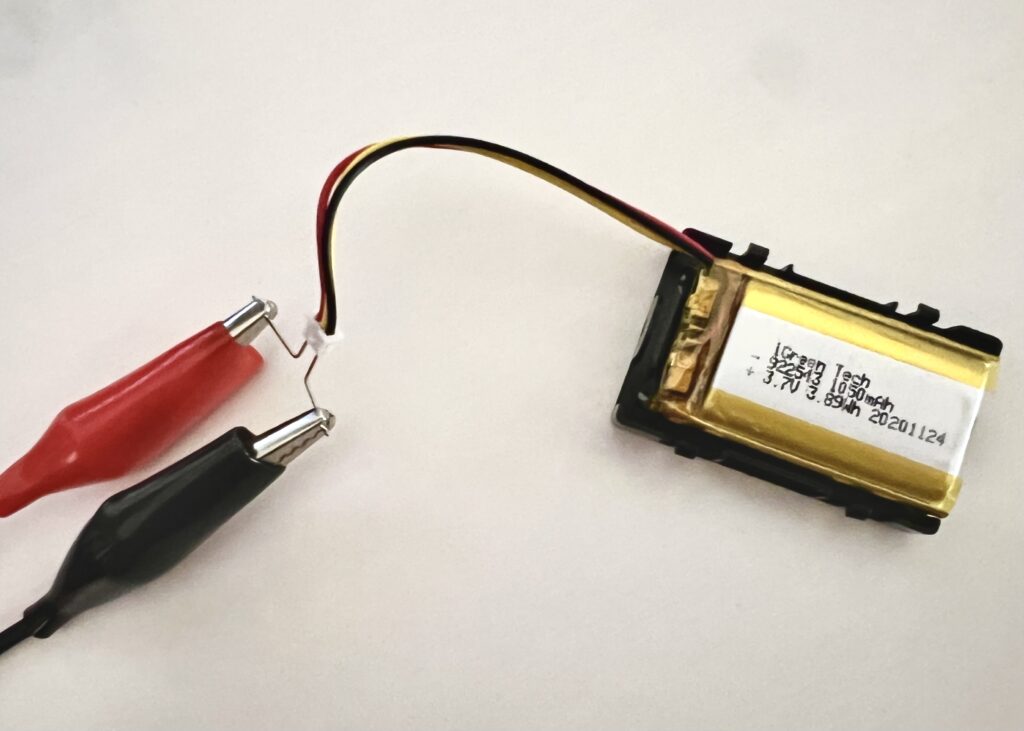
I was worried that the “random” size of the legs might have subtly damaged the spring terminals within the plug, so I didn’t want to recommend that as a solution more widely. It appears that those batteries use standard Molex PicoBlade connectors which have an aperture of at least 0.5-0.7mm, so a standard LED leg of 0.5mm should fit just fine without any worry.
Update — 2025-04-30
All the inline content such as datasheets and YouTube videos disappeared from this post when I migrated blog platforms. They've now been re-instated.
Comments
Hi Mike, great blog, I found it really informative and helpful. One question though – when you connected to the Lab power supply, how did you connect it – through the fitted plug? or did you bare the red and black wires and connect crocodile clips to them?
Hi David, Thanks for your feedback and question. I’ve included an update at the end of the post to answer your question. Luckily, I still had a photo in my archives to provide some more detail too. Cheers, Mike
Hi. Could you tell me which wires you connected to the charger please. I assume it was the positive and negative, and did not connect the third wire?
Hi Elwyn, I’ve updated the end of the post to address your question. I only connected the positive and negative terminals, leaving the centre pin unconnected. Cheers, Mike
Awesome, thanks – based om the information on your blog I have successfully recharged the battery in my smart cartridge. Unfortunately I’m still getting an error (ERR 6) so I guess I’m now going to move onto your Part 2.
Congratulations and commiserations! Good luck with the battery pack. It’s no more involved than the smart cartridge; it’s just a bit bigger so it takes a good bit longer to charge. Unfortunately, I’m now dealing with the dreaded Err44. If I had a spare/working e-shifter I’d be inclined to run a datalogger on the wires and try to reverse engineer the communications between it and the smart cartridge to see what I could come up with. Unfortunately, they’re like hen’s teeth.
Hi Mike excellent write-up. It has given me the confidence to attempt repair. I got a similar bench power supply as in the picture. When charging, it started with cc-mode at 4.2v & 0.53A. How do I change to cv-mode as shown in the other picture? Thank you
Hi Chet, Thanks for your kind words, I’m glad you found this useful. To answer your question, the power supply takes care of the switch-over from CC mode to CV mode automatically. When you set the voltage and current values you’re in effect setting the maximum values the power supply will drive. When the cell is flat the voltage will be low, so the current draw will be pinned against your 0.53A current limit which puts you in constant-current mode. Once the cell reaches 4.2V the voltage limit has been hit so then it’s in constant-voltage mode. Cheers, Mike
Hello Mike, These two posts have been very informative and helpful. I have disassembled my smart cartridge and it’s clear that the lipo battery is bulging and damaged. I’d like to replace it, but have not been able to find a source in the US. I only see the two wire variants on Amazon for example. Could you provide a tip on where I may be able to find one? Thanks in advance.
Hi Jon, It’s good to hear you found the posts useful. I’ve had a dig about and you’re right – US stockists of that battery are hard to come by. I found my datasheet on Farnell’s website, who are a part of Avnet, but it appears that Newark/Avnet don’t stock the same items. I couldn’t find anything from the usual suspects, either – Digikey, etc. It does look like something similar is available on AliExpress, which might be worth a try? https://www.aliexpress.com/item/1005006129387074.html In another listing the same company says, “If you are not sure whether the battery is suitable for your model, you can contact our customer service. Tell us your battery parameter model and size, we can customize the battery you need for you, thank you.” They might be able to put one together for you using the dimensions and values from the datasheet? Apart from that, I’m out of answers. Hopefully you get it sorted, good luck! Cheers, Mike
Thank you for the reply Mike. I was able to locate the proper battery on eBay, charged it correctly, and sadly no luck. Installed the battery in the smart cartridge and it flashes the skull icon, then turns off. A reset of the system results in the same outcome. If I plug in the charger while the skull is flashing that icon flash turns off, but will not present the charge icon. I suspect the smart cartridge is damaged in some other way. Unless you have any insight on this, I believe I will just need to part out the bike. I am glad this has worked for some and really appreciate what you posted here.
Hello Mike, Great explanation and really good instruction. Top Job!. I have a similar situation: a friend of mine asked if I could look at his battery (as I am the only one he knew who had a multimeter :-). I understand your explanation, but I do not own such a professional power supply. only a 12 Volt 20 amps Siemens unit. Would there any other way to do this?
Hey, thanks for publishing this, it’s super approachable. After reaching out to several e-bike shops in the area, none of them are willing to try and fix the battery, so I’m going to try and do it myself. The part of this that I’m most concerned about is connecting the battery to the power supply. Would a molex 3-pin like this (https://www.amazon.com/Davitu-Electrical-Equipments-Supplies-PicoBlade/dp/B089K2WQJ5/ref=mp_s_a_1_24) hook up to the battery to charge a bit more securely? Thanks!
Hi Jon, Sorry for taking so long to reply – I’d missed the notification that you’d left a comment. It does sound like something more serious has happened to your smart cartridge. I’m afraid, I’ve never had to deal with a damaged smart cartridge, so I’m out of advice. If it’s of any consolation, I’m sure there will be people desperate to buy parts from your bike; the e-shifter in particular.
Hi Arie, Right… I whole heartedly DO NOT recommend this but, in theory, it might work. I would hook up the cell and aim for getting its voltage up to about 2.5V – 3V. You could then transfer the cell back to the smart cartridge and hope that’s within the range that the bike might recognise it and carry on charging – safely. 12V @ 20A is really dangerous though. I’d be worried about going much above 1A, maybe 2A, if you have a thermometer you can use to keep an eye on the cell’s temperature. You’re really abusing the cell at that point, so explosions and fires are possible if not likely. I’d try cannibalising an old USB power supply/cable; that would be much safer since you’d restricted to the 5V and 0.5A – 2A range.
Hi Danny, sorry for taking so long to reply – I’d missed the notification that you’d left a comment. Yes, that looks like it’s got the right sort of connector on it to let you plug in the battery. I hope it goes well for you, good luck!
Hi Mike, i had a go at manually charging this module myself, and I think I found an easier way. when you supply 24v and 1.5 A to the bike, instead of the normal 42 V, somehow the power goes directly to the battery, which needs 29000 mAh to let current pass through the battery. Vanmoof used to sell these power supplies to repair shops, but I made one myself by sacrificing a charger and soldering the end plug’s two wires to a 24v power supply, should save some effort!
Hello Mike, thanks for your guide, that is very useful. My 2023 Vanmoof S3 has a problem located in the smart cartridge. I’m pretty sure because the battery and the BMS have just been restored thanks to a reparations shop in Tilburg. I’m lucky because I have two smart cartridges: the new one (the only one connected with my phone) while plugged in, shows the shipping mode’s boat led blinking (charger LED is green). The second smart cartridge gets connected to the main battery but error 45 is shown and isn’t linked with my phone. The same shop doesn’t repair the smart cartridge and VM customer support is bouncing me… I’m looking for a technical help near Verona, Italy, because I’m not able to do it by myself. Any suggestion? Thanks in advance. Best regards. Nicola
Hi Mike, my Van mood S3 has an error 41 which does not respond to a reset. I am non techno. Do you think it is fixable? Thanks
Hi Nicola, I’m afraid I live in the north of Scotland, so I don’t have any advice about getting help near Verona. My only suggestion is that Error 45 means the Smart Cartridge cannot talk to the wheel motor so I’d try disconnecting the cable to the wheel from within the fork and trying to clean the electrical contacts. It’s possible that road grime or water has gotten in there and is causing your problems. Sorry I couldn’t be more help, good luck! Mike
It looks like Error 40 and Error 41 are due to the bell and the boost buttons failing, usually due to rainwater getting in them. Someone’s written up a guide on iFixit on replacing the buttons, https://www.ifixit.com/Guide/VanMoof+S3+Bell+Button+Replacement/138539 and they’ve also given a link to a replacement button on Amazon https://www.amazon.co.uk/Gebildet-Latching-Lockable-Trumpet-Doorbell/dp/B07XQSBW7Q I’ve not tried, but it sounds like this should do the trick. Cheers, Mike
Thanks Max, that’s really useful to know!
Thanks Mike, looks too technical for me, so its off to Holy Spokes! I do hope it’s fixable. As an aside can water get into the smart cartridge from the cross bar and cause damage, or are those little holes sealed? My bike got really wet the other day and that’s when the error 41 started.
Water shouldn’t really be able to get in to the Smart Cartridge. There aren’t any holes in the top, the dot-matrix display has a reasonably decent seal and only lets light through. If you rode through a **really** deep puddle, there’s a chance you could spray some up around the power button/charge port area but you’d have to be really unlucky to get enough water up there to do any damage.
Thank you, Mike! You are very kind. Happy Sunday
Cześć, Zwracam się z prośbą o pomoc w sprawie mojego Vanmoof S3 który nie chce połączyć się z aplikacją w telefonie… Czy macie pomysł czym to może być spowodowane? Z góry dziękuję za pomoc. Pozdrawiam, Mariusz
Hi, I'm asking for help with my Vanmoof S3 which won't connect to the app on my phone... Do you have any idea what could be causing this? Thanks in advance for your help. Best regards, Mariusz
I'm sorry Mariusz, but I don't. There are too many variables at play when it comes to the app communication. It could be the Bluetooth connection. It might be the bike/app encryption keys. The bike might have lost its memory and lost its pairing information. It's almost impossible to diagnose. You just kind of have to try everything and hope for the best. Maybe ask on Reddit and see if anyone there can help?
2023-09-08

