Trusted Certificates for Private Servers - Part 2
In part one of this series, I showed you how to generate self-signed, untrusted certificates for your private Caddy server. In this installment, I'll show you how to skip the manual generation and distribution steps and instead get trusted certificates for your private servers, automatically.
DNS-based Automatic Certificates
In the first post, we used an ACME HTTP-01 challenge to prove to Let's Encrypt that we were in control of a public server behind the domain. This required a "line of sight" from the internet to our server, which fails when we want to retrieve certificates for our private servers.
Instead of performing HTTP-01 challenges to prove to Let's Encrypt that you're in control of the server behind the domain, there's an alternative DNS-01 challenge you can use which proves you control the whole DNS for that domain. With DNS-01 challenges, we can retrieve certificates for private servers, or even wildcard certificates for our whole domain.
To make this work, you need two things. One; a DNS hosting provider that has an API for creating the DNS records you need to complete the DNS-01 challenge. Two; a version of Caddy that supports your chosen DNS provider's API so it can run the challenge for you.
Mythic Beasts
My DNS provider of choice is Mythic Beasts. They're a small company, based in the UK, that really knows their stuff, technically speaking. They're also one of the few companies that are active on the Fediverse, with actually responsive staff; they're not just using it as a PR outlet.
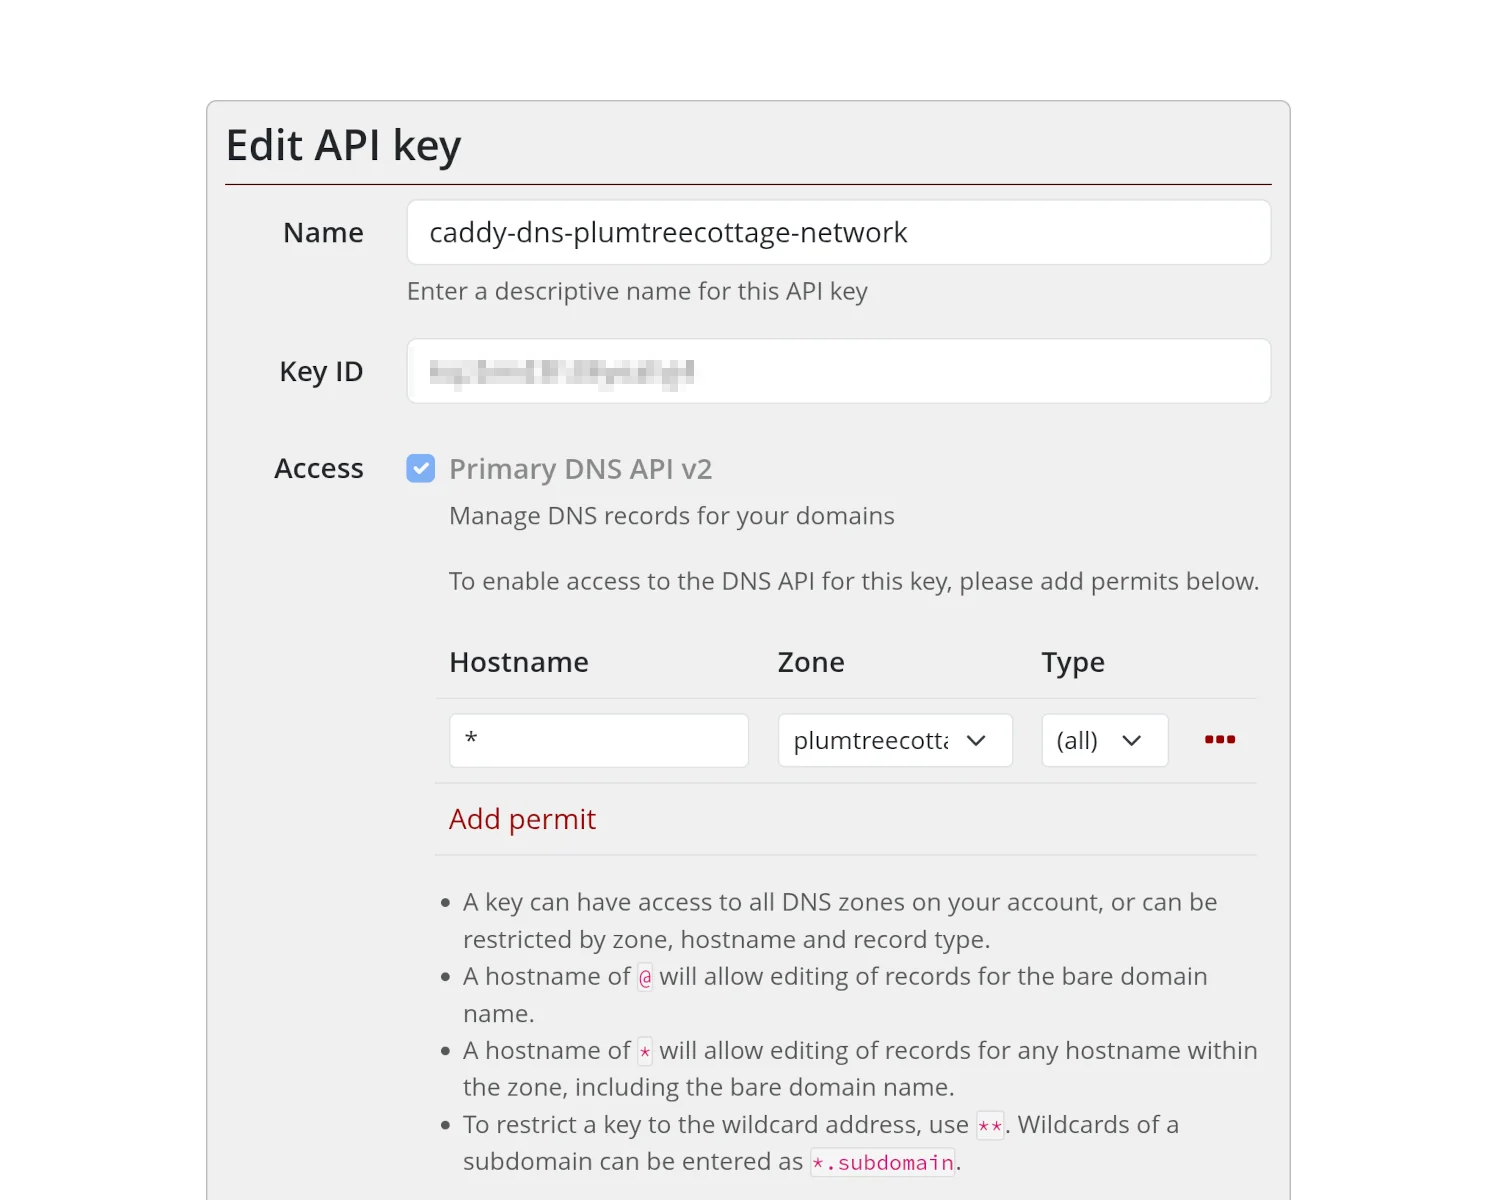
You can create a key within Mythic Beasts' dashboard that will let you access their DNS API. With this key, you'll be able to programmatically create DNS records for your domain.
With our provider prepped and ready to accept our DNS changes, we now need a copy of Caddy that supports the Mythic Beasts API. Out-of-the-box Caddy doesn't support Mythic Beasts, but a quick search of the Caddy DNS providers page reveals an official module for Mythic Beasts that can be bundled into a custom Caddy binary.
There is a process for building and downloading custom Caddy binaries, but it's noted on that page that it's not particularly reliable. Instead, we can use the xcaddy tool to build our custom Caddy binary with the Mythic Beasts module bundled in. The xcaddy command is basically a thin wrapper around the Go compiler, so first we'll need that.
Install Go
The Go website has some reasonable instructions for installing Go on most platforms; my shortened version looks like this.
$ sudo apt update && sudo apt install curl
$ curl -L https://go.dev/dl/go1.25.4.linux-amd64.tar.gz >go.tar.gz
$ sudo tar -C /usr/local -xzf go1.25.4.linux-amd64.tar.gz
$ echo "export PATH=\$PATH:/usr/local/go/bin" >>~/.profile
$ source ~/.profile
You can test you've got a working Go installation by asking it to display its version. Any errors here will probably prevent you from continuing.
$ go version
go version go1.23.5 linux/amd64
Install xcaddy
With Go installed, we can now install xcaddy. The Caddy team publishes installation instructions on their GitHub repo. I'm coming at this from a "Debian Administrator" point-of-view, rather than a "Go Developer" one, so I've opted for their apt-based installation method.
$ sudo apt install -y debian-keyring debian-archive-keyring apt-transport-https
$ curl -1sLf 'https://dl.cloudsmith.io/public/caddy/xcaddy/gpg.key' | sudo gpg --dearmor -o /usr/share/keyrings/caddy-xcaddy-archive-keyring.gpg
$ curl -1sLf 'https://dl.cloudsmith.io/public/caddy/xcaddy/debian.deb.txt' | sudo tee /etc/apt/sources.list.d/caddy-xcaddy.list
$ sudo apt update && sudo apt install xcaddy
This step could be more slick and list Go as a dependency of xcaddy, but maybe there are version compatibility issues I'm not aware of? Once installed, xcaddy can be tested by asking for its version.
$ xcaddy version
v0.4.5 h1:7E4b+3Gm2do/WpuDXh5MWIj+qgCCvQqR487Sm8C6hwc=
Be sure to run the version subcommand and not just a bare xcaddy command. It really is just a wrapper around a Go compile command, and you will get very cryptic errors if you just run it bare.
$ xcaddy
go: cannot match "all": go.mod file not found in current directory or any parent directory; see 'go help modules'
Error: exec 0x5cd380: exit status 1:
exec 0x5cd380: exit status 1:
Build custom Caddy with xcaddy
With Go and xcaddy installed, we can now build our custom Caddy binary with the Mythic Beasts module bundled in.
$ xcaddy build --with github.com/caddy-dns/mythicbeasts
This will update your Go compiler if needed, download all the source code to build Caddy, grab the extra code for the Mythic Beasts module, and then compile it into a binary.
Once complete, you'll have a new file called caddy in your current working directory.
You can confirm the build was successful by asking it to list its bundled modules.
$ ./caddy list-modules
# ...
dns.providers.mythicbeasts

  Non-standard modules: 1
# ...
Install our custom Caddy
The following instructions assume you're already running the Debian packaged version of Caddy and want to replace it with your custom build. First, we need to stop the currently running Caddy process. We then need to move the packaged Caddy binary out of the way and copy our custom build into place. We set the file ownership and permissions to match the packaged version, and then restart Caddy.
sudo systemctl stop caddy
sudo mv /usr/bin/caddy /usr/bin/caddy.old
sudo cp ./caddy /usr/bin/caddy
sudo chown root:root /usr/bin/caddy
sudo chmod 755 /usr/bin/caddy
sudo systemctl start caddy
Putting it all together
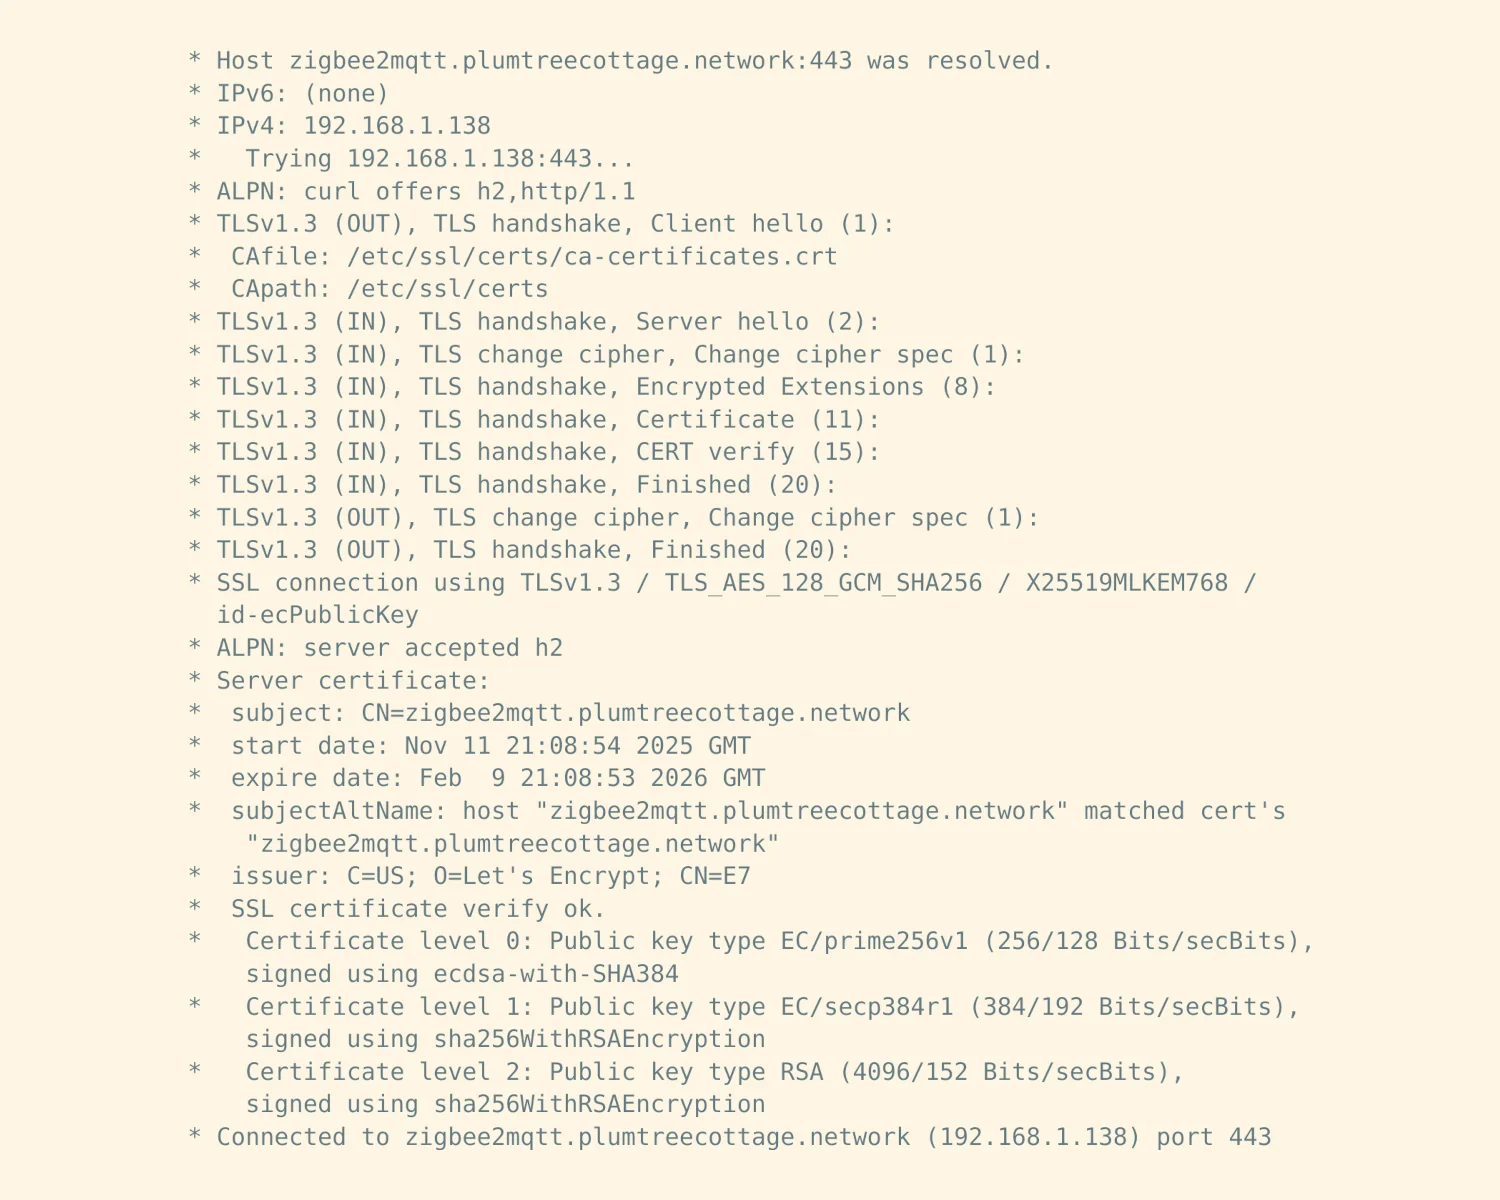
With all of our preparations complete, we can now configure our custom Caddy to complete a DNS-01 challenge with Mythic Beasts and retrieve trusted certificates for our private servers.
Don't panic! In the following snippet I've not gone off the rails and given you my actual API key and secret. These are just randomly generated placeholders of the right "shape and size", so you'll know which of your values needs to go where.
https://miniflux.plumtreecottage.network {
    tls {
        dns mythicbeasts {
            key_id "tn1871z1k3bgzv9j"
            secret "OWAR9wkL35X;b5ax1X,m3QU-Rxu-aO"
        }
    }
    reverse_proxy localhost:8080
}
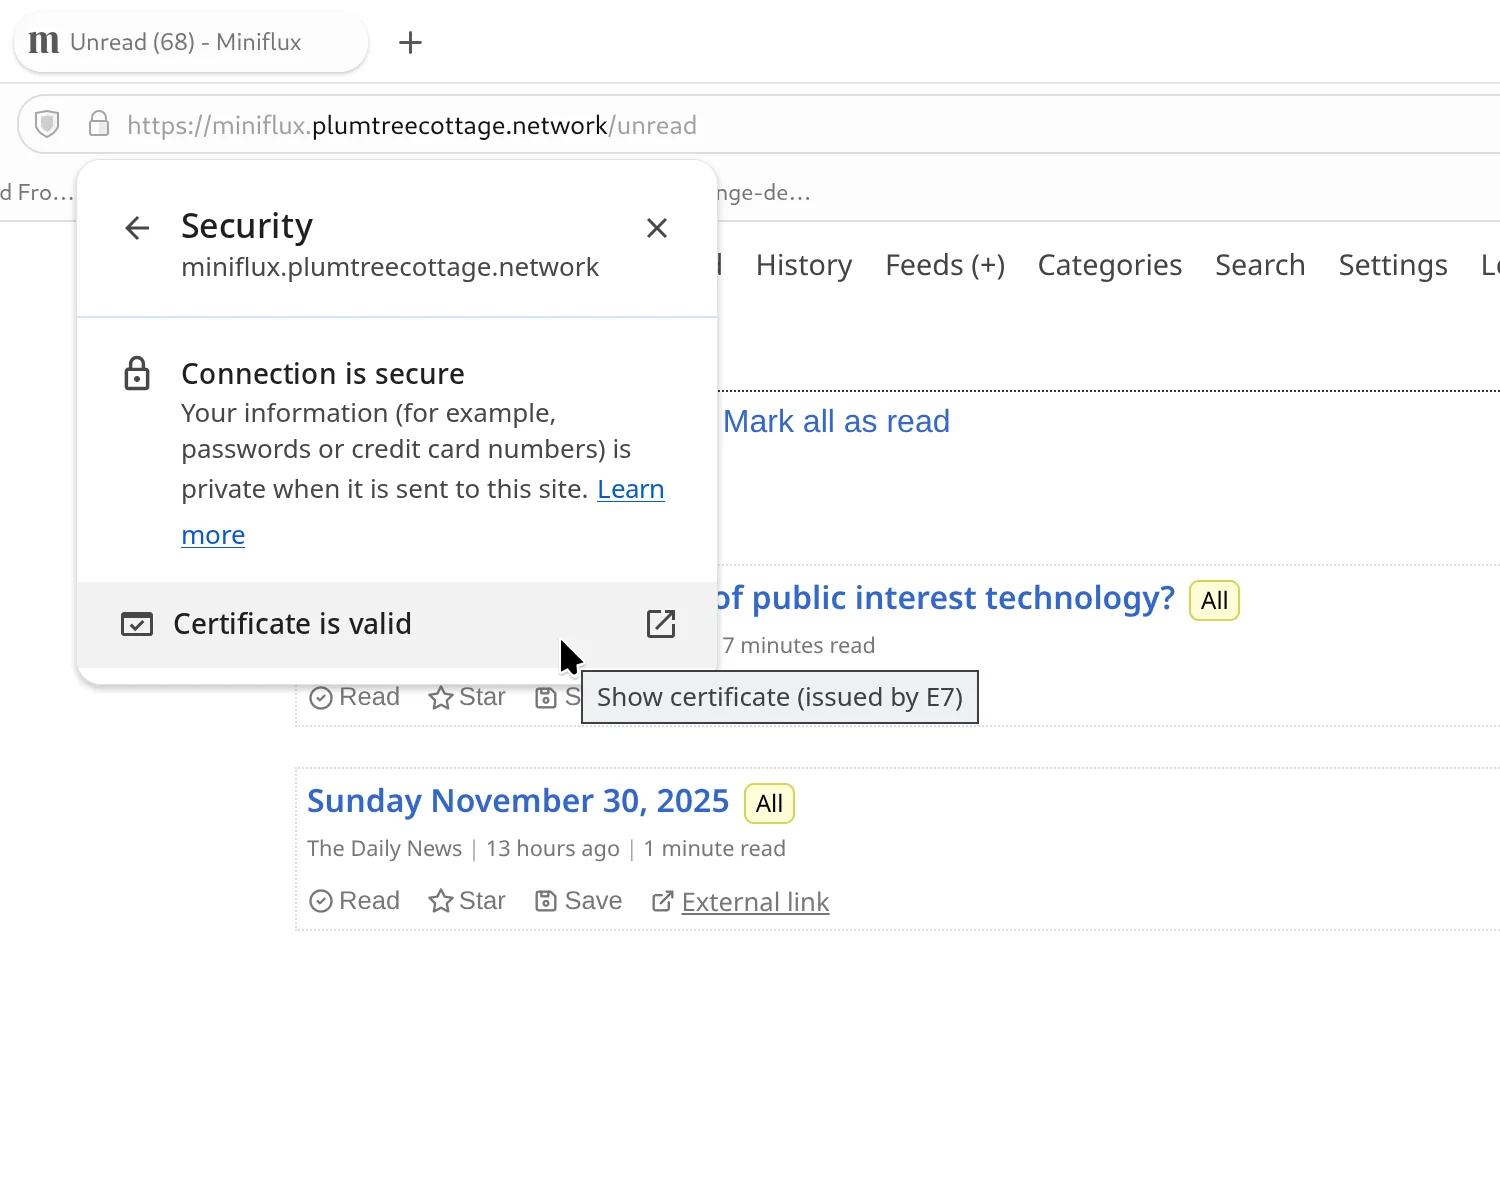
With a correctly provisioned configuration file, we can restart Caddy to apply the changes, complete the challenge, and correctly respond to TLS requests.
$ sudo systemctl restart caddy
Caveats and Provisos
If, like me above, you're relying on a previously installed version of Caddy for your working, integrated startup and shutdown commands, a future OS package update may overwrite your custom Caddy binary. You might want to learn how your distribution handles the caddy/systemd interaction and write your own replacements to completely remove the original packaged version.
You are, also, now responsible for keeping your custom Caddy binary up to date. You cannot rely on your operating system's security packaging team to keep on top of things for you.
Next time
In the third and final installment of this series, I'll show you how to extend this pattern out to other parts of your internal infrastructure, including routers and wireless access points by enabling DNS-01 challenges on OpenWrt.
2025-12-01