Designing 3D Printed Sewable Badges
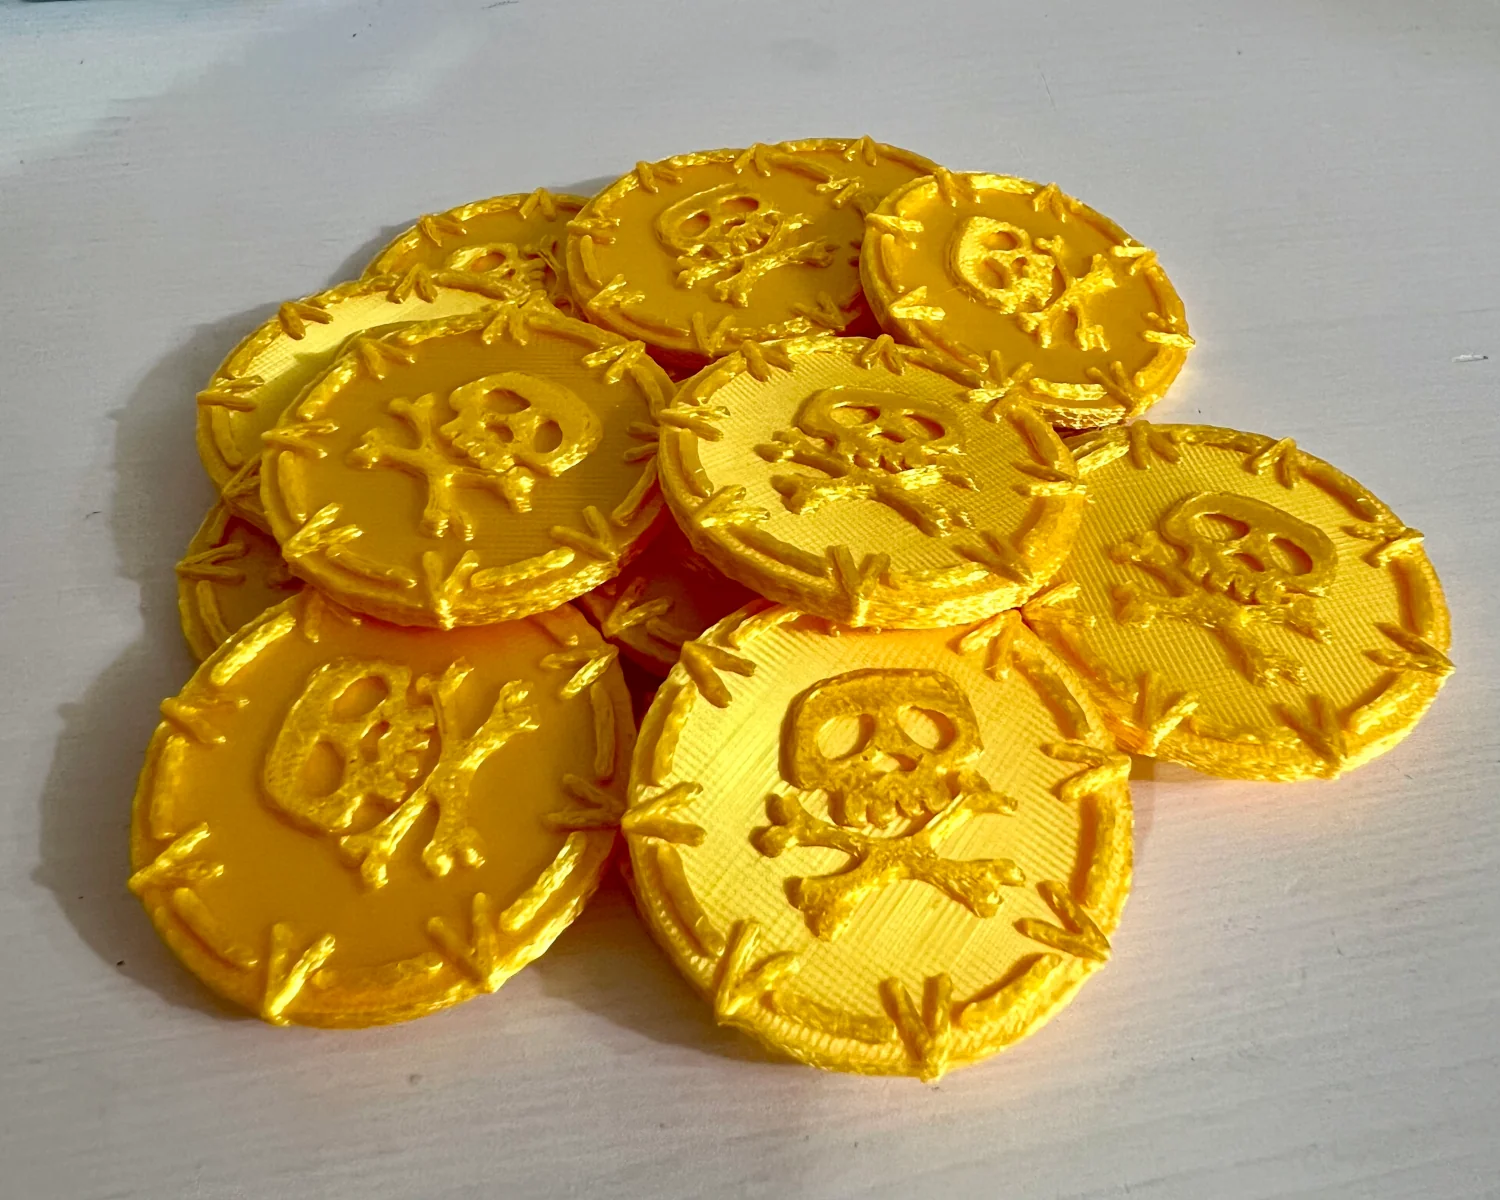
I've been on a bit of a 3D printing spree lately, designing and printing some props and accessories for my daughter's Halloween costume. She's going as a pirate, so in addition to the gold coins I designed for her last month, I've been designing a cap badge for her Tricorne.
![]()
Here are the steps I followed to design and print a sewable badge.
Draw the badge in Inkscape
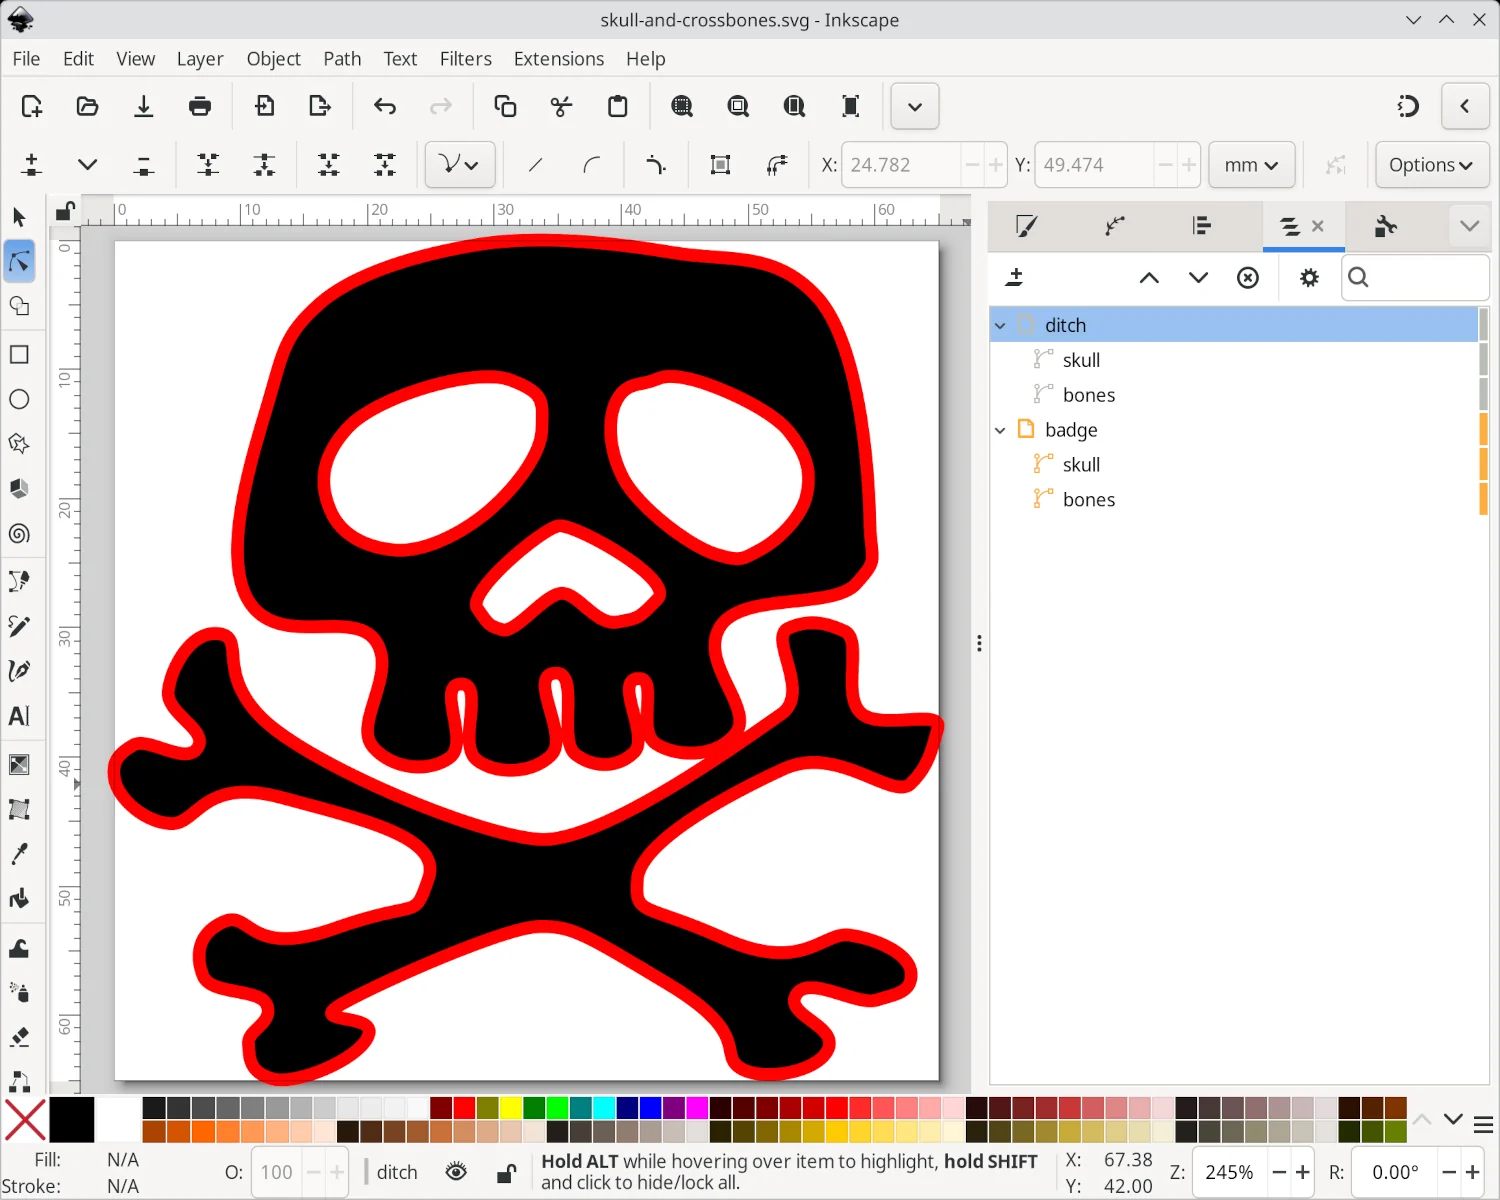
I started by deciding how big to make the badge. My partner was sewing together the actual hat, so based on her pattern pieces, I decided to make the badge 65 mm x 65 mm. Setting the Inkscape document size to match makes it easy to scale the design to fit.
I use OpenSCAD to generate most of my 3D models. Its SVG importer can filter by layer, so I made sure all of my paths were organised within a single layer. I picked "badge" for the name of the layer holding the complete design, which is based on the Skull and Crossbones I drew for the gold coins.
![]()
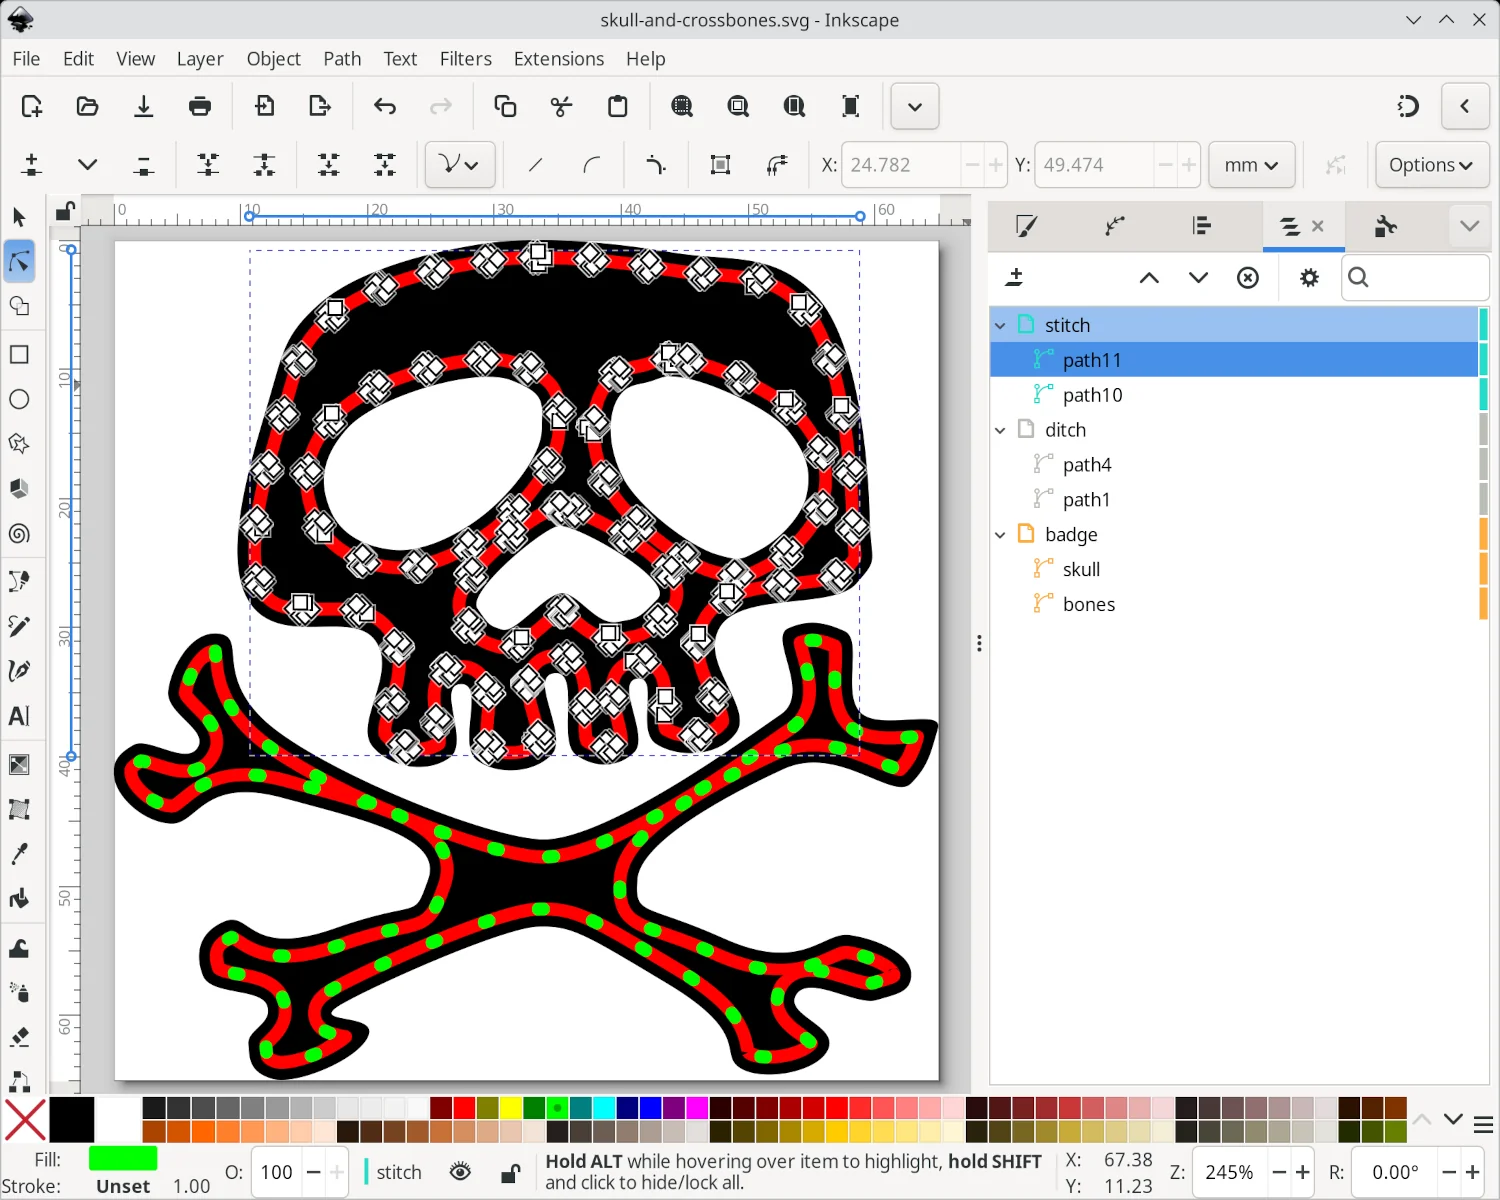
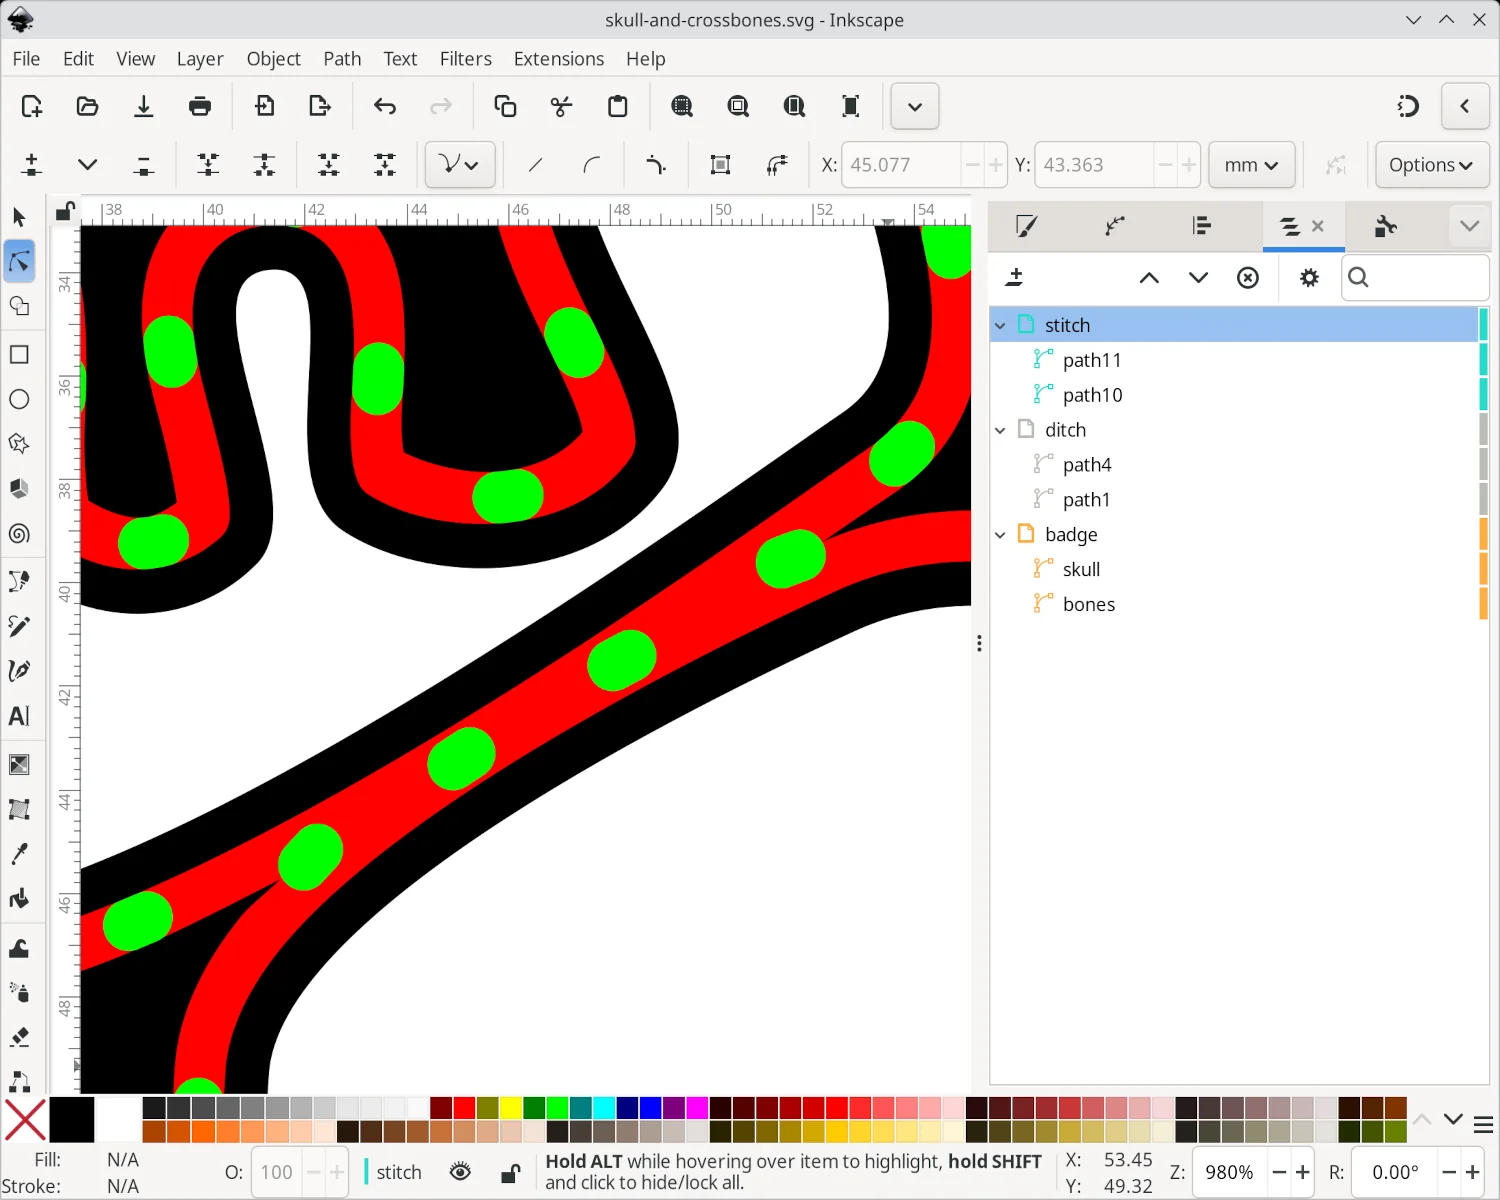
Next, I duplicated the "badge" layer and named it "ditch". Applying an Offset path effect, removing the fill style and setting the line style on each of the paths in the new "ditch" layer completes the space for the stitches to sit in.
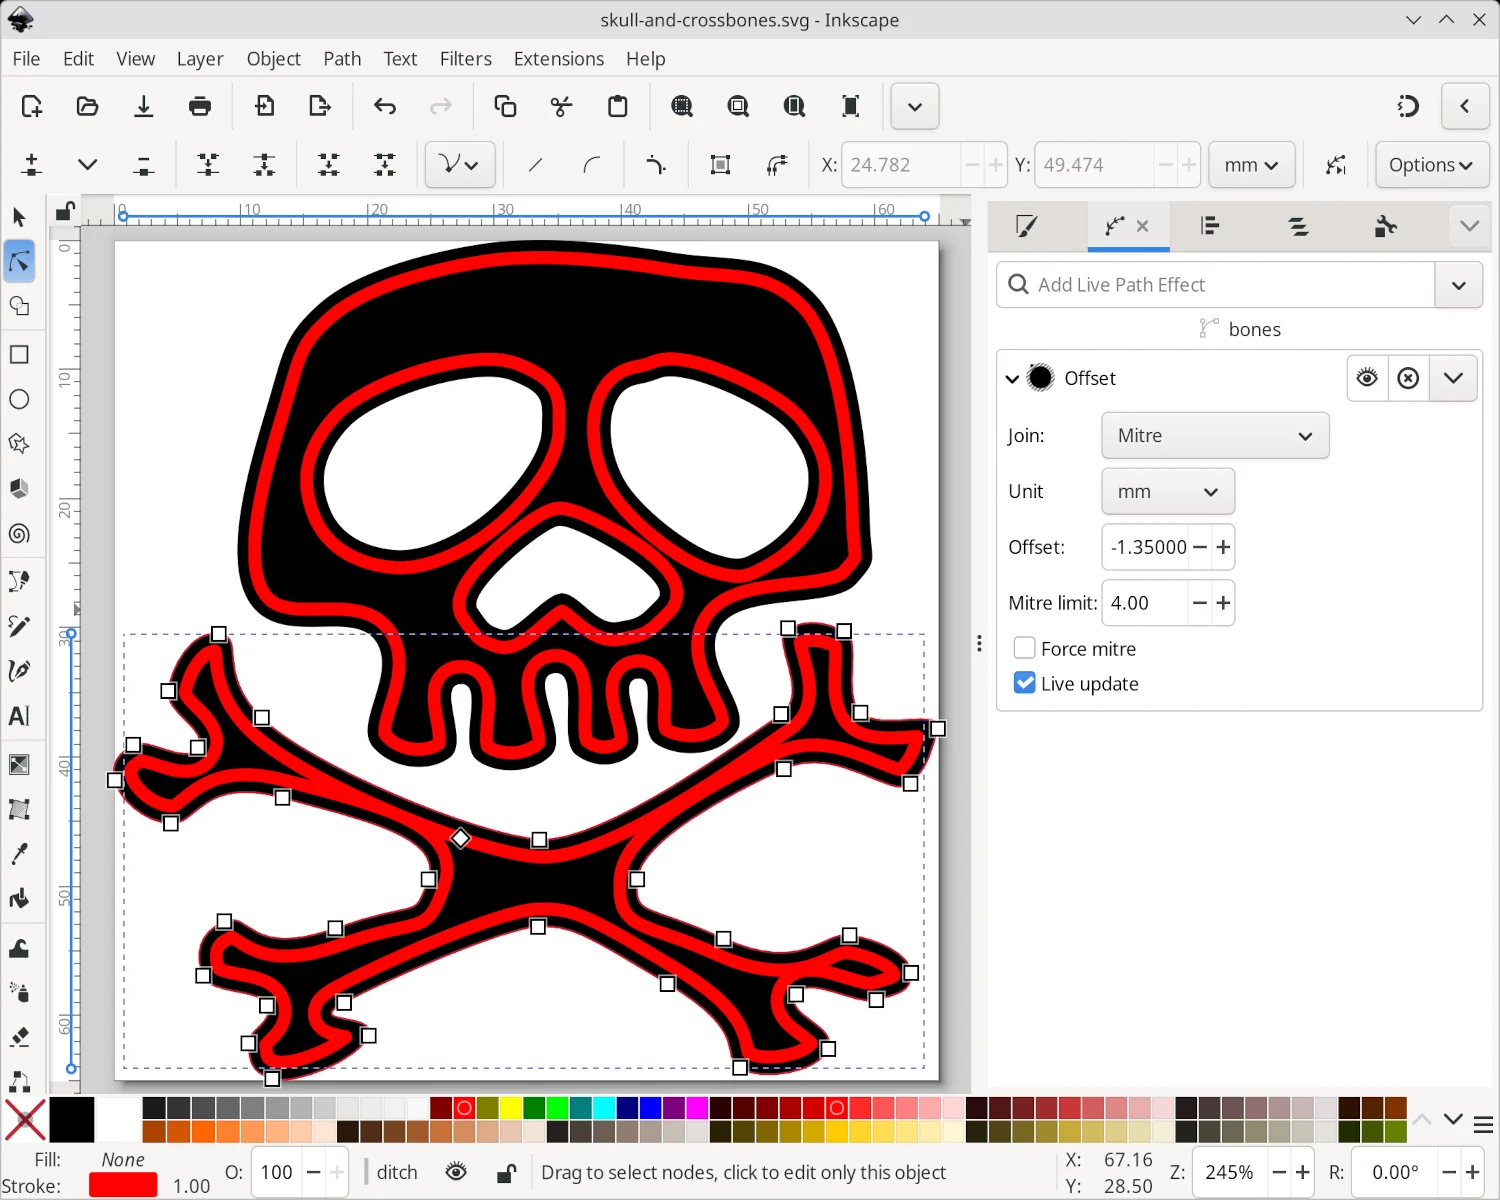
The choice of Offset distance and line width will depend on the overall design and size of the badge. A 1 mm wide ditch, with an offset of -1.35 mm, seemed to work well for this pirate badge.
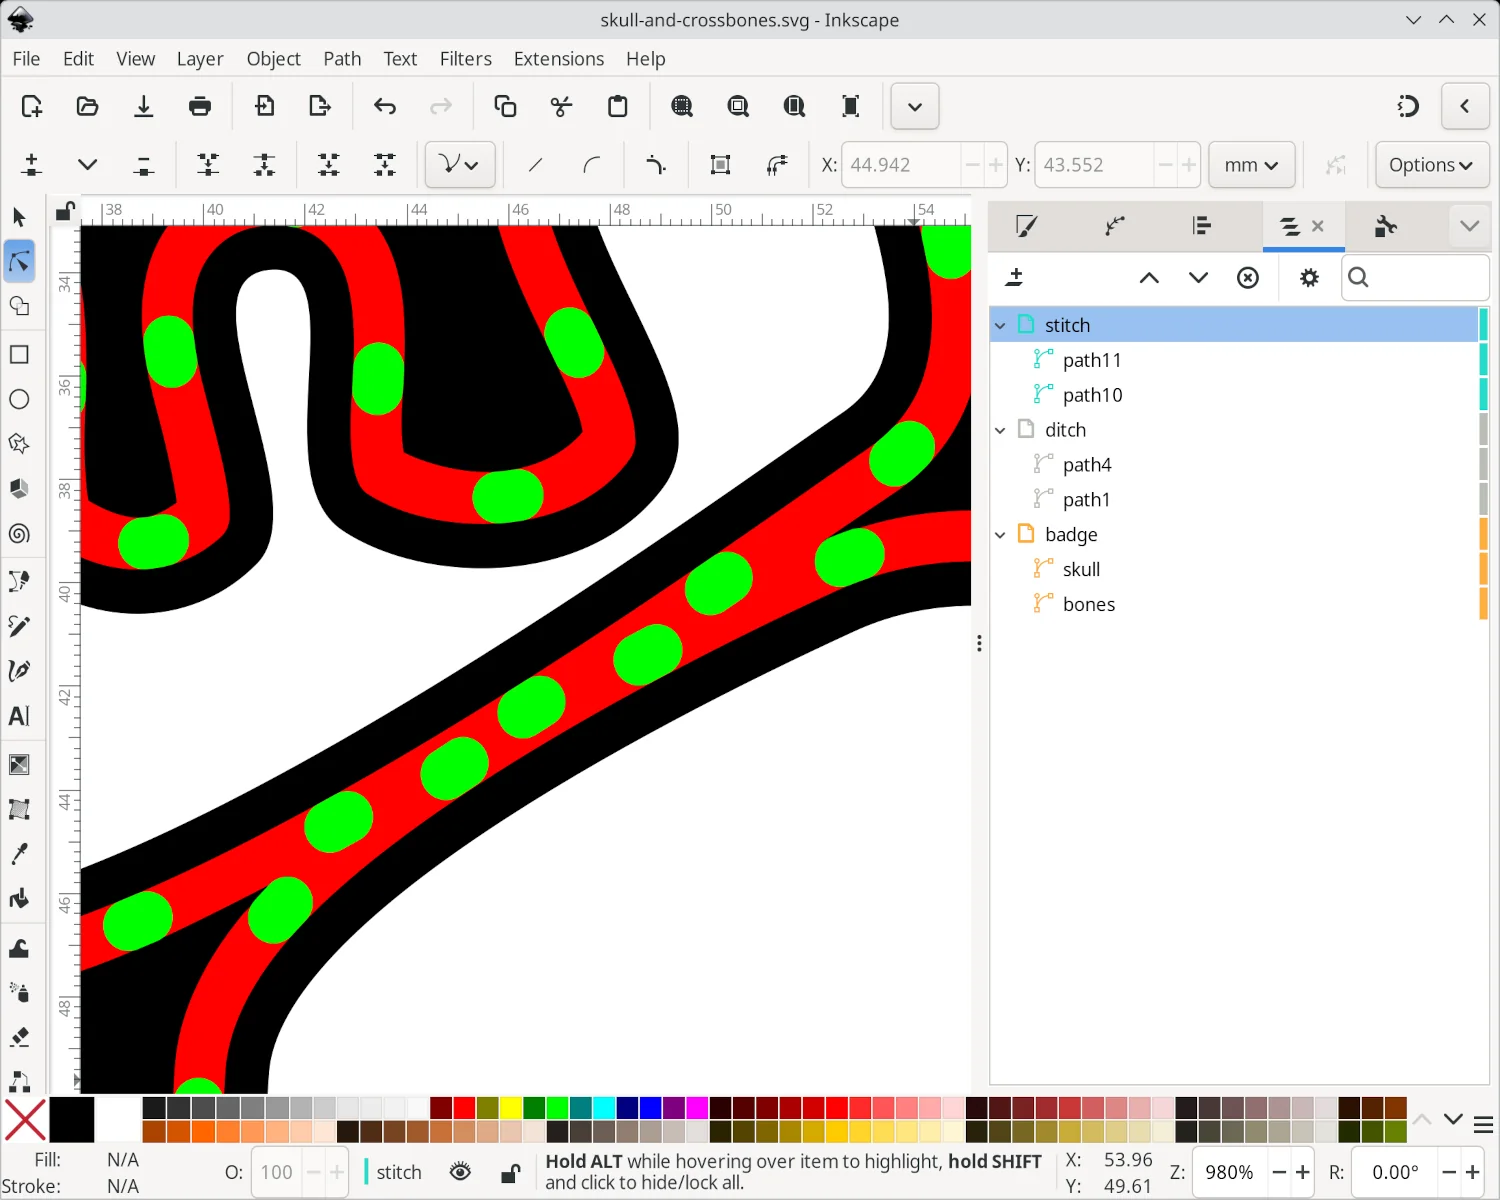
With the ditch in place, I can now start to draw holes for the stitches through the badge. Duplicate the "ditch" layer and name it "stitch". The paths in this "stitch" layer can be turned into holes by applying a Custom Dash Pattern. Much like the ditch width and offset, the custom dash style will depend on the overall design and size of the badge.
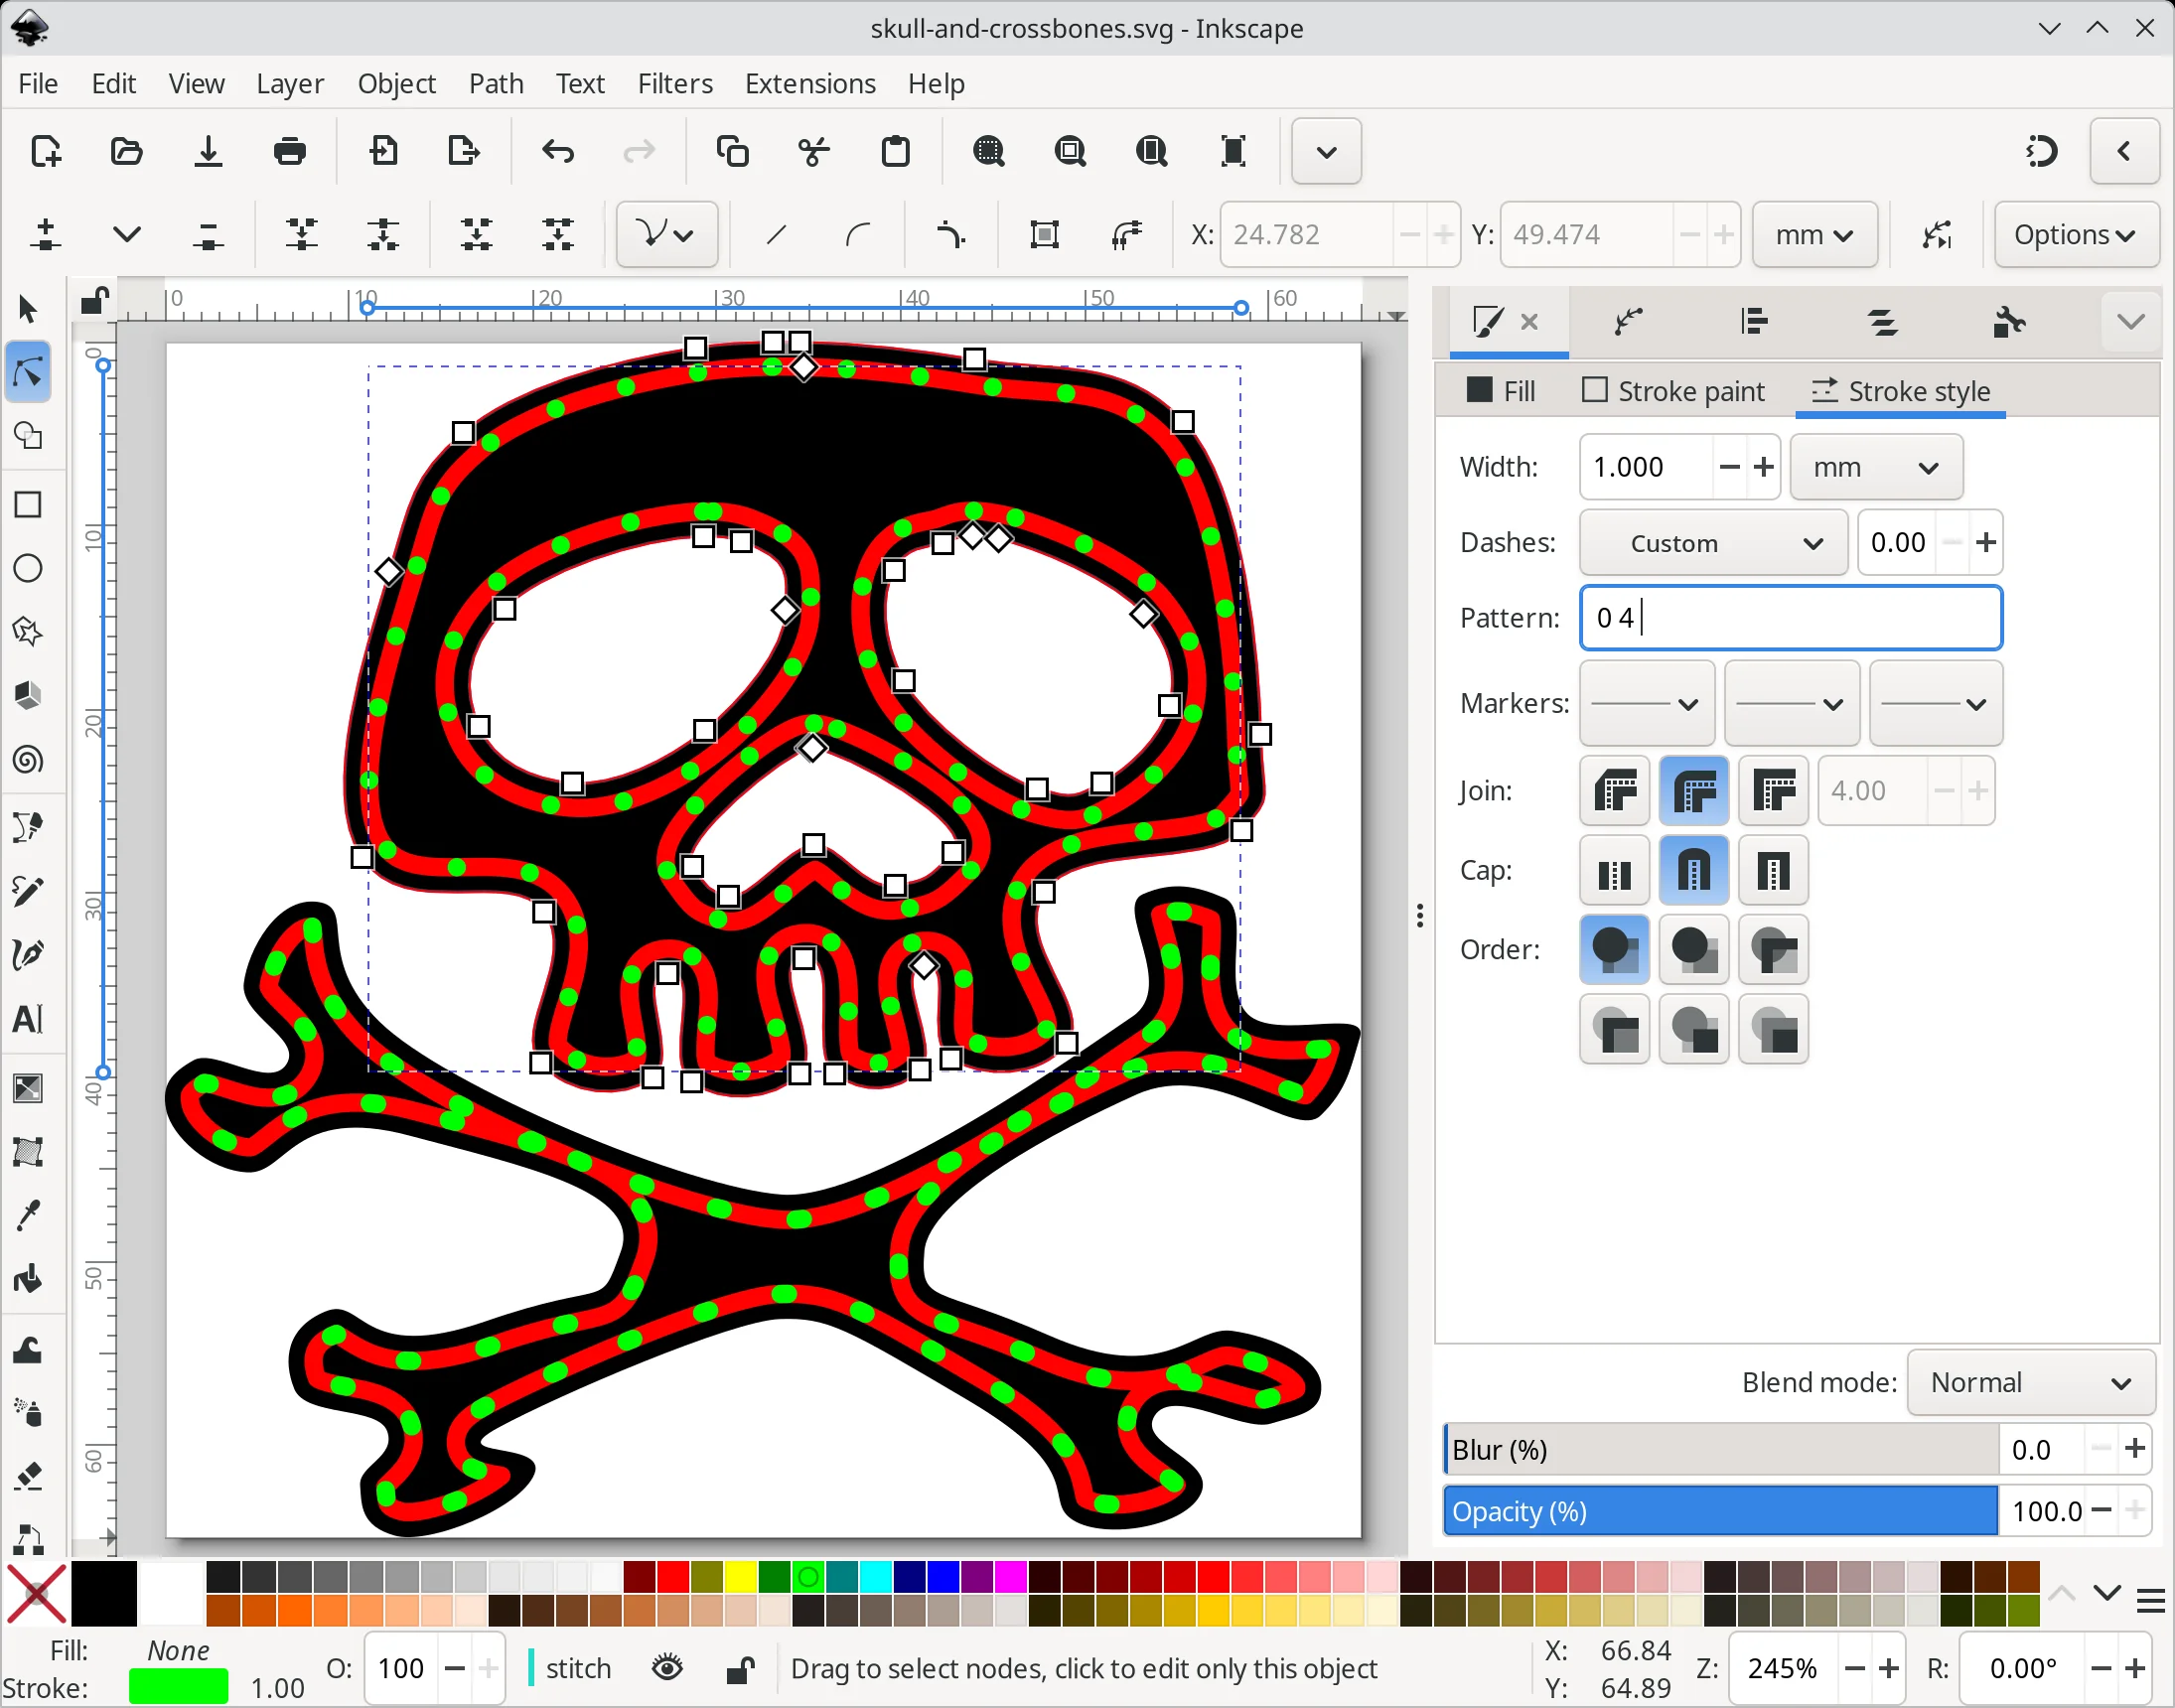
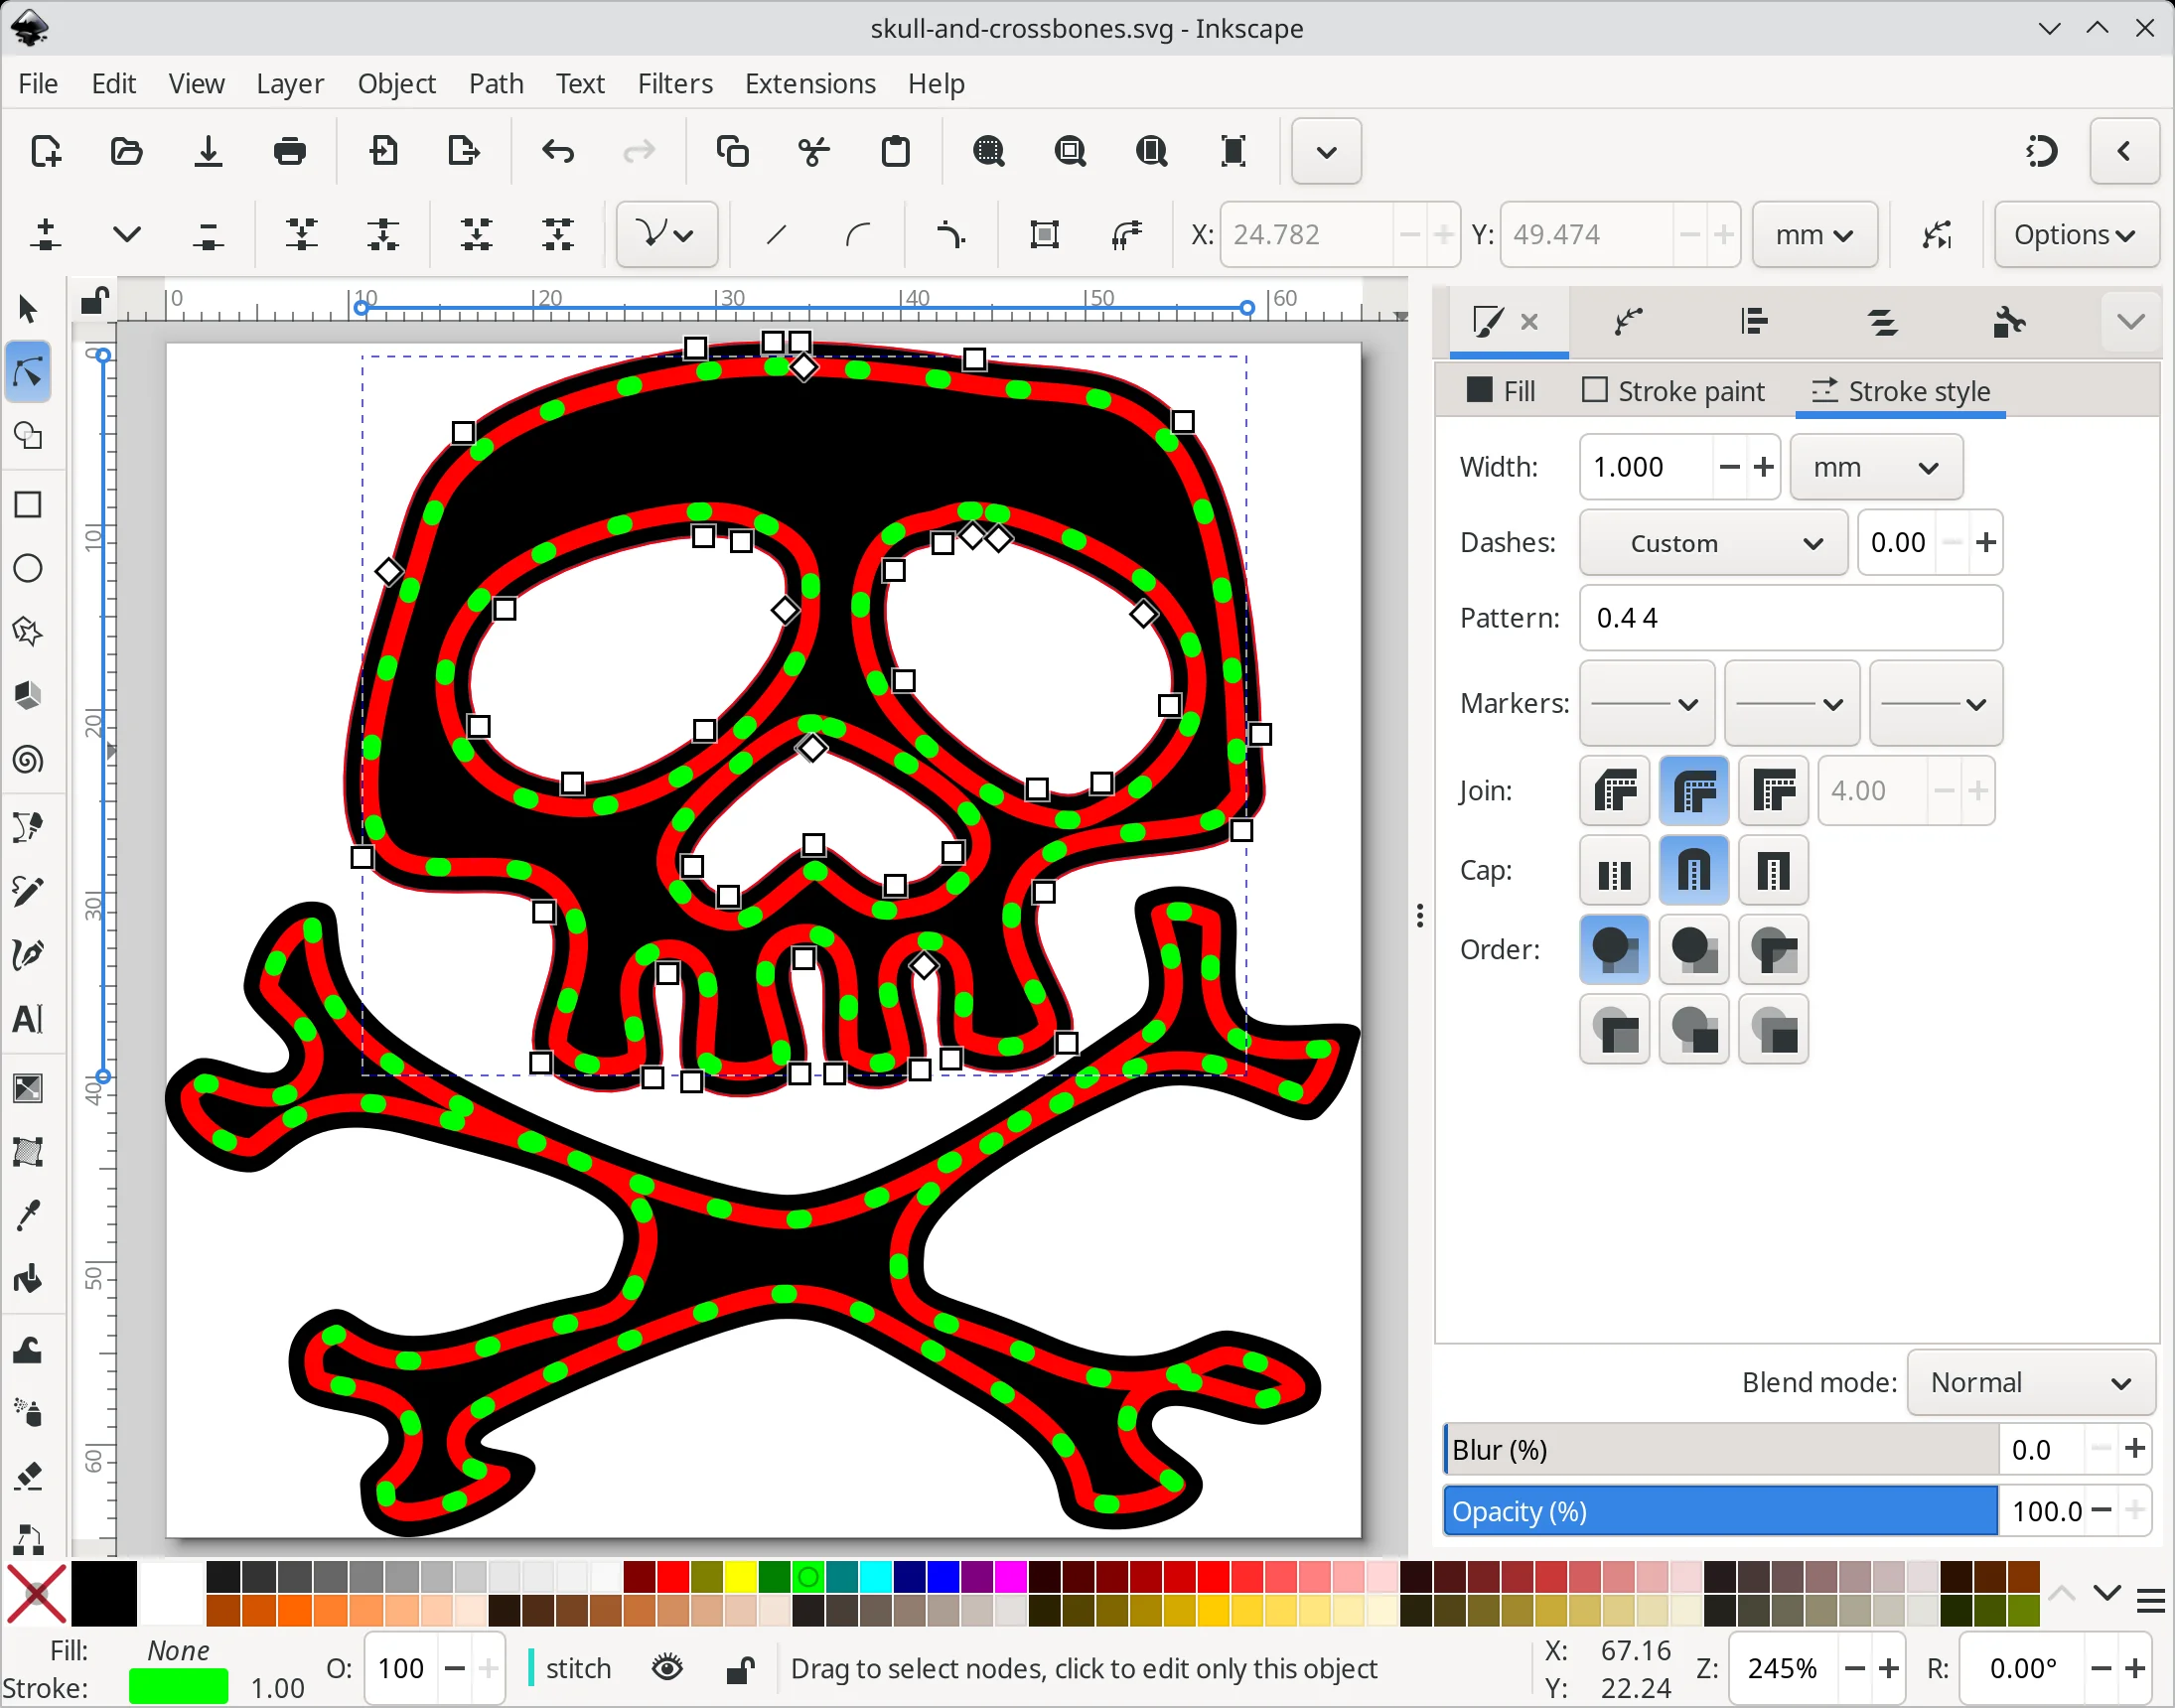
Circular holes can be created by using a "0" dash length and applying a "Rounded" cap style, but Inkscape will refuse to convert these shapes to paths in the later steps of this tutorial. Instead, I decided to embrace this bug as a feature and create slightly oversized holes to make sewing easier. I therefore used a fairly standard "4" dash gap combined with a short "0.4" dash length. This will allow both Inkscape and OpenSCAD to render the holes correctly.
Get the paths ready for OpenSCAD
Despite the badge looking finished in Inkscape, it's not quite ready for OpenSCAD. OpenSCAD will always render a closed path as a solid shape, not an outline, so we need to convert the strokes' outlines to paths in their own right.
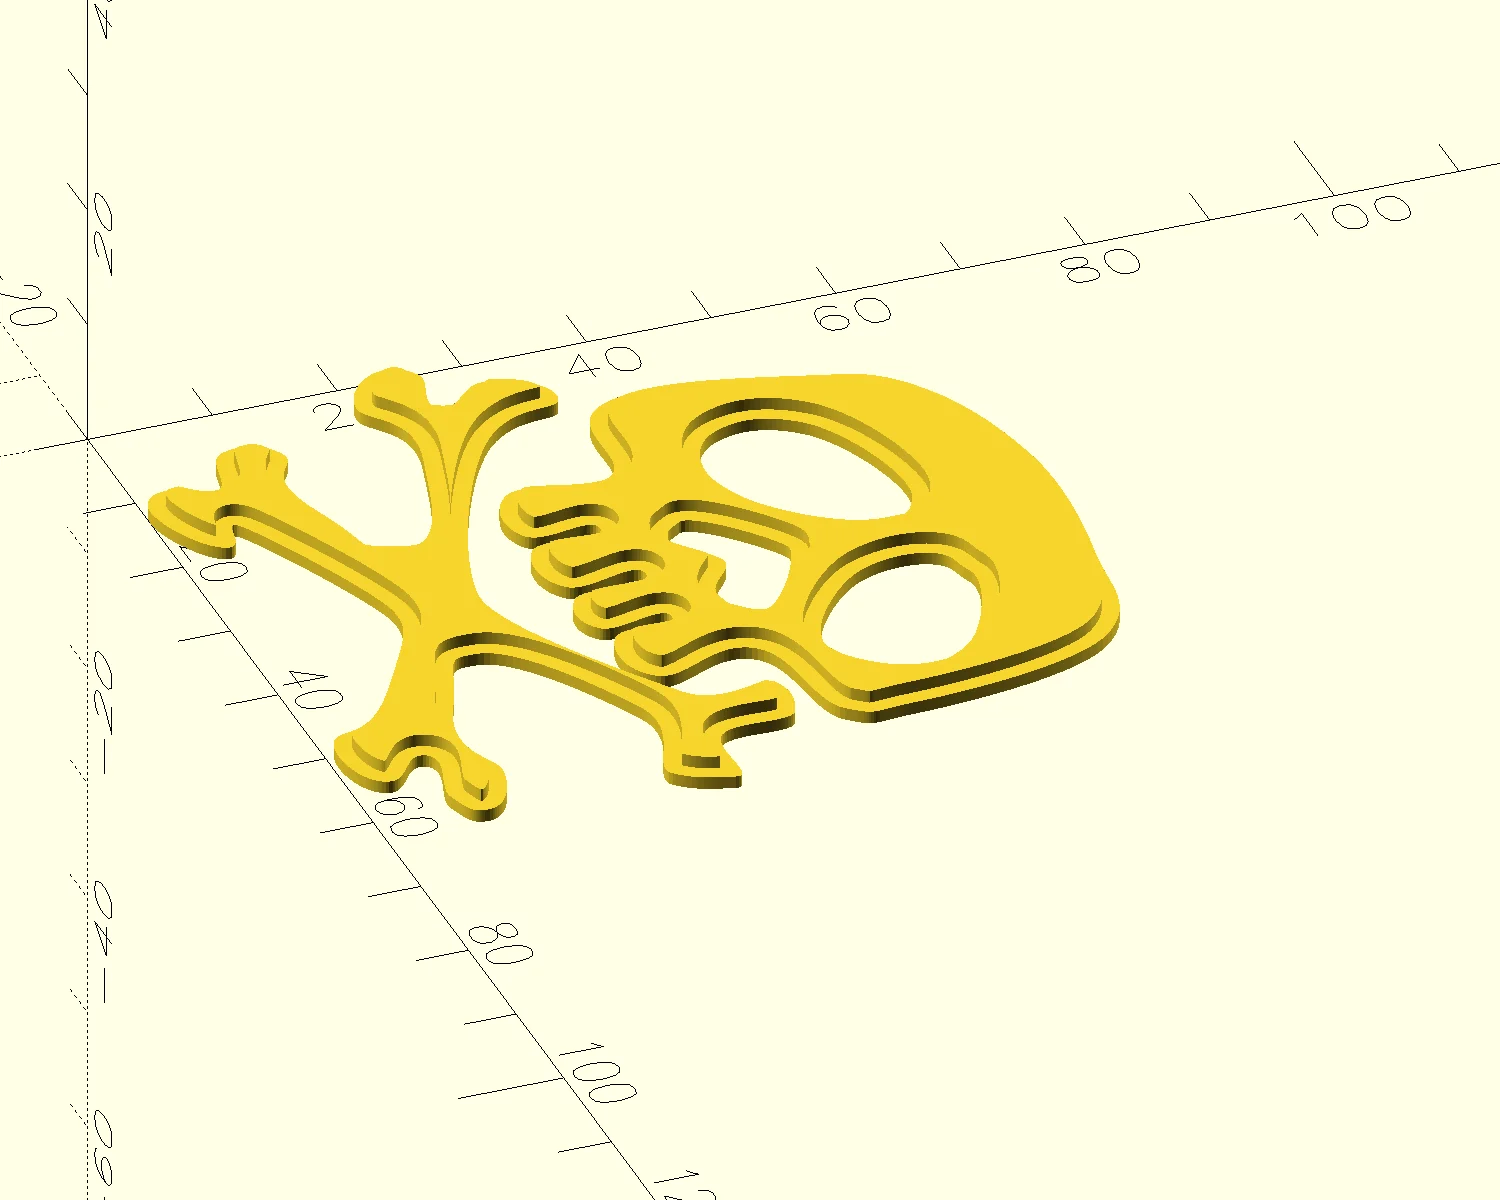
This can be achieved by using the Stroke to Path command found in the Path menu. It needs to be done for every path in both the "ditch" and "stitch" layers. Once corrected, OpenSCAD can render our "ditch" and "stitch" shapes as 3D objects with the correct width and thickness.
With individual shapes generated for each needle hole, we can go back in and customise the stitch pattern, removing any overlapping or close holes.
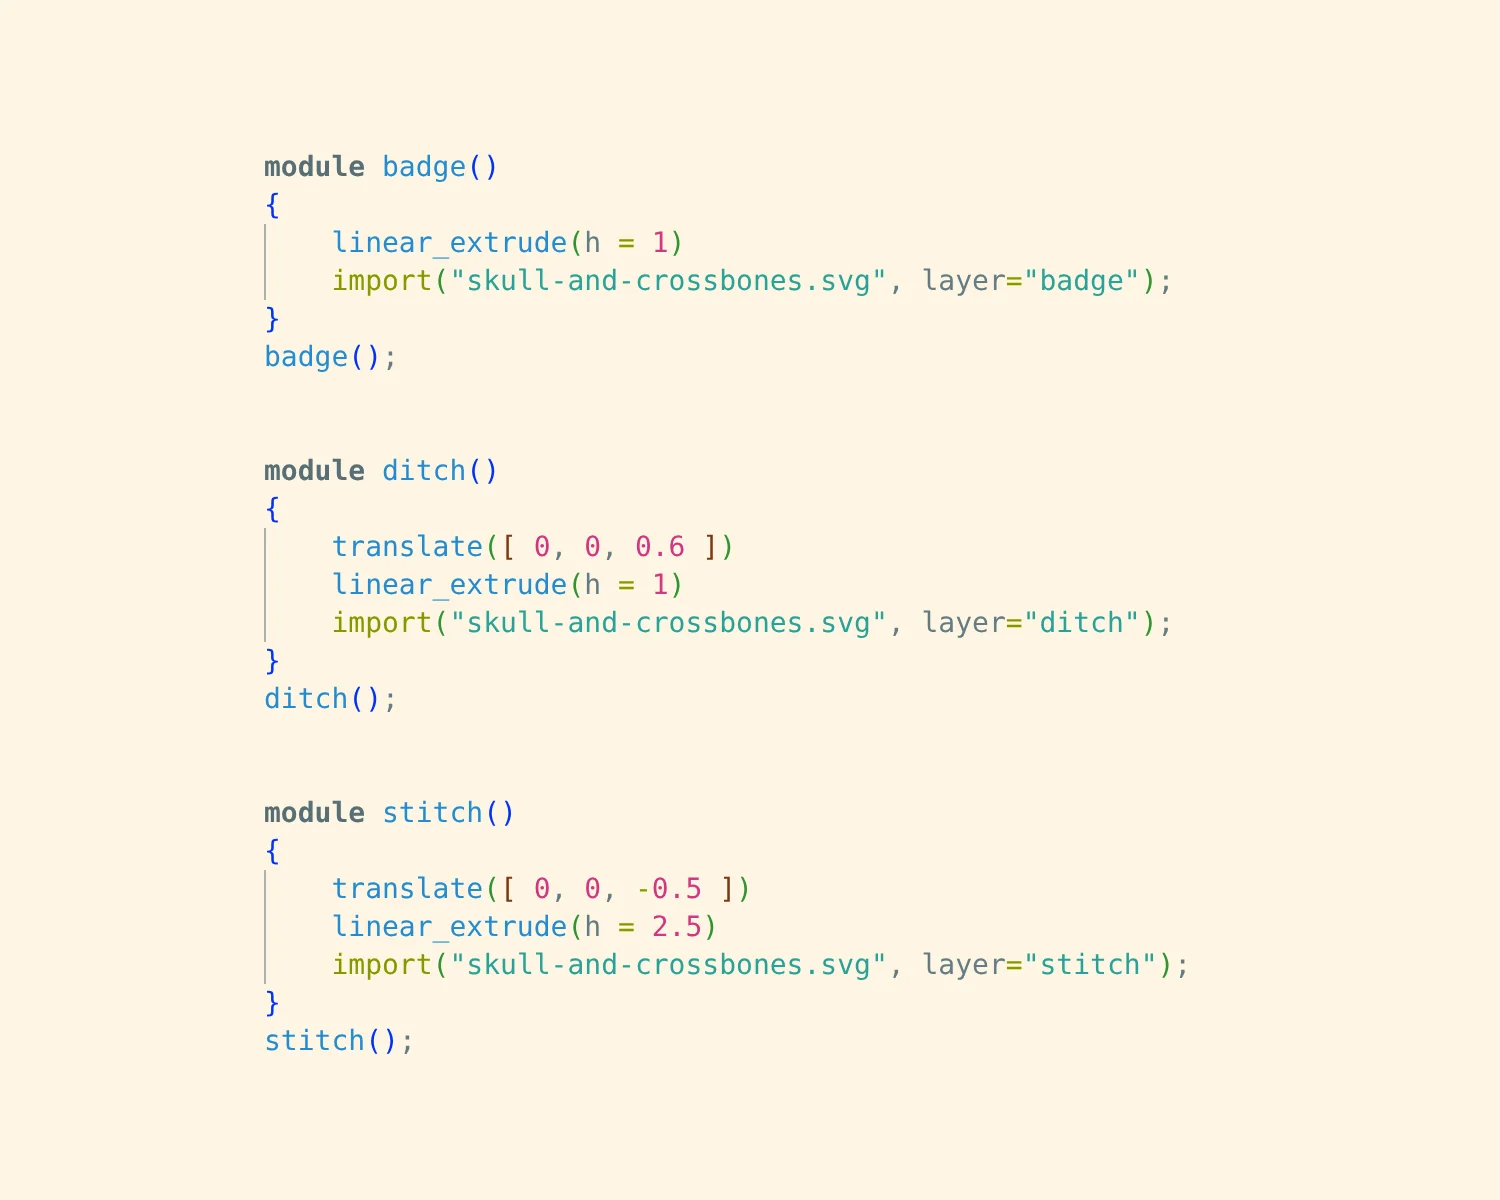
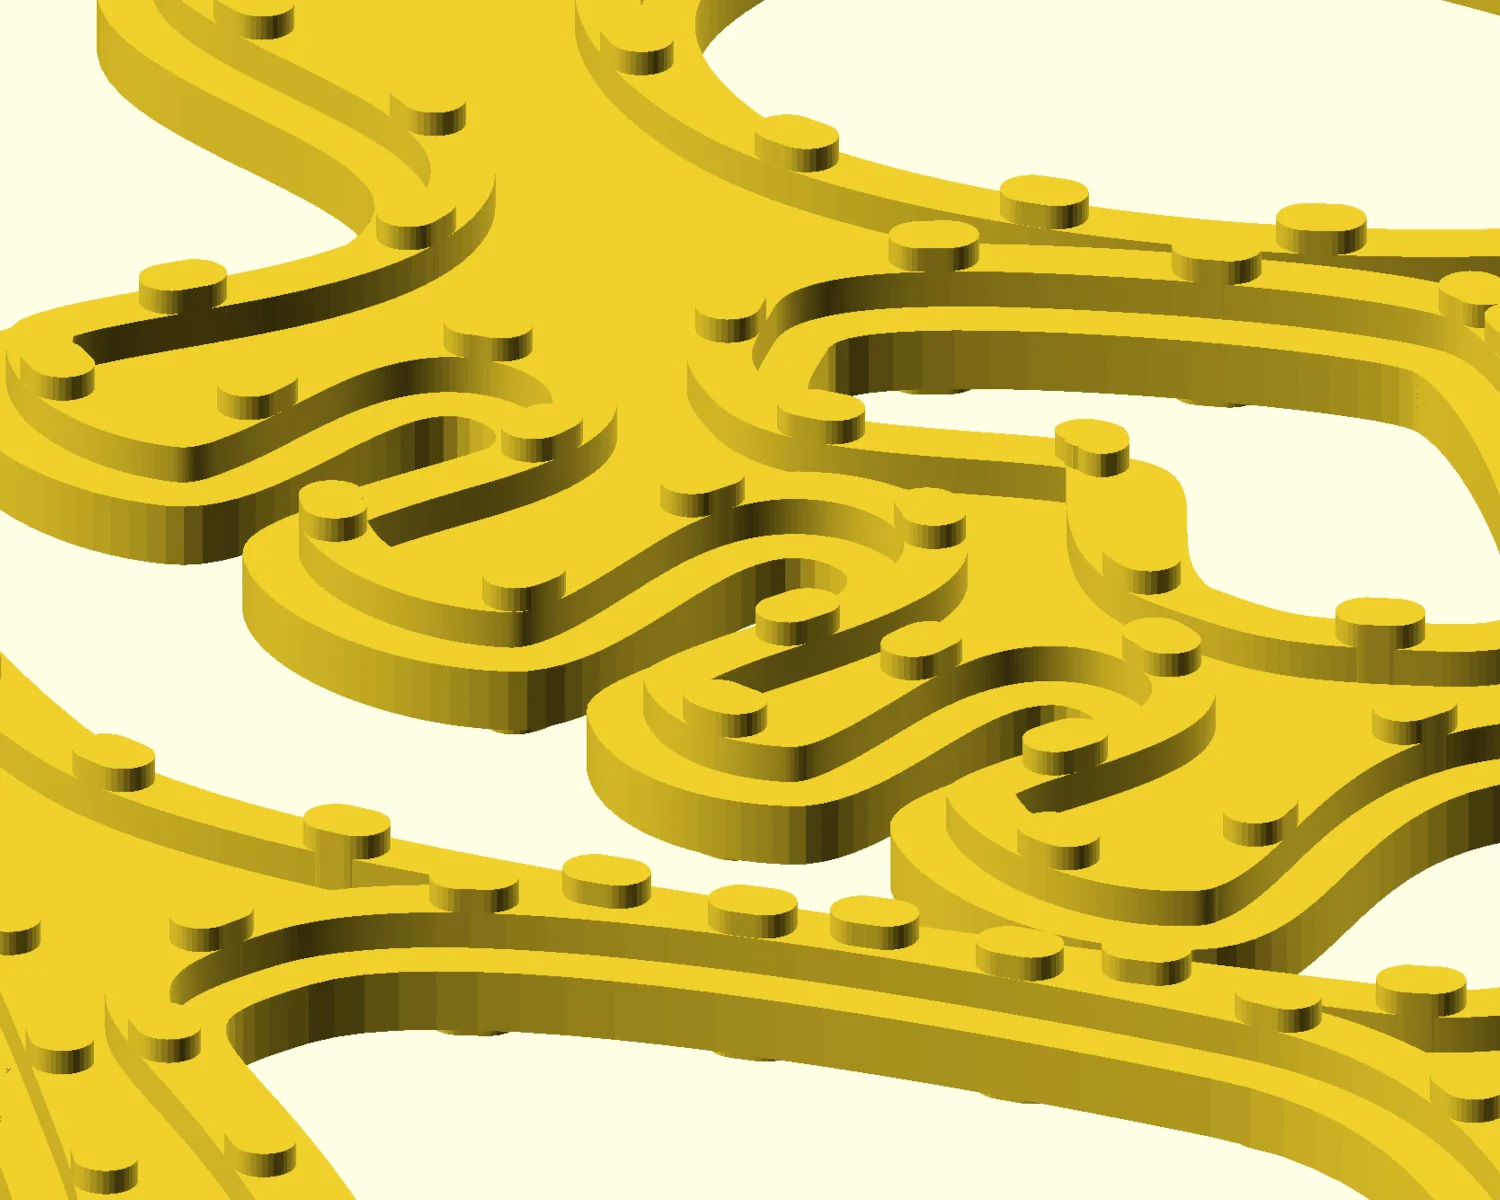
The completed SVG file can now be imported into OpenSCAD, and with a few CSG operations we can render the completed badge, including ditch and stitch holes.
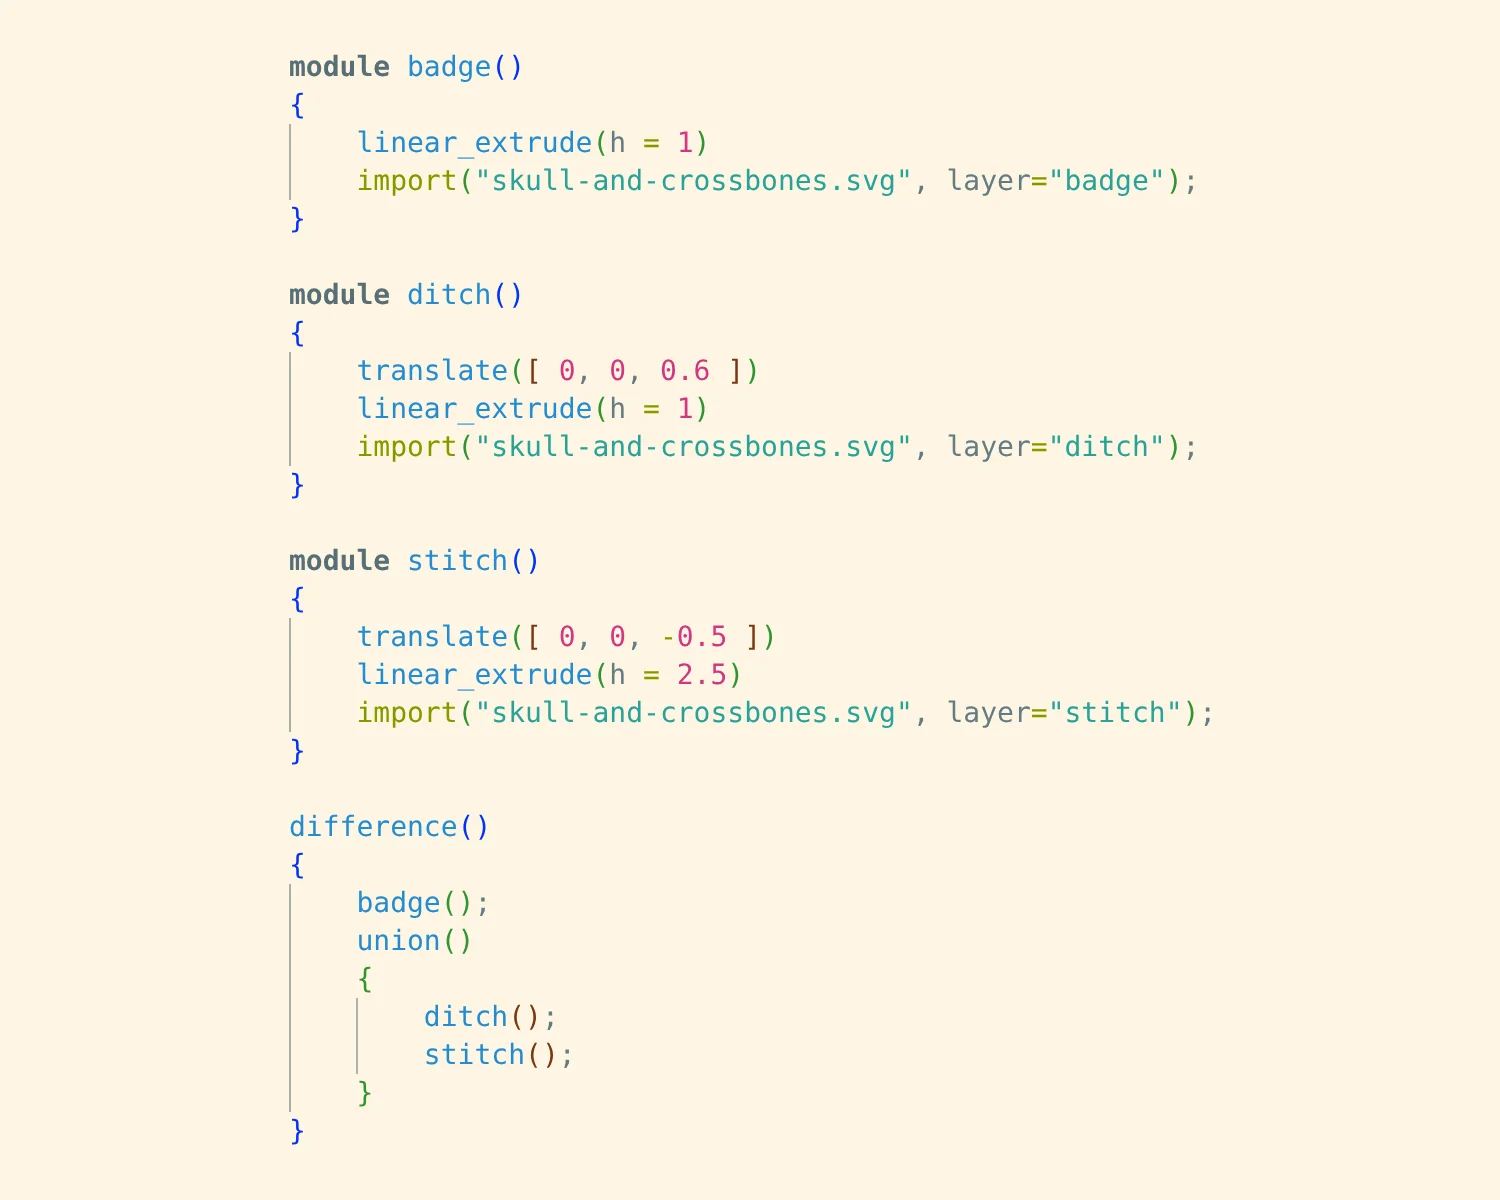
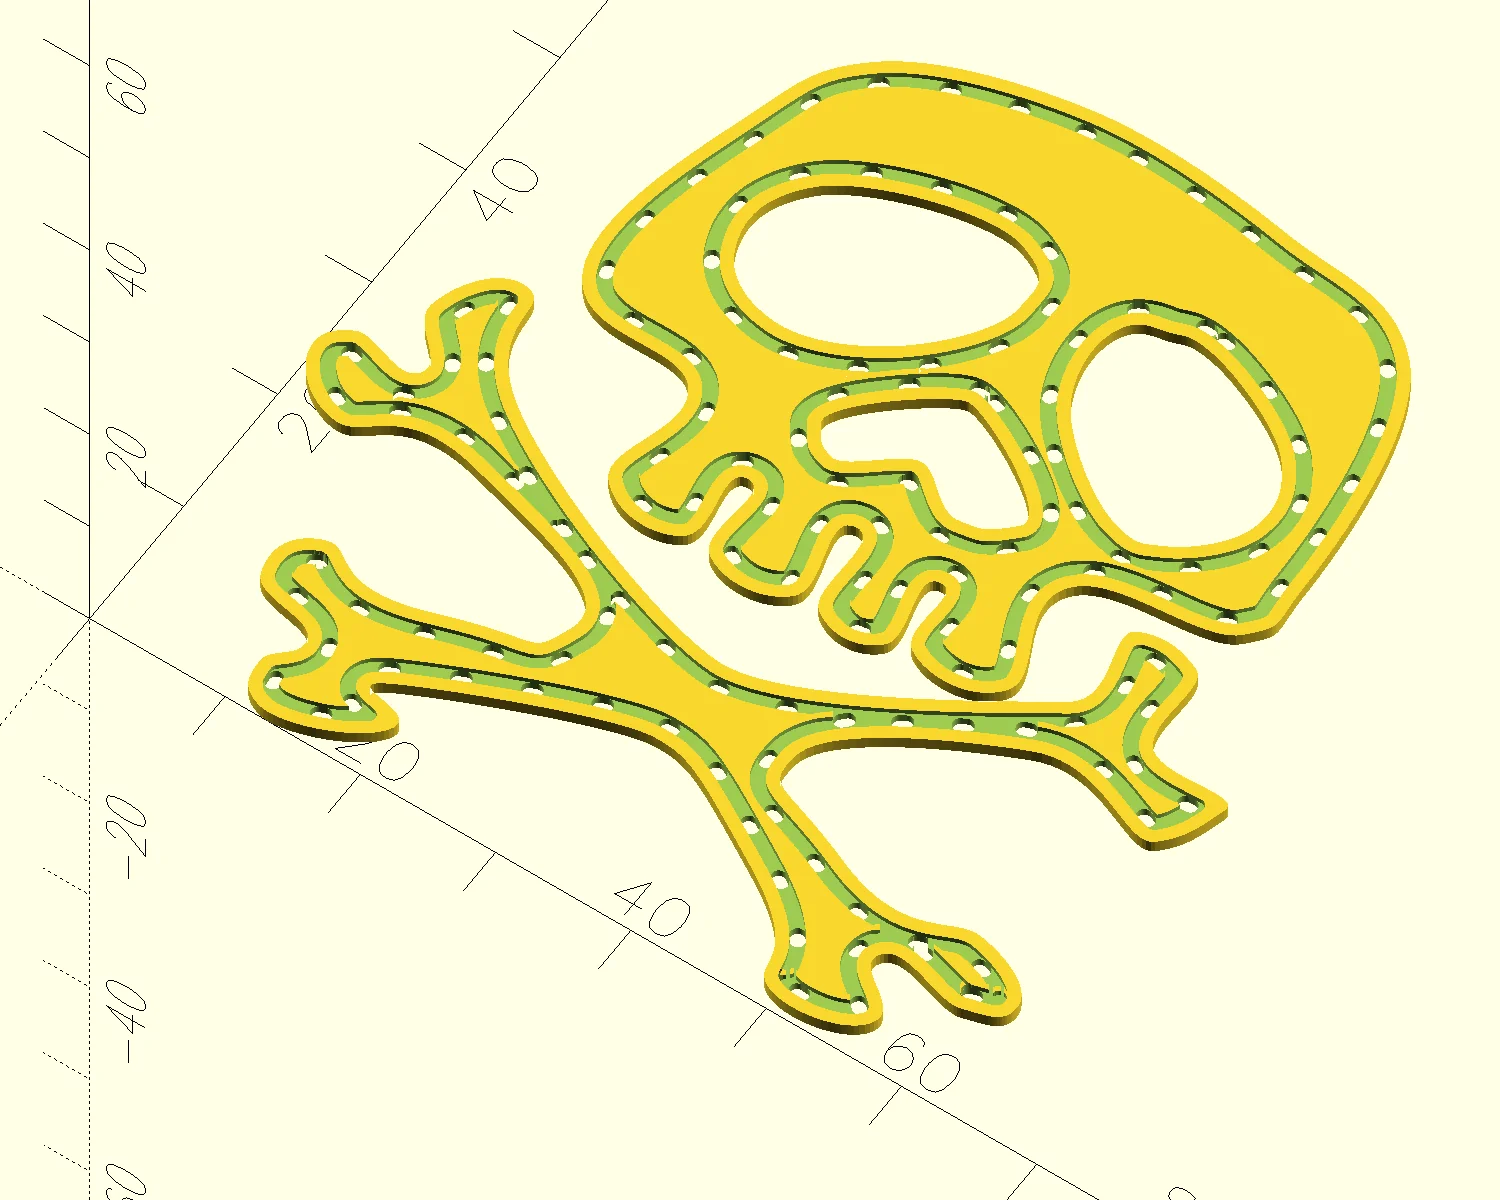
The height of the badge and the Z-offset of the ditch can be adjusted to suit the design whilst ensuring it remains printable. With a standard 0.2 mm layer height, a 0.6 mm Z-offset will give us 3 solid layers for the backing. A 1 mm overall height leaves two layers, or 0.4 mm to hold the stitches in place.
Slice and Print
Slicing and printing the badge is the simplest part of this project. I used nearly all default settings for the printer, but I did make one adjustment to strengthen the smallest details in the model. In the Advanced section of the Quality tab, I set the "Only one wall on top surfaces" option to "Not applied". This ensures that all the stitch holes and the ditch edges have two full walls of material.
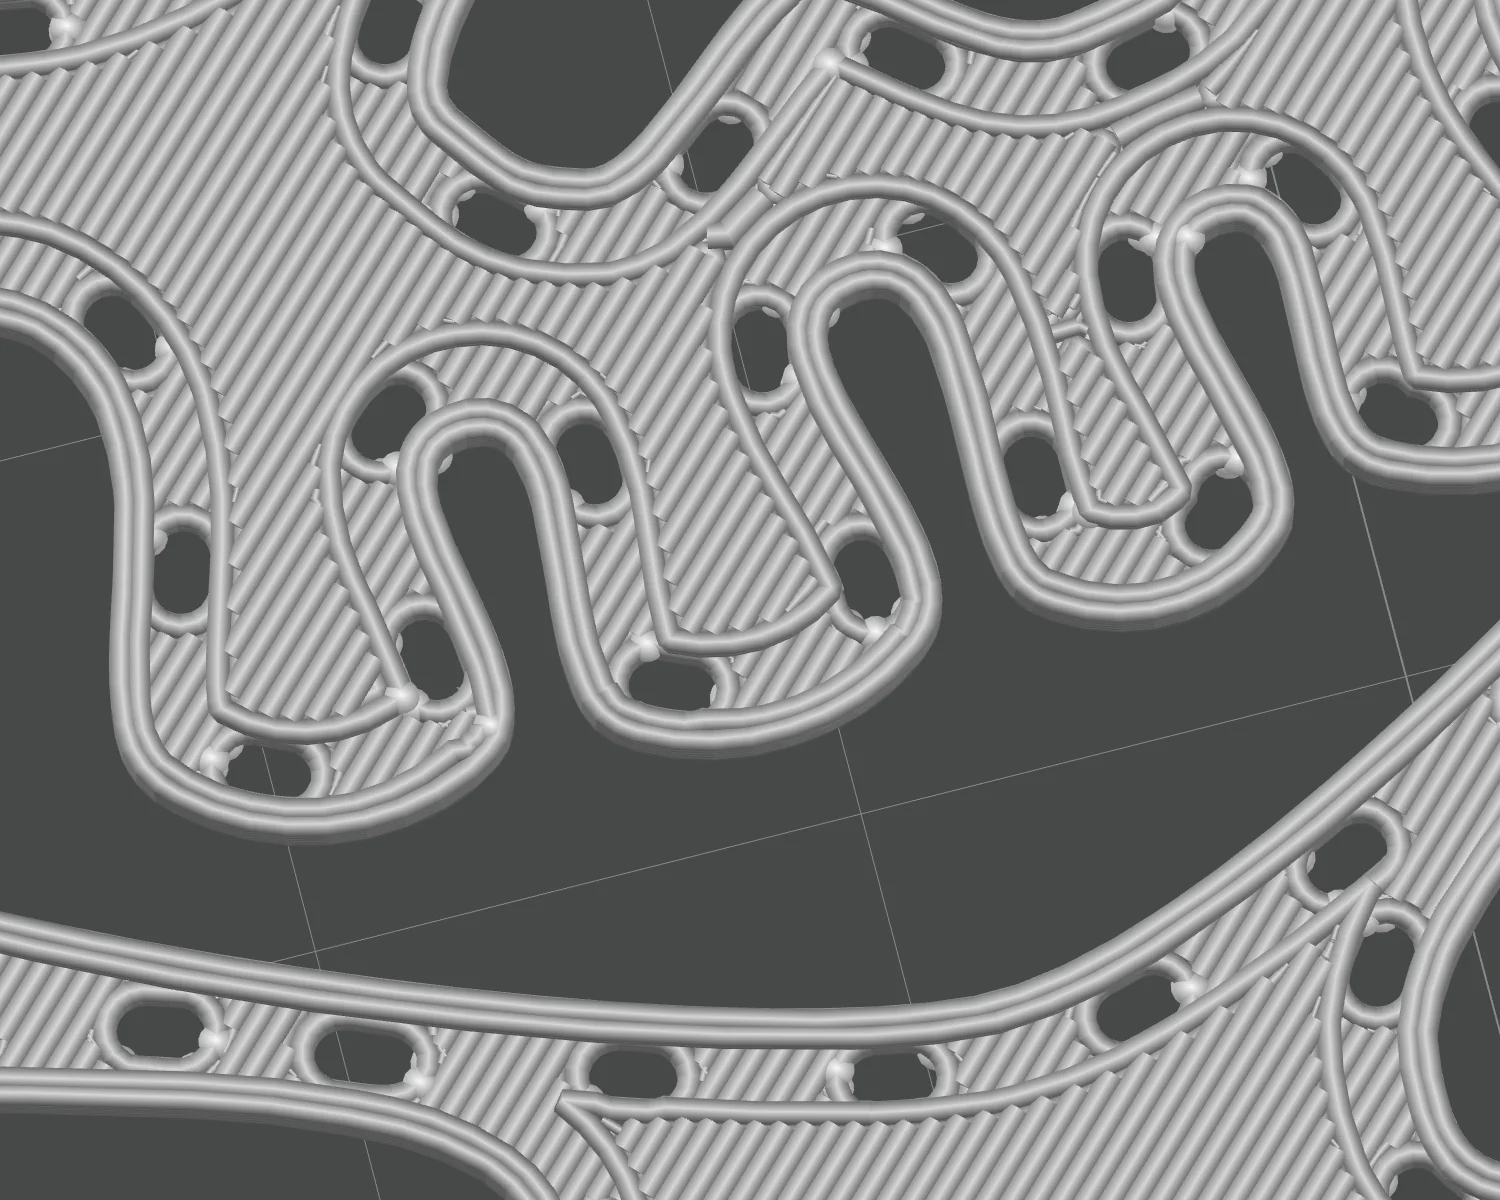
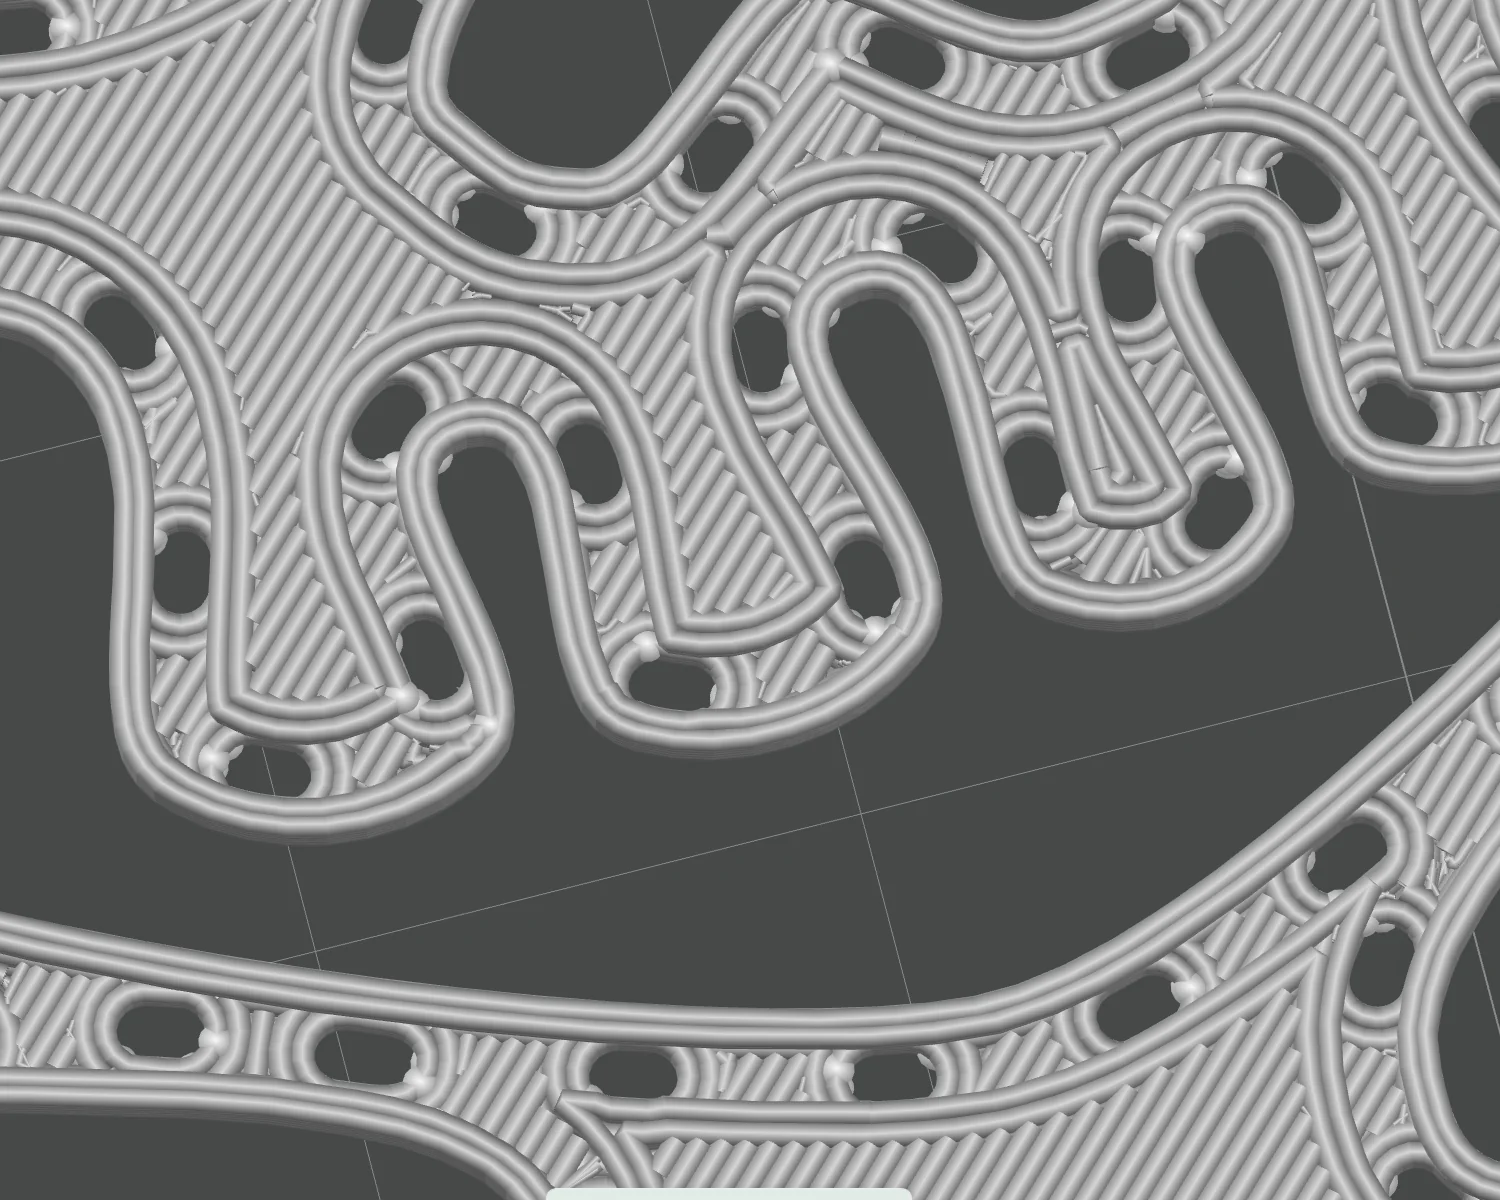
Since we're dealing with a single-digit number of layers and multiple sub-mm details, it doesn't make sense to otherwise jeopardise the strength of the overall print to provide a more uniform surface appearance.
![]()
Even with a complicated design with lots of edges and holes, it takes 15–20 minutes to print and uses less than 2 g of filament. If you find your chosen line thickness, offset distance, heights, or Z-offsets don't work quite right, it's easy to tweak and try again.
Sew
Depending on the desired effect, you can sew the badge in different ways.
If you want to make the badge look seamless, you can pick a thread with the same colour as your filament. For a visible contrast, you can pick a different colour thread, match the backing fabric, and sew the badge using a back stitch filling the ditch with thread.
Since we're making a cap badge for a pirate, we chose a contrasting thread colour but used a running stitch to emphasise the hand-sewn nature.
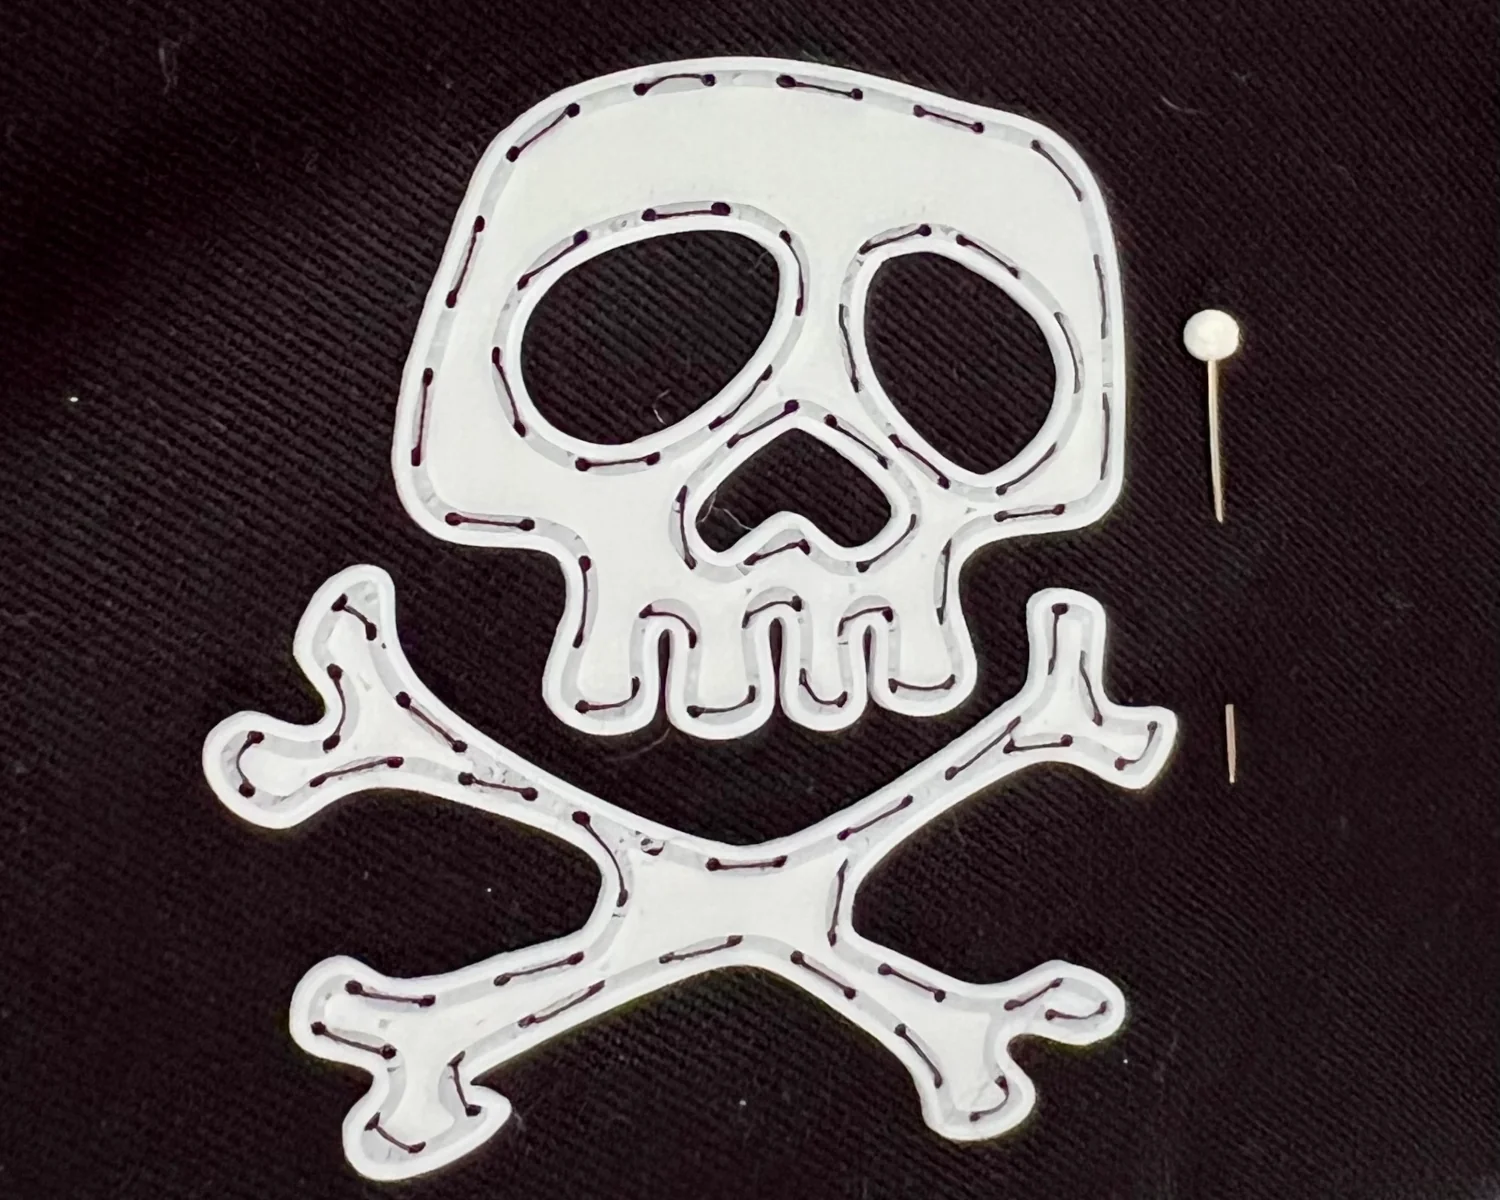
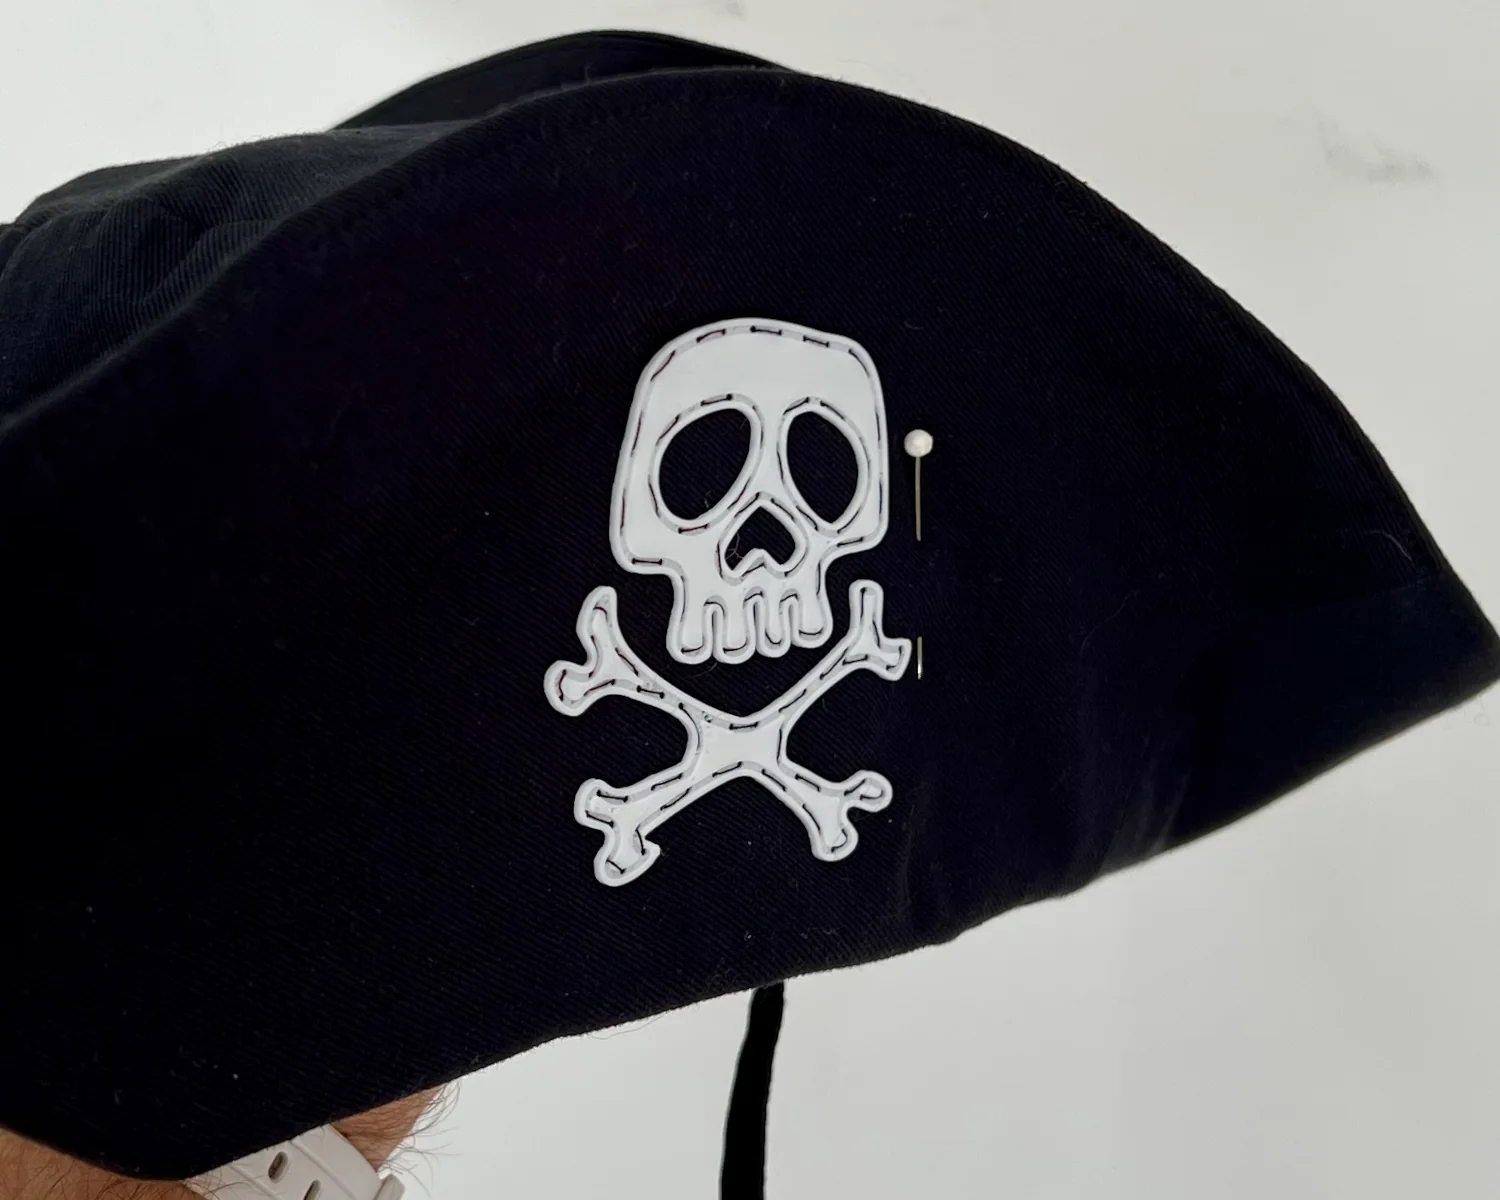
I'm thrilled with the result. The design works well when inspected close up, and from a distance the contrast of the thread highlights the hand-sewn effect.
2025-09-03